Tutorial:AssetEditor
The AssetEditor is a poor man's 3d program for Total war games (currently only supports WH2).
It aims at trying to recreate the Kit bashing feeling you get when working with plastic models.
Download link: https://github.com/donkeyProgramming/TheAssetEditor/releases/latest
Youtube tutorials: https://www.youtube.com/channel/UCXnf2q9fRNYlMn4XULPLKgg
Beginner tutorial by FaallenOon: https://docs.google.com/document/d/1QZefJwJLvG_ny2MUMZZvvxV-4o2AAuSCmmiA-twAIXw
Disclaimer: I am not good at technical writing or enjoy it, so if someone feels the desire to improve this, then please!
The Basics
Creating a New Packfile
To create a new packfile go to the top left corner of the program and click file then select New Packfile and a window will open asking you to enter a name, once you have entered a name press ok and your packfile will be created in the file browser to the left and will be marked as active which is identified by bold text.
Opening a Model
To get started working with models navigate to the file browser on the left and open the All CA Packs folder, scroll down to variantmeshes, into wh_variantmodels and browse through the list for a model of your choosing and once you have found the model that you seek you can double click upon the rigid_model_v2 file to open the model within the 3d viewer.
How to find a Model
If you have an idea of what kind of model you are looking for you can use the Search Filter box at the top of the file browser to try and narrow down the amount of folders you need to search through but if you do not then you can take a rough guess at where models are located by the folder names which correspond to the models skeleton for example:
- hu1 = humanoid01 - which are associated with male humans.
- hu1b = humanoid01b - which are associated with female humans and female elves.
- hu1c = humanoid01c - which are associated with norscan and chaos humans.
Etc, you'll quickly become familiar with these while modding.
Camera Controls
While in the visual work space you can navigate the 3d area by placing your mouse cursor within the window and using the following:
- Holding down Alt + Left Mouse Button (LMB) will move the camera around a fixed point.
- Holding down Alt + Scrolling the Mouse Wheel up will zoom in towards the fixed point and scrolling it back will zoom out.
- Holding down Alt + Right Mouse Button (RMB) will allow you to reposition the fixed point.
Saving a Model
To save your freshly acquired model to your packfile navigate to the tool bar at the top of the screen and hit the save icon (Ctrl+S) at which point you will see the model appear under your packfile in the file browser marked in red which means that you have saved the models current state but this does not save your packfile and closing the program before doing so will delete any work you have done up to this point.
If you are working with multiple packfiles at the same time you must switch to the correct packfile before saving your models or they will save in the wrong place, to do this right click an inactive pack in the file browser and select Set as Editable Pack.
Saving a Packfile
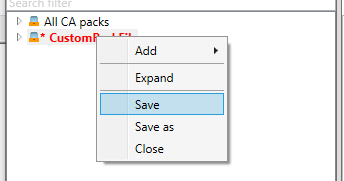
To save your packfile navigate to the file browser and right click your packfiles name, select Save or Save As and select a location for your file then hit save again, your packfile is now saved and it is safe to close the program.
Sub Tools
Kitbash Editor
Select a .rmv2 file to open the Kitbash Editor
Find your self a model to play with. Go to:
variantmeshes/
wh_variantmodels/
There is folders named after skeletons. hu1 is for humans.
In hu1 you have files for each factions that use it.
Look for a file that ends with .rigid_model_V2
Ignore the .wsmodels for now
Youtube tutorial: https://www.youtube.com/watch?v=LeObDGqV2PM
Re-Regging
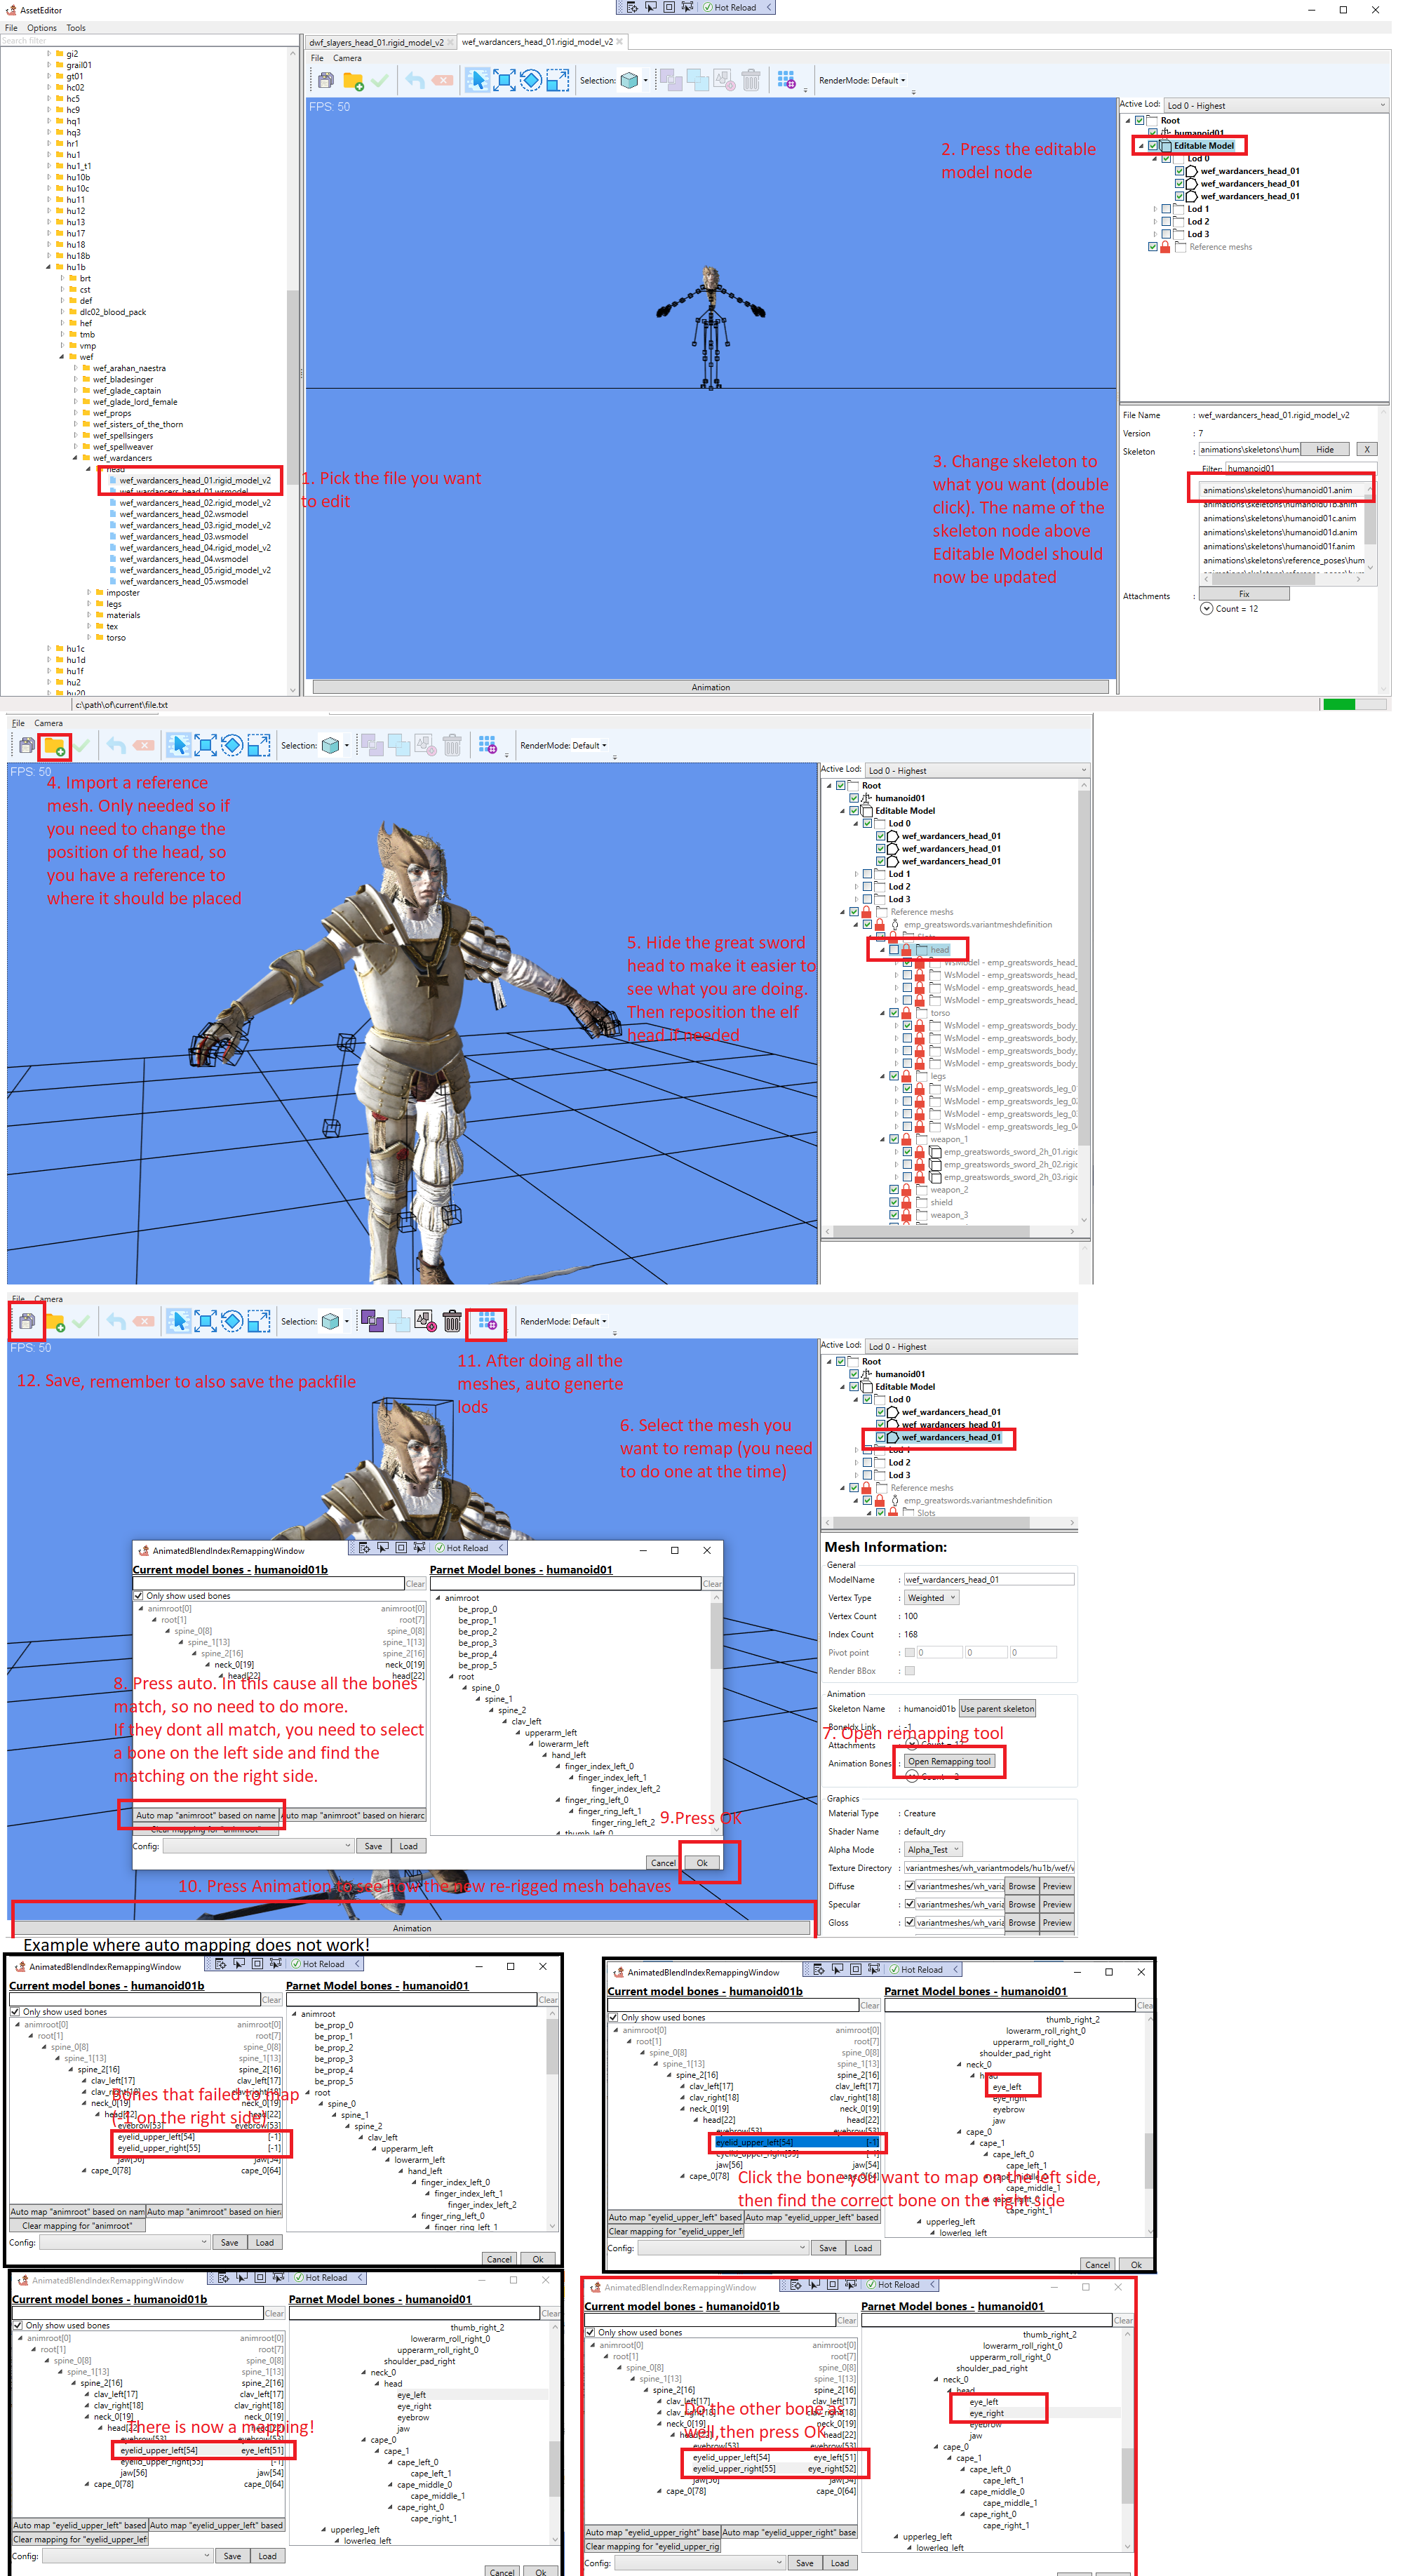
One of the key parts of the Kitbash editor is the ability to re-rig a mesh from one skeleton to an other. If this is not done, the mesh will turn into spaghetti when an animation is applied.
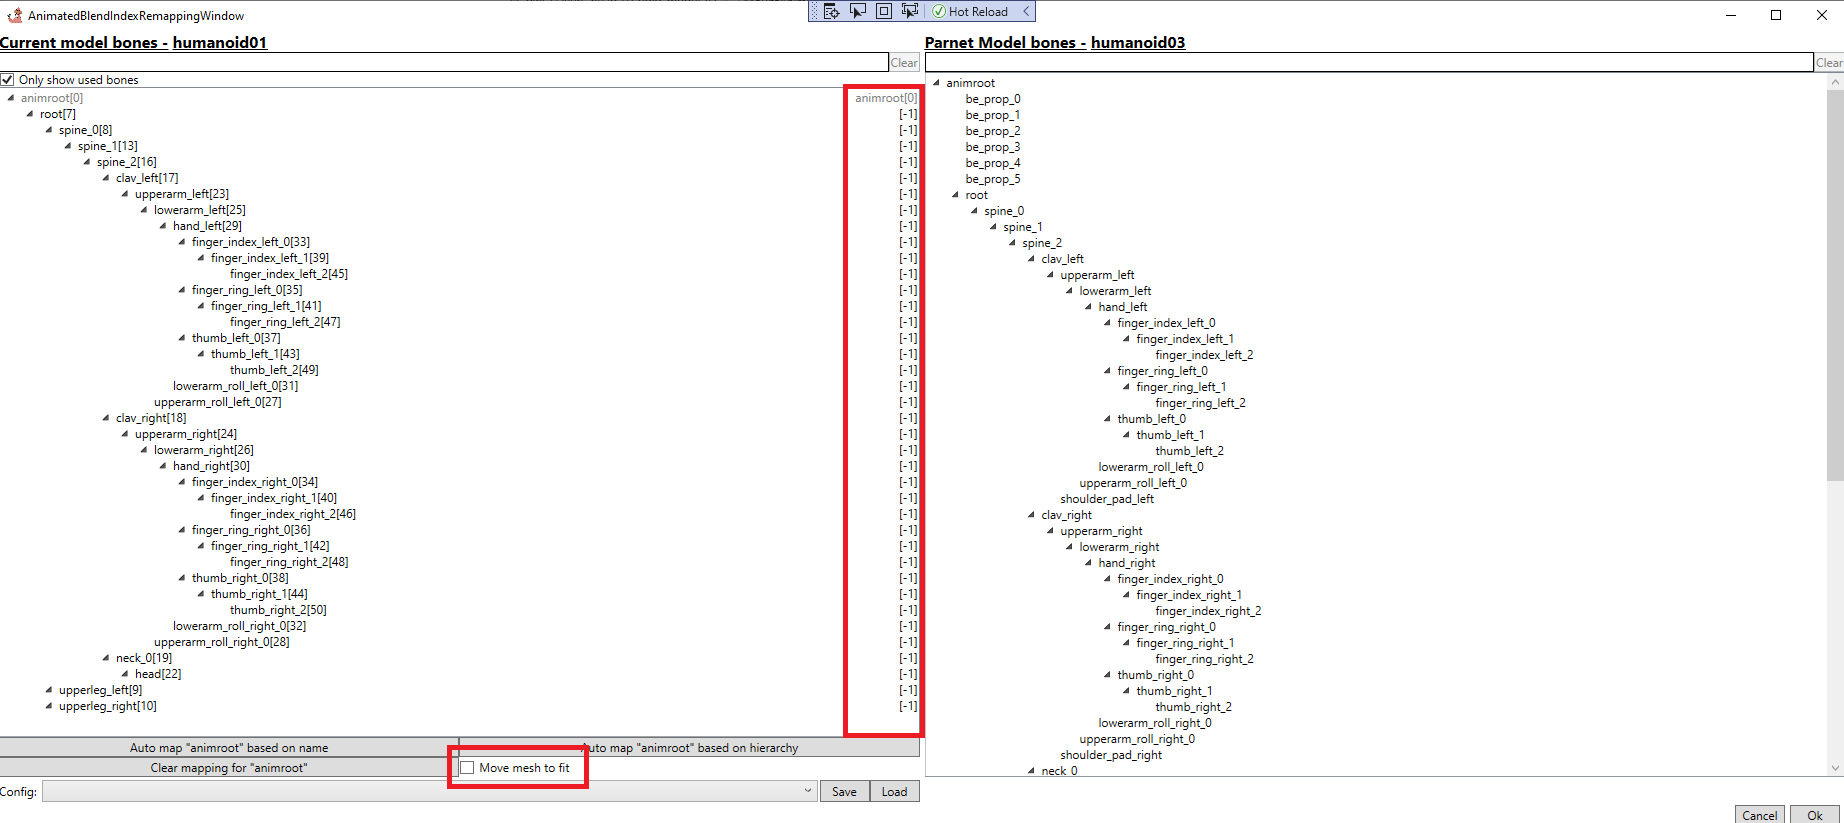
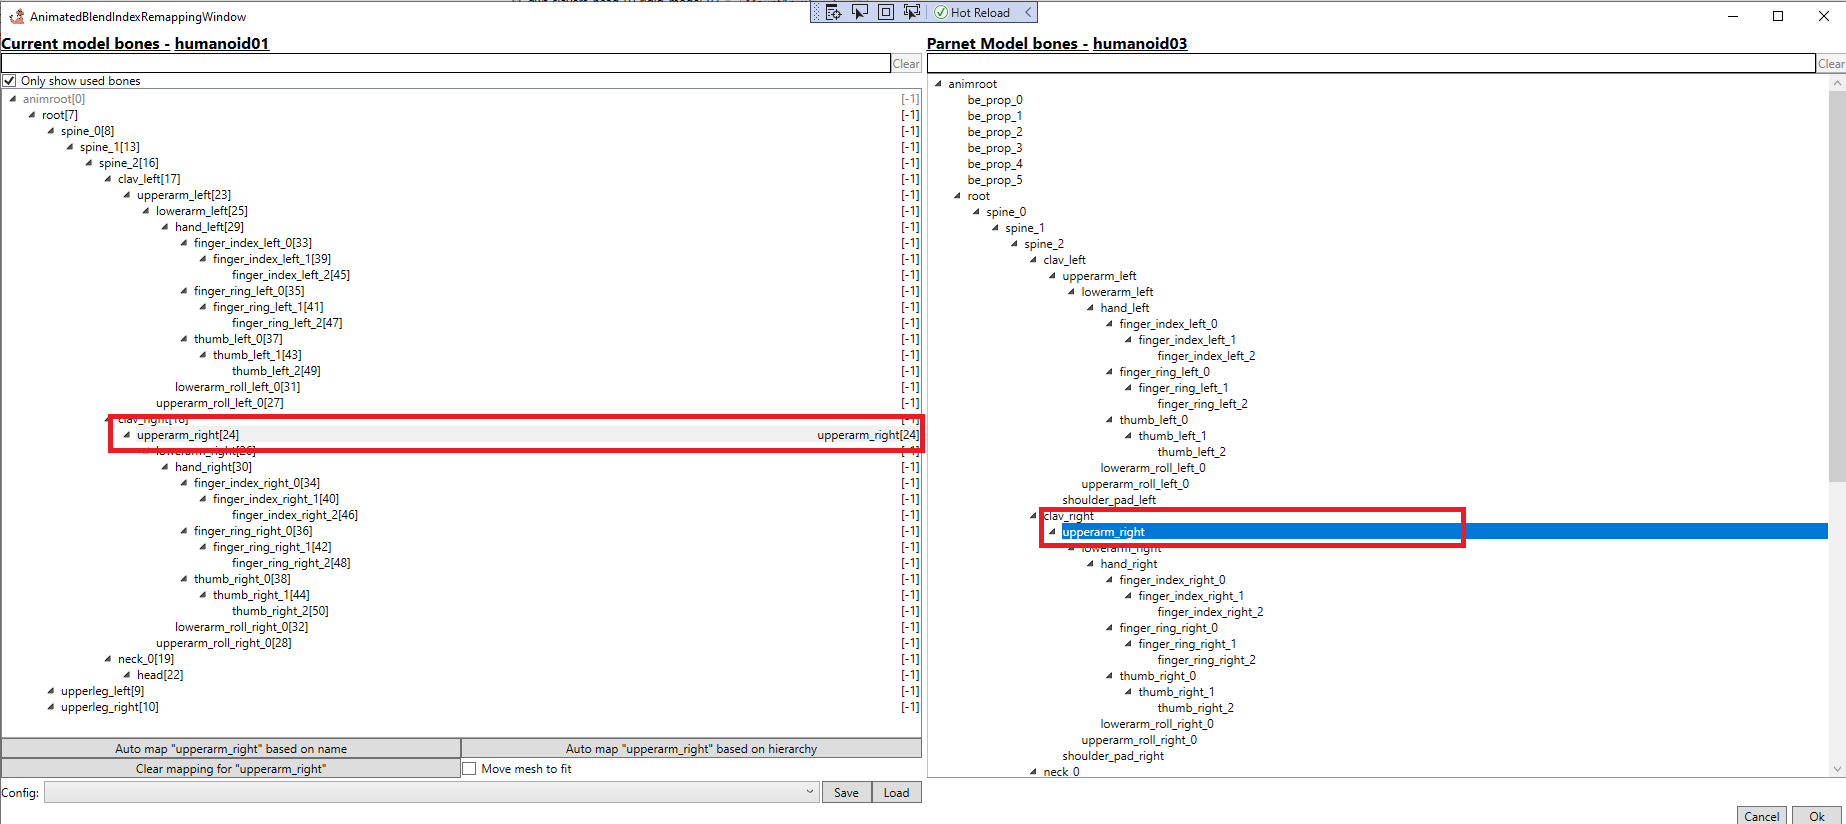
It works by doing a 1:1 mapping between bones in the original skeleton (left side) and the target skeleton (right side)
It works by selecting bones one by one on the left side and then selecting a bone on the right side. When this is done the column on the left side that says -1 should turn into the same the bone selected on the right side.
The tool can also attempt to auto fit the mesh onto the skeleton by selecting the "Fit mesh to skeleton" checkbox.
BMI tool
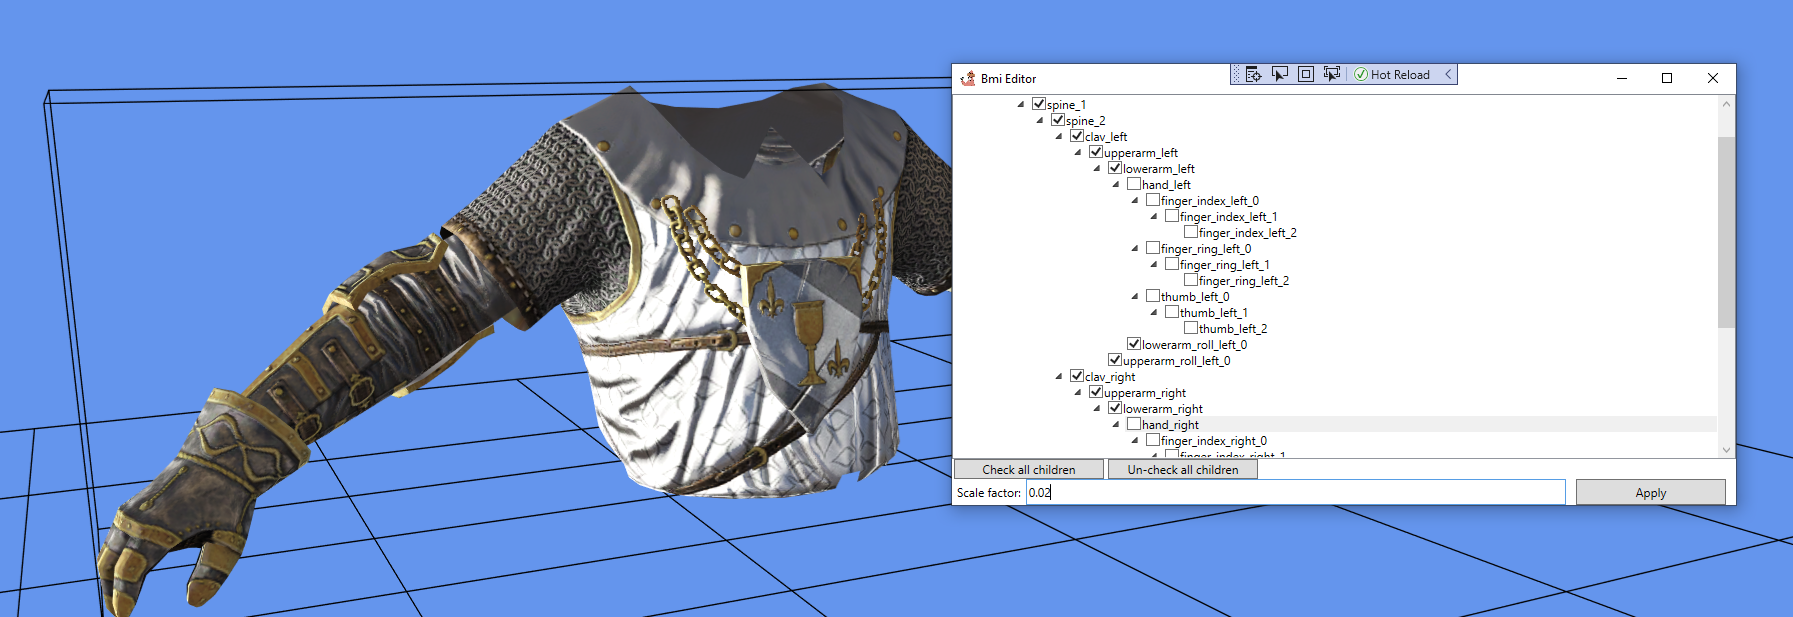
The BMI editor allows the scaling of a mesh along its normals. This gives the impression of adding or removing thickness to and object.
All the bones that are selected in the tree view is applied to the scale when the apply button is pressed.
Mount Animation Creator
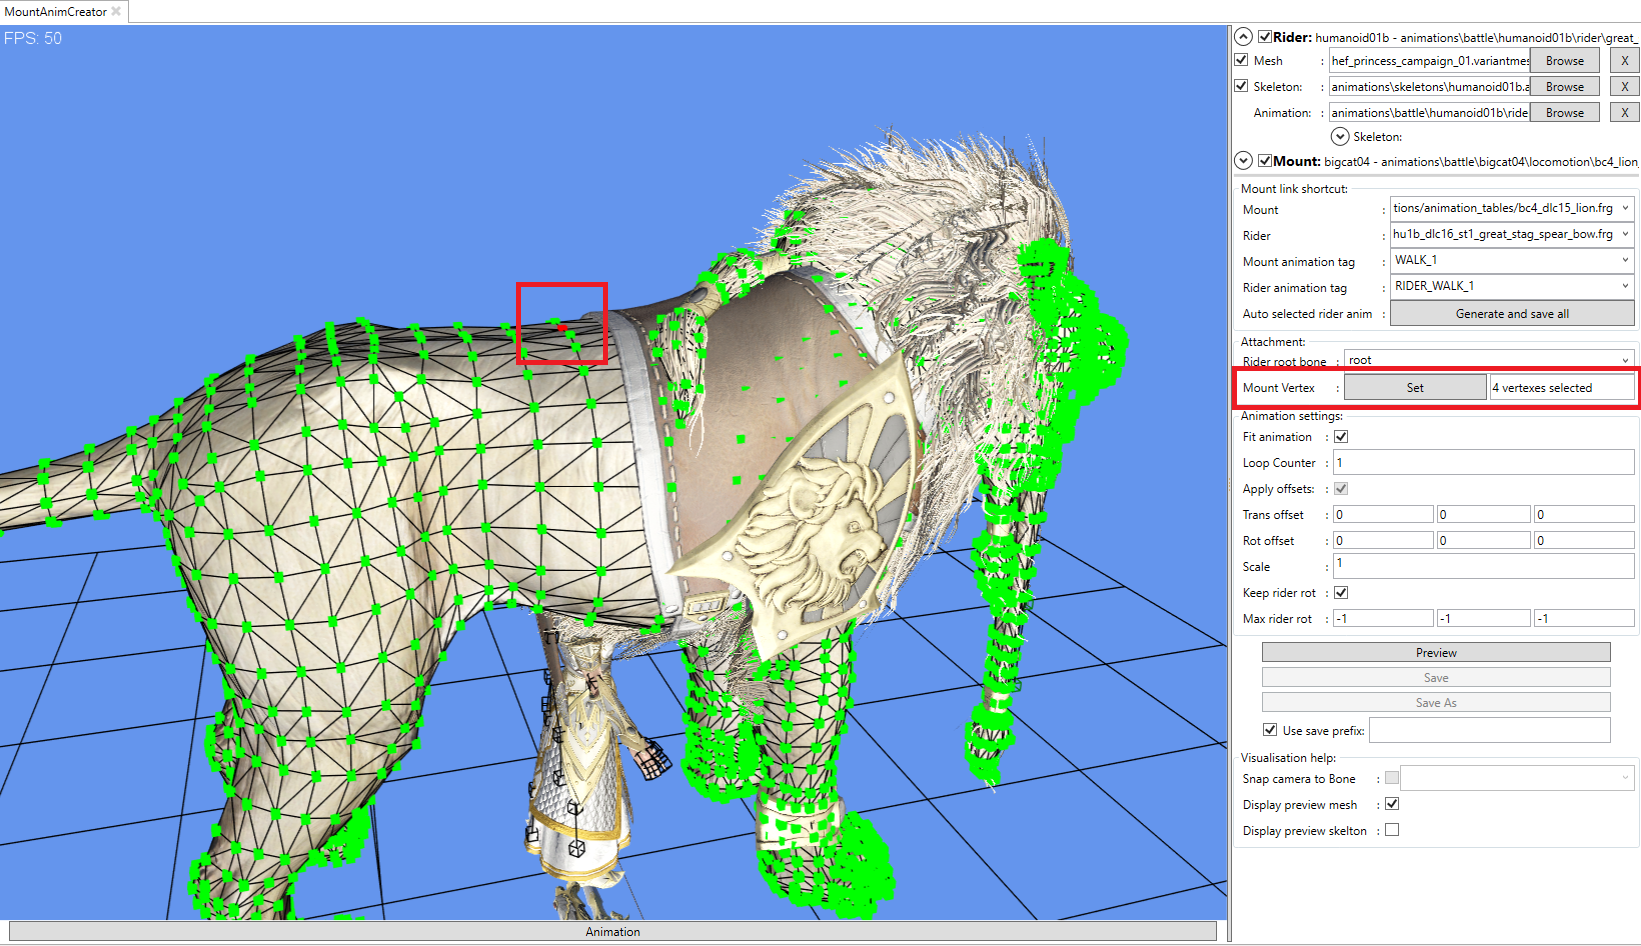
The tool also allows for attaching an animation to a vertex on an other skeleton. This is useful for creating mount animations for mount that does not exist in the game.
An example of this would be adding a Squig mound to Karl Franze or a Lion animation to the High Elf Princess. https://www.youtube.com/watch?v=4dKFXAu4R1Y
Excellent, must read tutorial for how to use the tool: https://docs.google.com/document/d/123LZH16sY2EGRJWwTH4T3XvT0ENUUQXLLfL6tVUtezk/edit
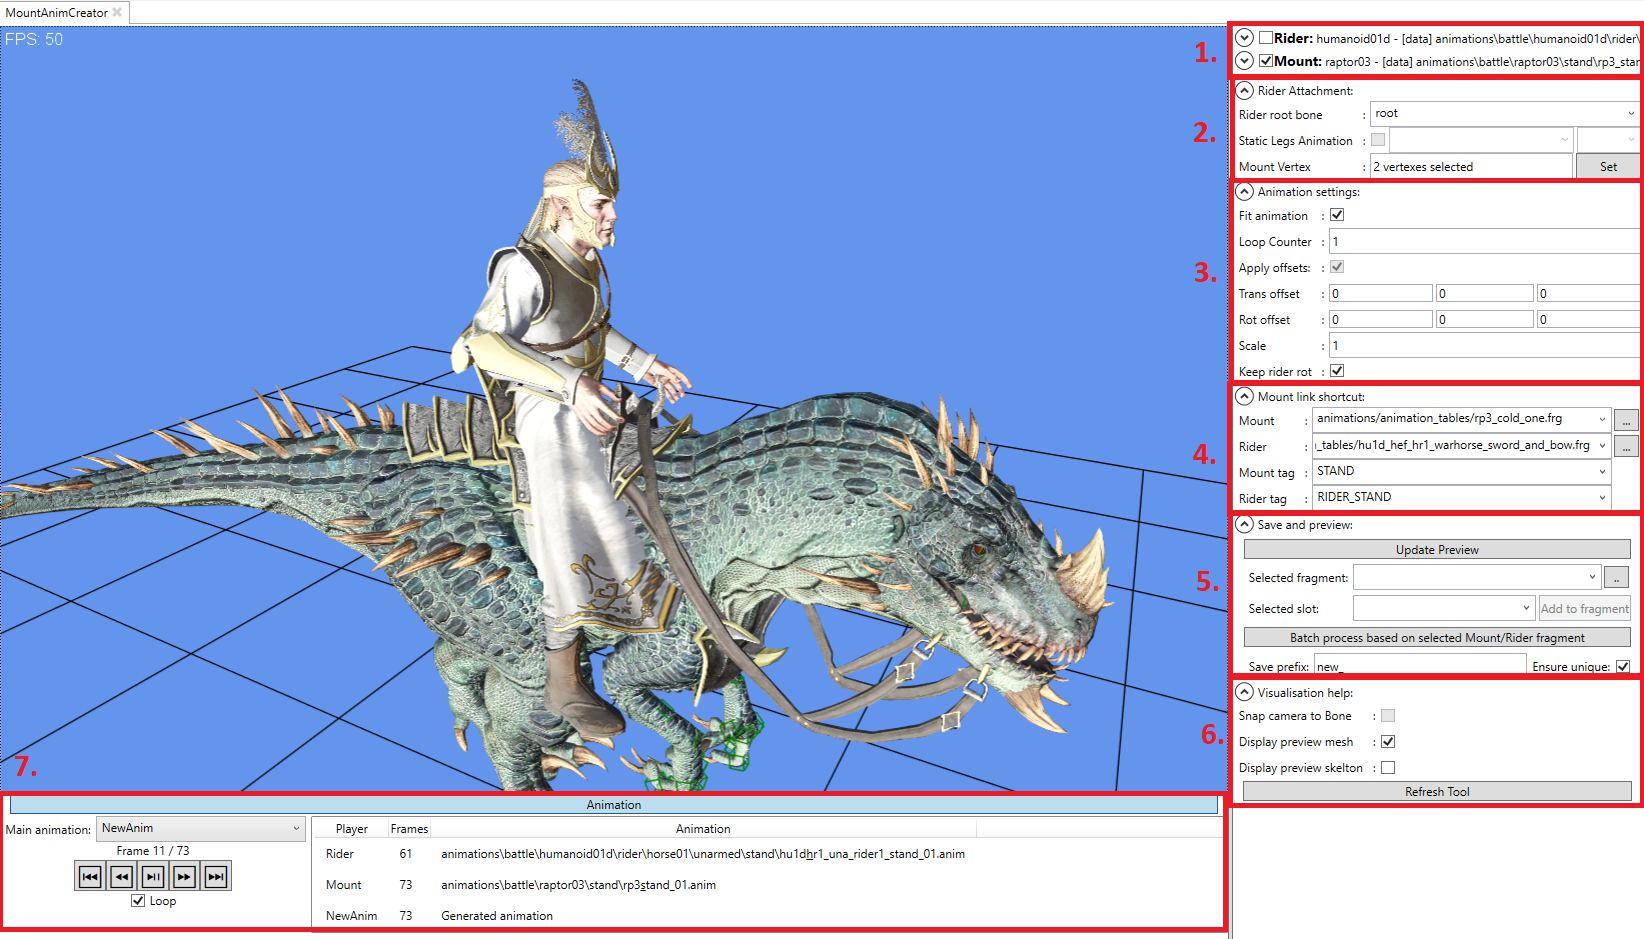
A run-through of the UI components:
- Information about the rider and mount (mesh, skeleton and animation)
- Control how the rider is attached to the mount
- Rider root bone (probably never change this)
- Leg animation (disabled for now)
- The vertex the rider is attached to. Select the mount, press F3 then select the vertex that the rider should be select to and press Set. The first selected vertex is used if multiple vertexes are selected
- Settings for the animation - Hopefully pretty intuitive
- Rider and mount animation fragment and active slots
- Mount is the animation fragment used by the mount
- Rider is the animation fragment used by the rider
- Mount animation tag is the animation used by the mount
- Save and Preview:
- Update the preview to reflect changes done in the animation settings view
- Active fragment to add items to
- Slot in the active fragment to add to
- Batch process based on the values in "Mount link shortcut view"
- Drawing related things
Workflow
- Select rider and mount meshes
- Select attachment point
- Select rider and mount fragment
- Play around with the settings until you are happy with how it looks
- Press Batch prosess to generate animpack, bin and fragment.
- Look at the report to see if manual tweaks are needed.
- If manual tweaks are needed:
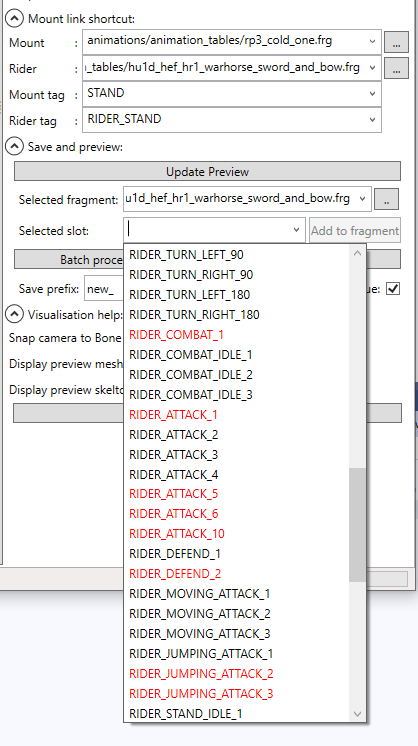
- Load the new fragment into "selected fragment"
- Find a slot that needs to be fixed.
- Select the correct Mount tag for the selected rider slot
- Select a rider tag that looks good
- Press add to fragment
- Repeat
Sliding
If the rider is sliding around or popping, make sure that the scale of the mount is correct.
Matched animations
Matched animations does not work well right now, I recommend deleting them.
Anm.Meta files Editor
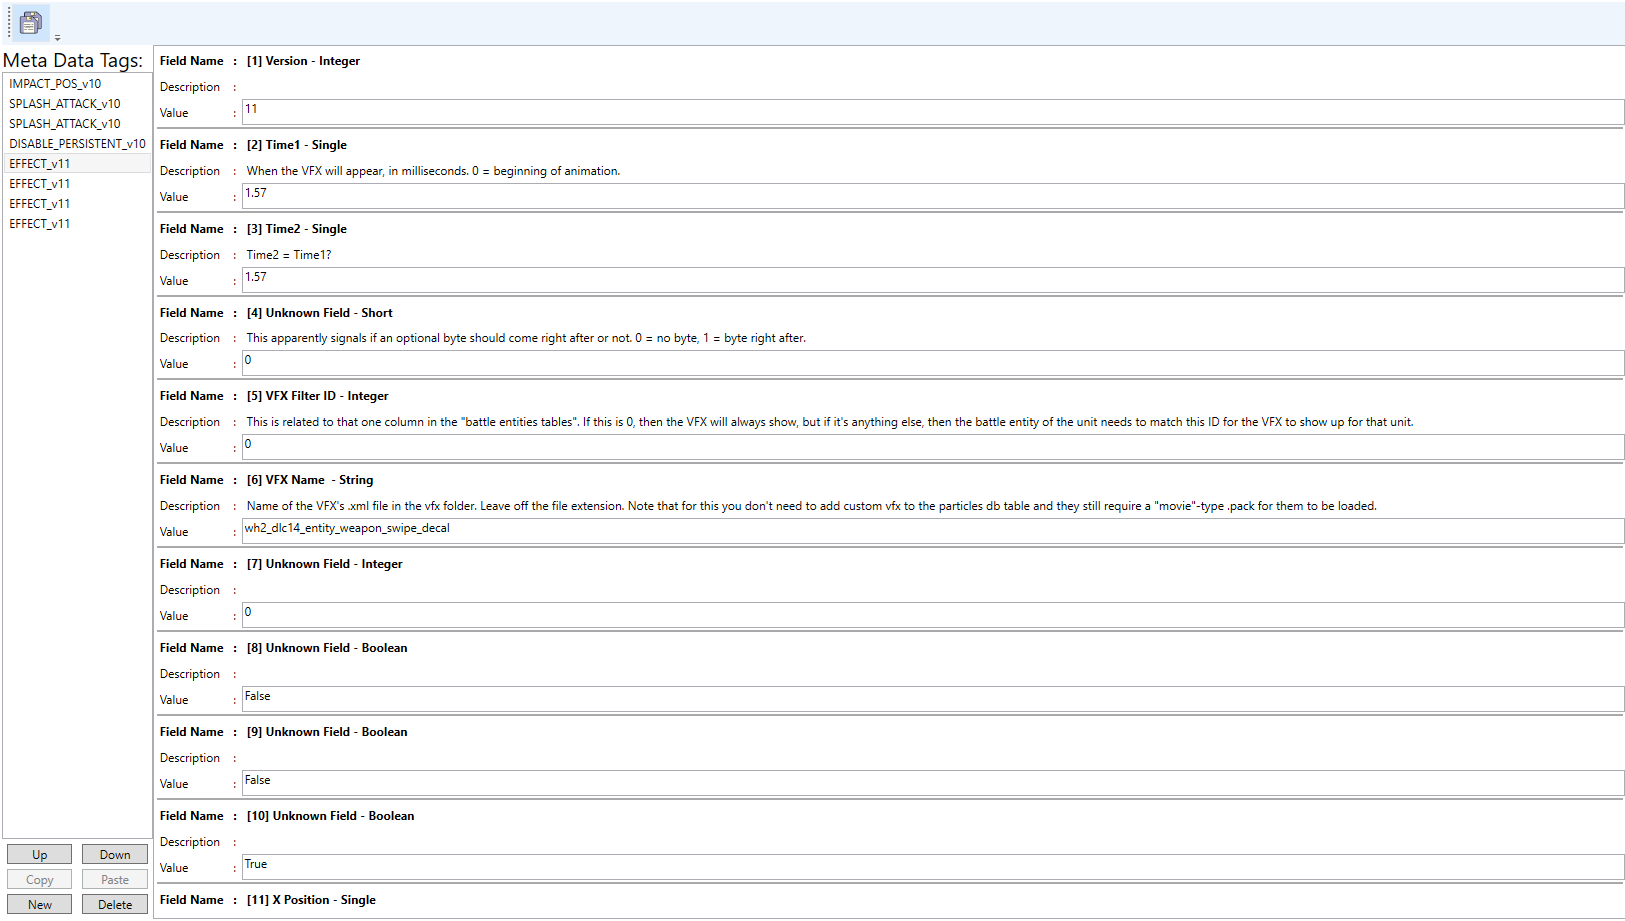
The tool can display and edit most meta file, more information will be added later
AnimPack Editor
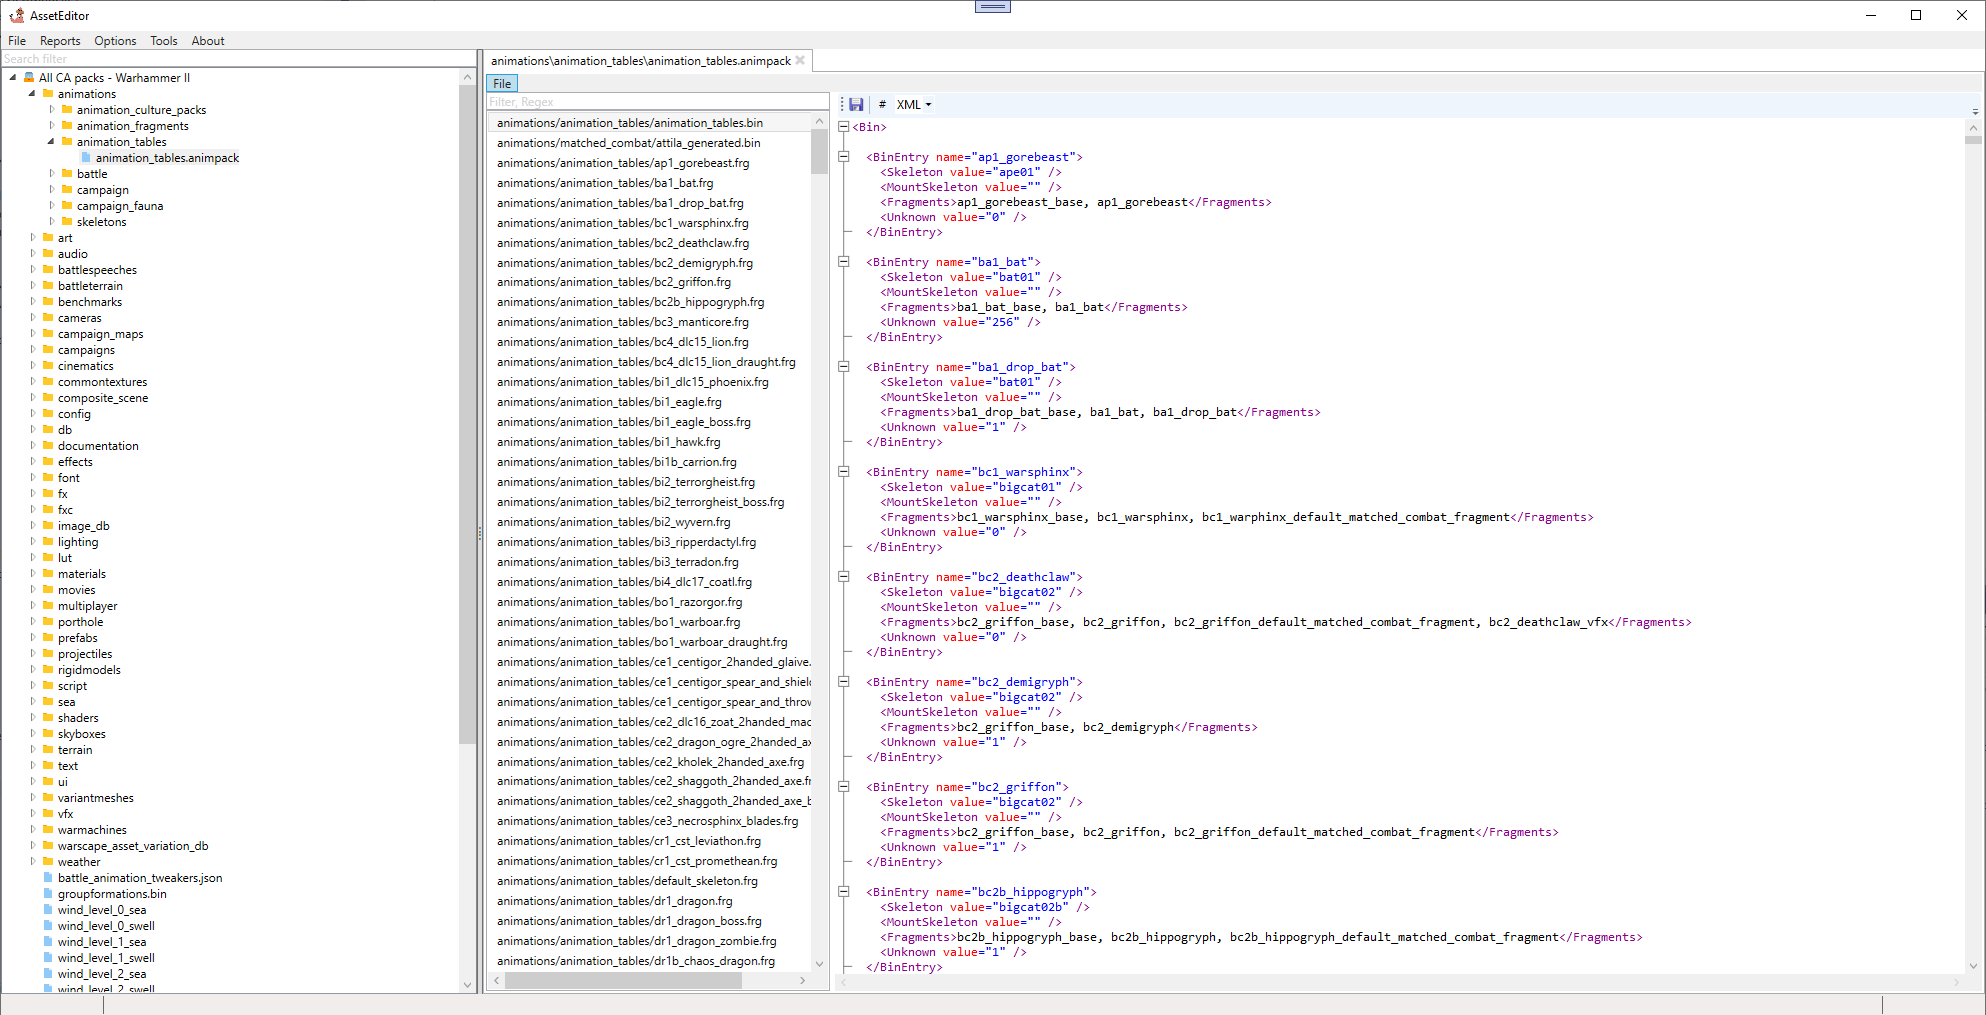
The tool comes with an animation pack editor. The animpack is the file which controls how animations are configured.
Refer to the "animation and you" tutorial for more information about how they are structured
How to create a new fragment (animation set) for a unit
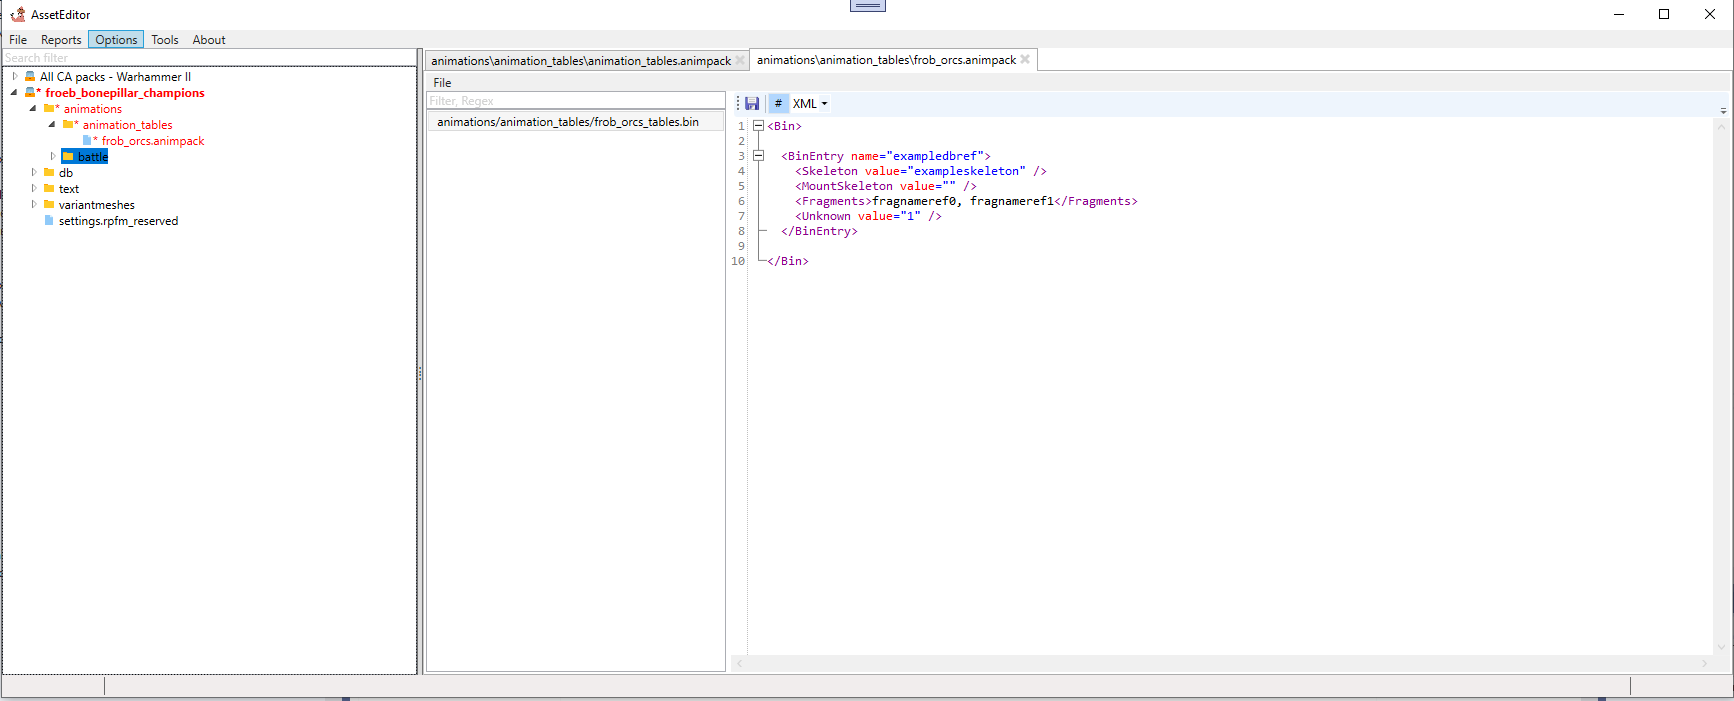
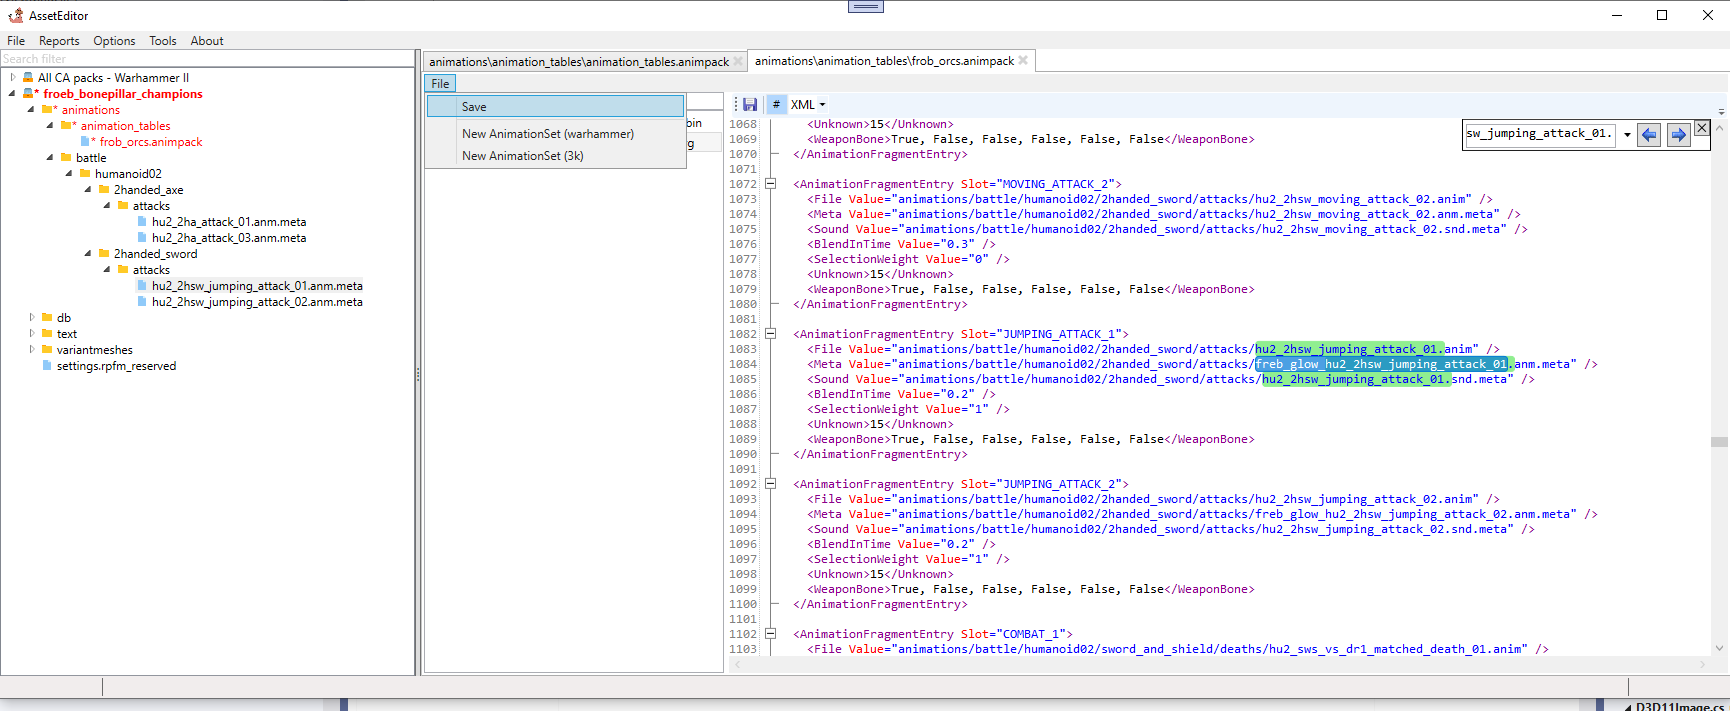
Go to File -> Create -> New AnimPack(game) and enter a name when prompted. This gives you a very basic example of how the file works. For more information I recommend looking into the existing game animpack
By default the tool creates a placeholder bin entry
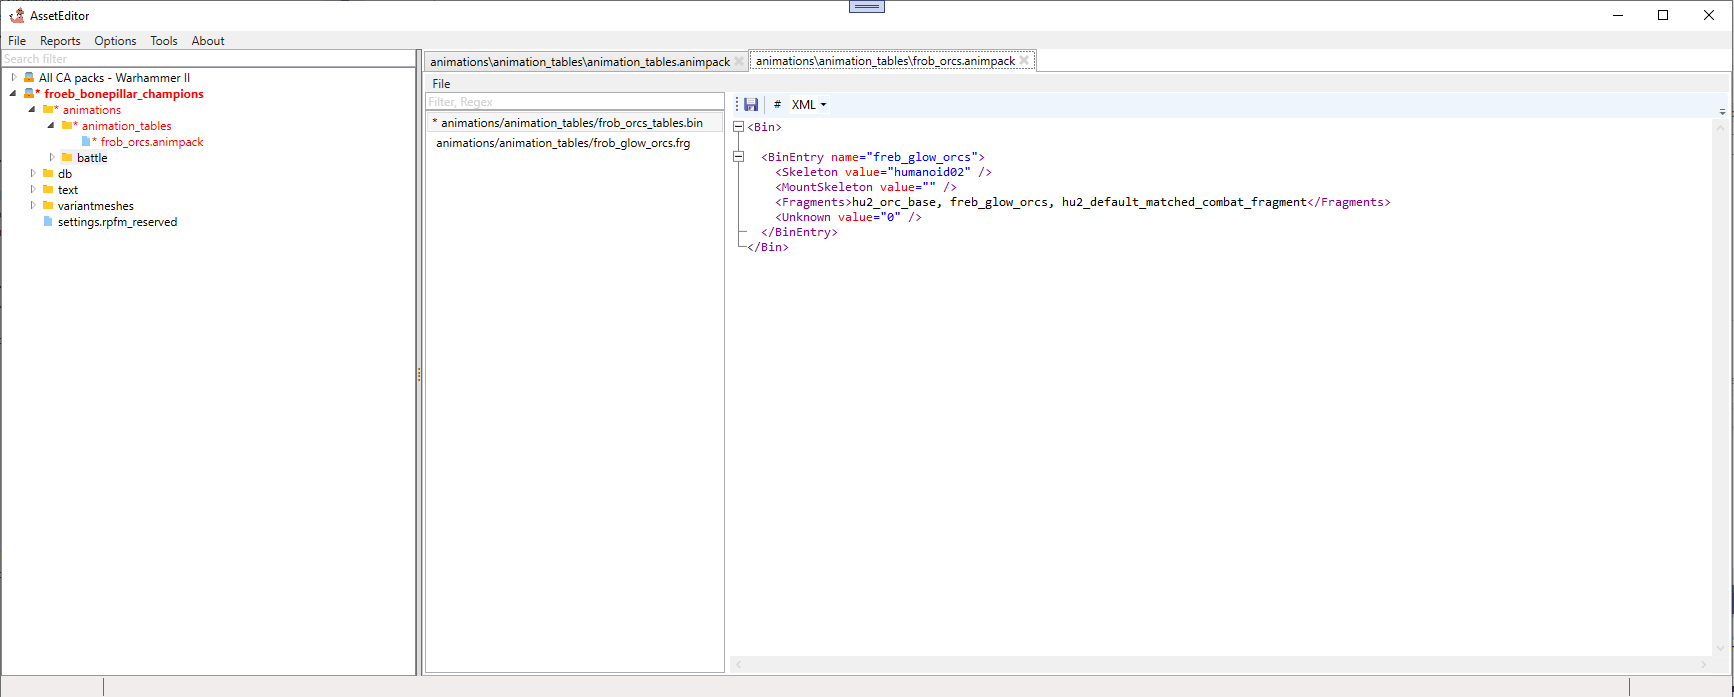
Create a new fragment by going to File->New AnimationSet(Game) inside the animpack editor. This gives you the fragment where the animation information about the unit is stored
Edit the bin to to be sensible values. Best way to do this is by copying a bin which is the closest to what you want to do. In this case it was the "hu2_orc_2handed_axe" entry and then I replaced the "hu2_orc_2handed_axe" names with the new name of the fragment.
Save the bin.
Go the the frag, it contains some example data. Replace it with the data you want. Typically this means copy pasting in the fragment the closest to what you want, then updating it. In this case it was the "hu2_orc_2handed_axe" and I updated some of the meta files to use the new files I have created (Note, the files on the left in the tree view has not yet been renamed!)
Save the frg, then save the animpack by going to File->Save
Now your animpack is done, but you need to link it to a unit. Dindi has kindly created an example animpack for how to do this!
