Tutorial:AssetEditor
The AssetEditor is a poor man's 3d program for Total war games (currently only supports WH2).
It aims at trying to recreate the Kit bashing feeling you get when working with plastic models.
Download link: https://github.com/olekristianhomelien/TheAssetEditor/releases/latest
Youtube tutorials: https://www.youtube.com/channel/UCXnf2q9fRNYlMn4XULPLKgg
Disclaimer: I am not good at technical writing or enjoy it, so if someone feels the desire to improve this, then please!
Basics
Camera
All the visual editors uses ALT+ Mouse to move the camera.
Zoom = Alt+ Mouse Wheel
Move = Alt + Right button
Rotate = Alt + Left button
Beginner tutorial by FaallenOon: https://docs.google.com/document/d/1QZefJwJLvG_ny2MUMZZvvxV-4o2AAuSCmmiA-twAIXw
Saving
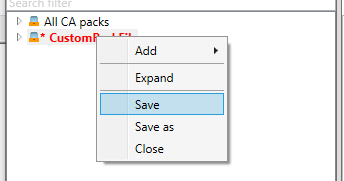
The tool works both with individual files and the pack files themselves. As a result of this each of them has to be saved separately. Saving a file in an editor adds it to the in memory packfile (which then goes red), which have to be right clicked then saved.
Sub Tools
Kitbash Editor
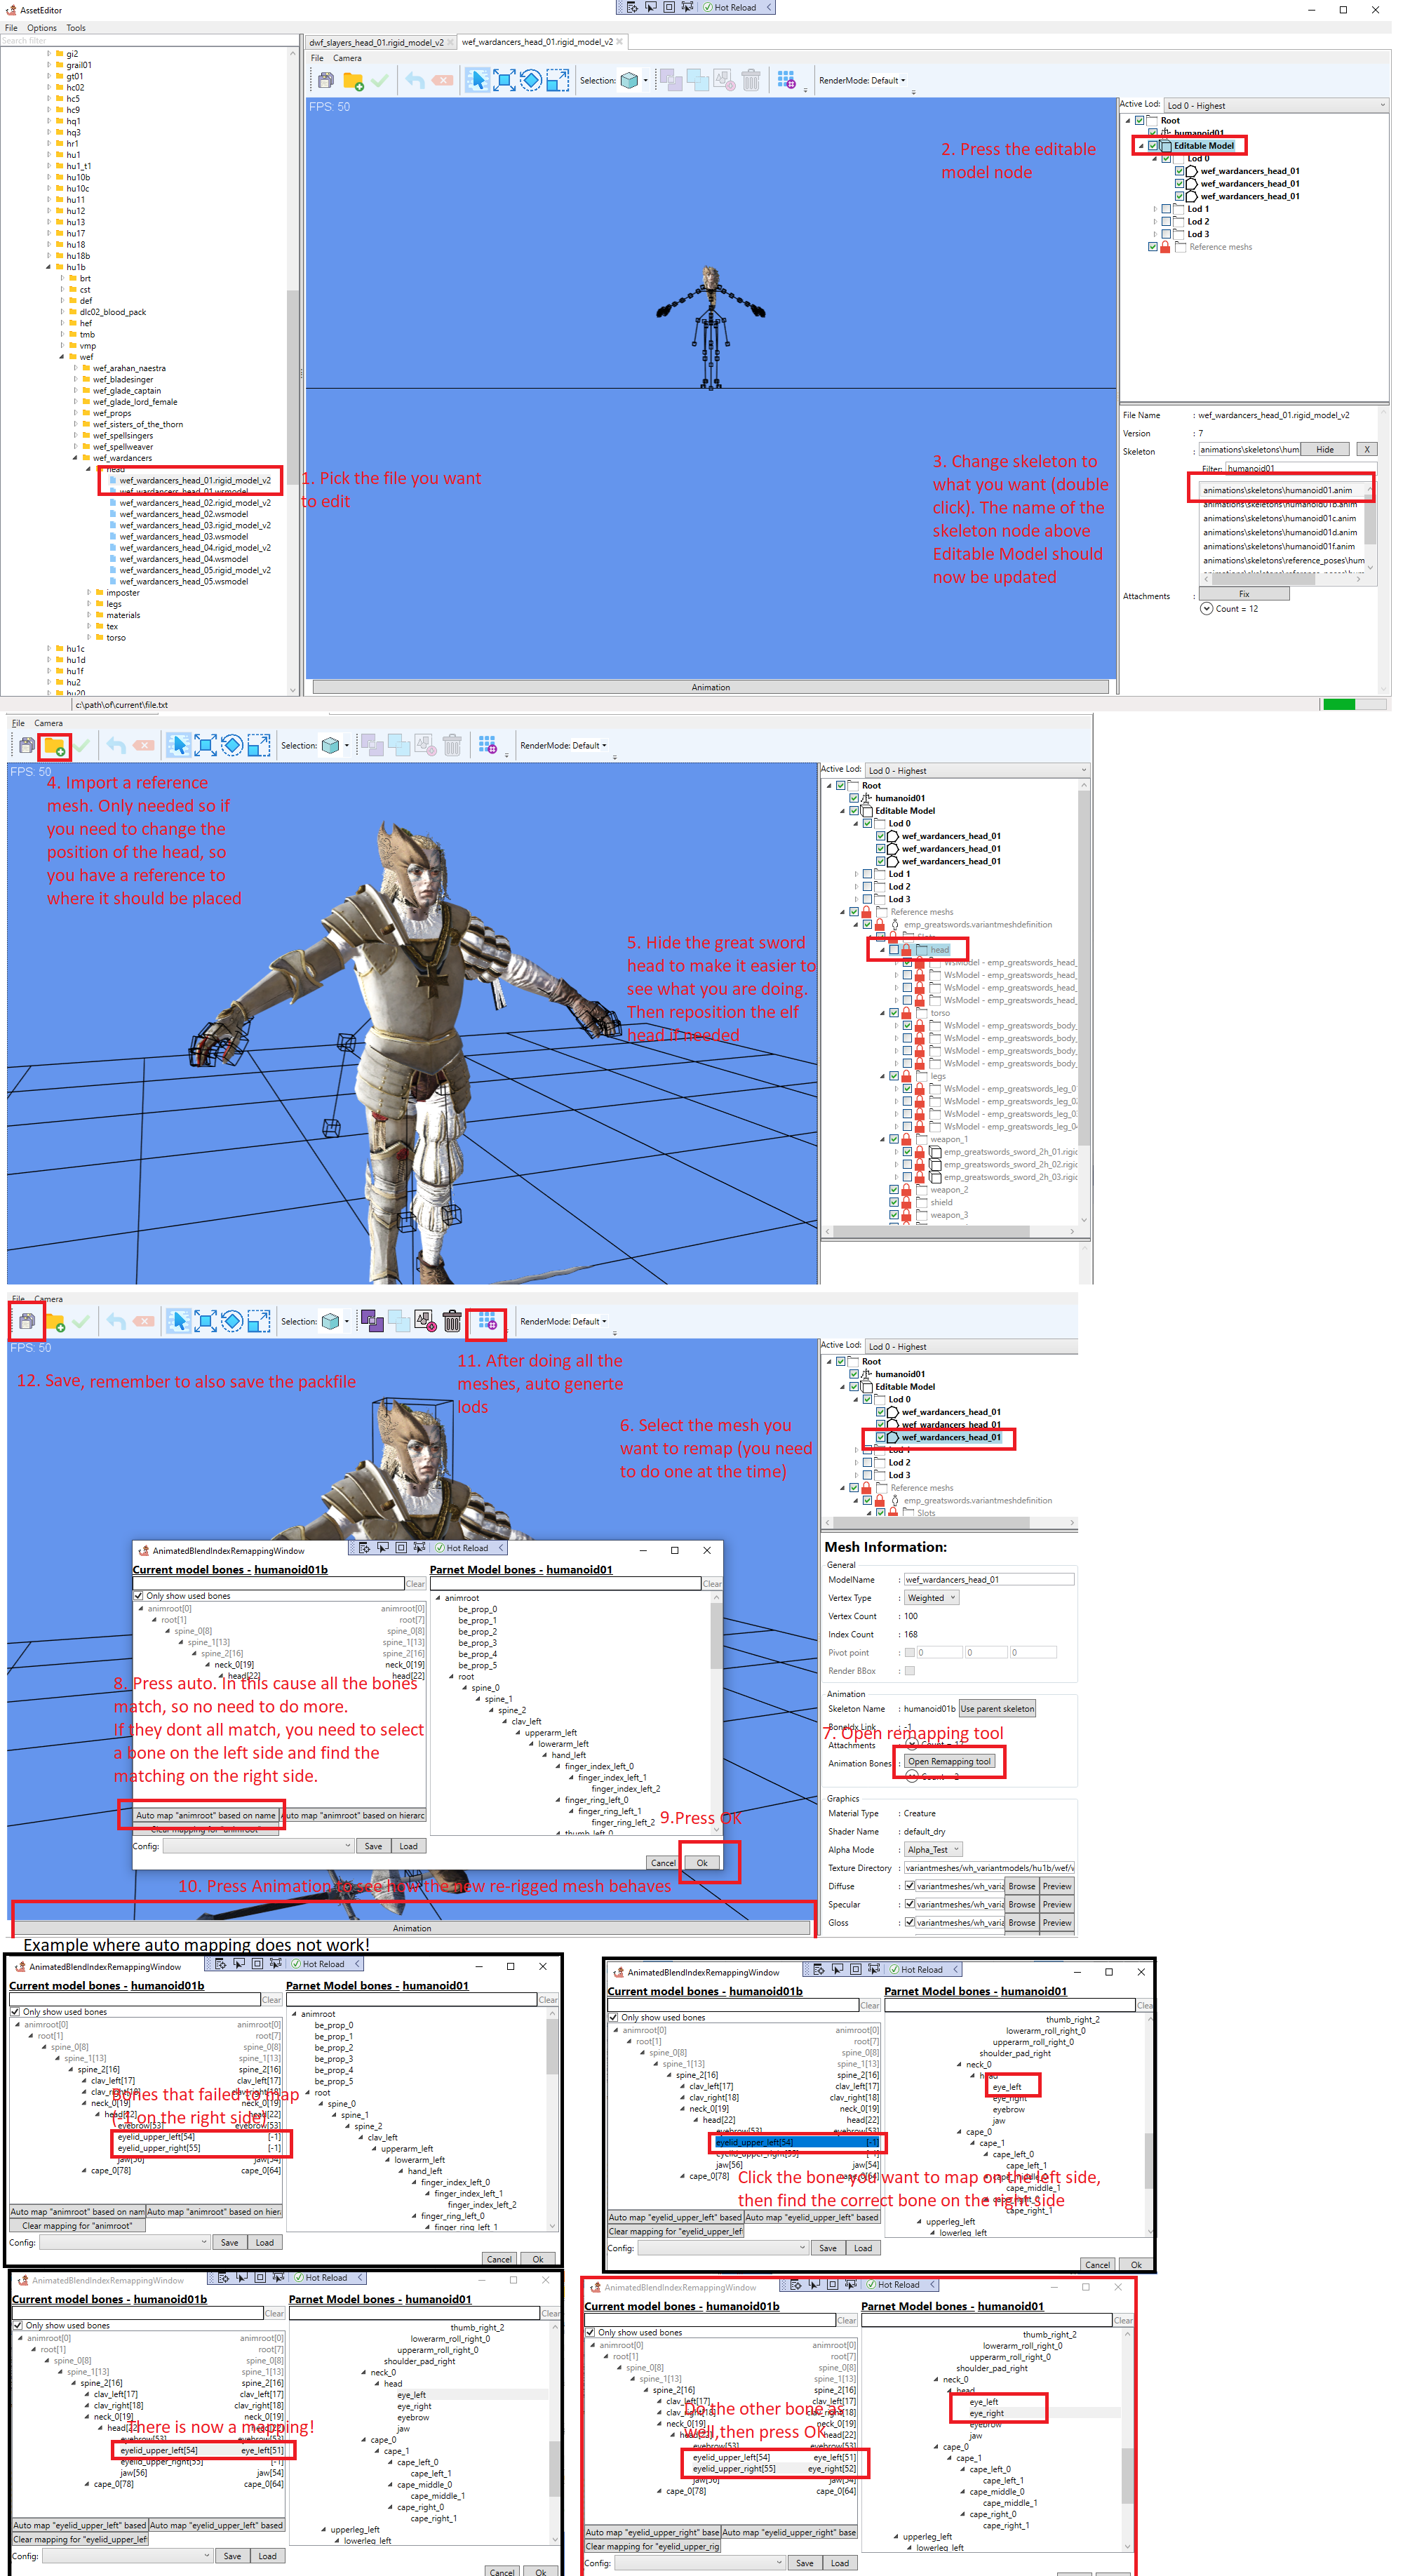
Select a .rmv2 file to open the Kitbash Editor
Find your self a model to play with. Go to:
variantmeshes/
wh_variantmodels/
There is folders named after skeletons. hu1 is for humans.
In hu1 you have files for each factions that use it.
Look for a file that ends with .rigid_model_V2
Ignore the .wsmodels for now
Youtube tutorial: https://www.youtube.com/watch?v=LeObDGqV2PM
Re-Regging
One of the key parts of the Kitbash editor is the ability to re-rig a mesh from one skeleton to an other. If this is not done, the mesh will turn into spaghetti when an animation is applied.
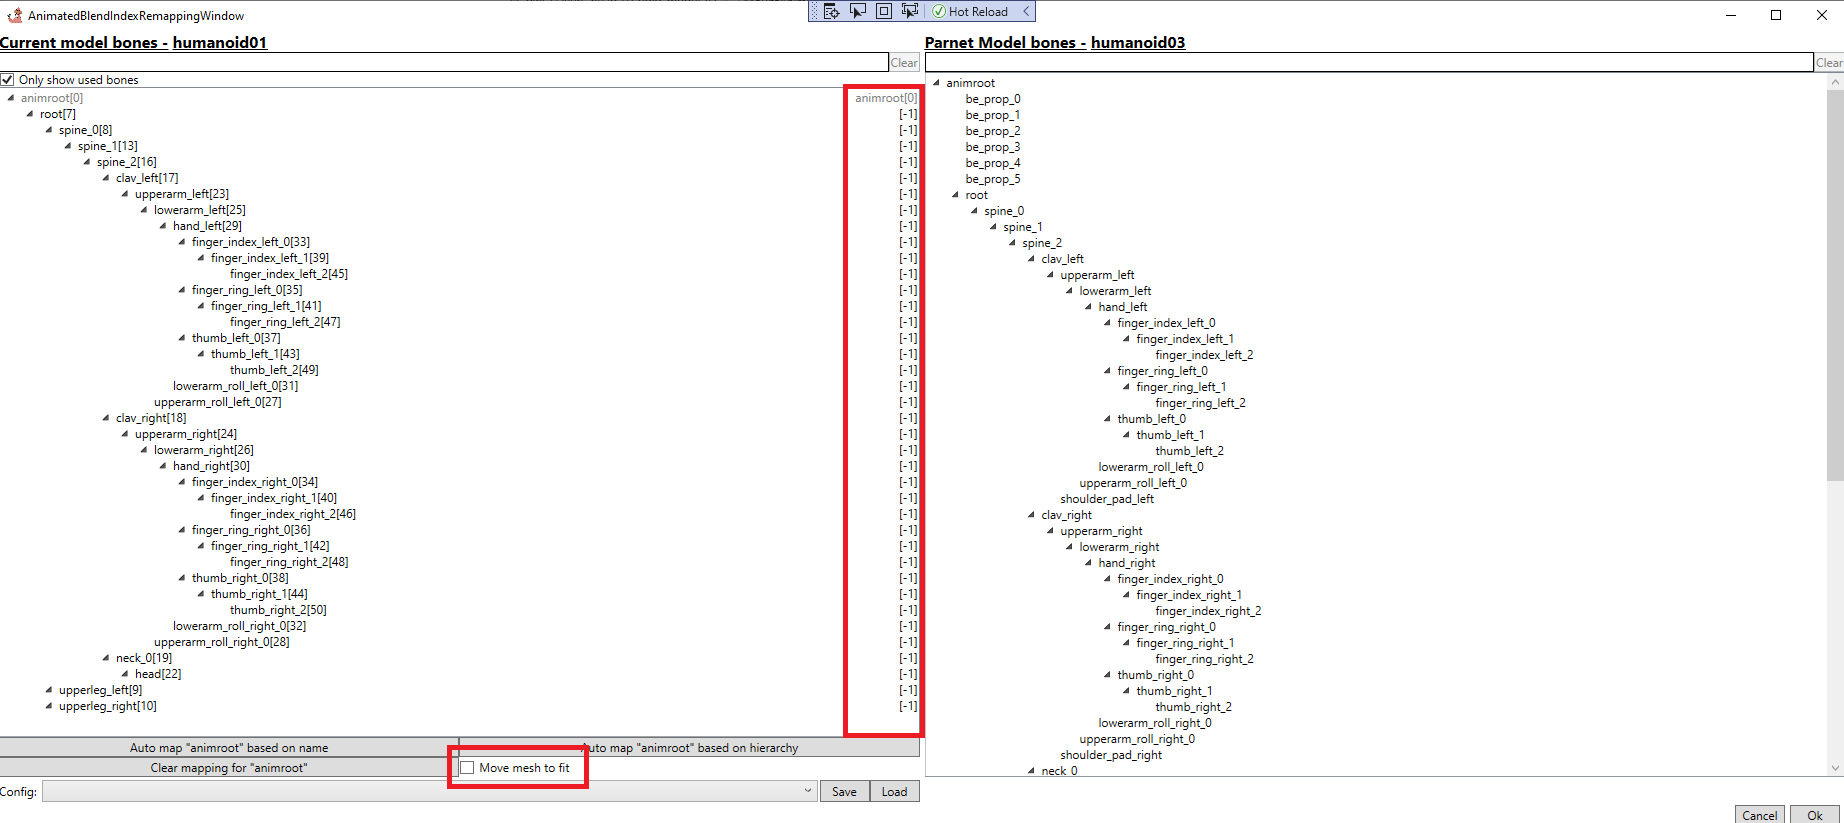
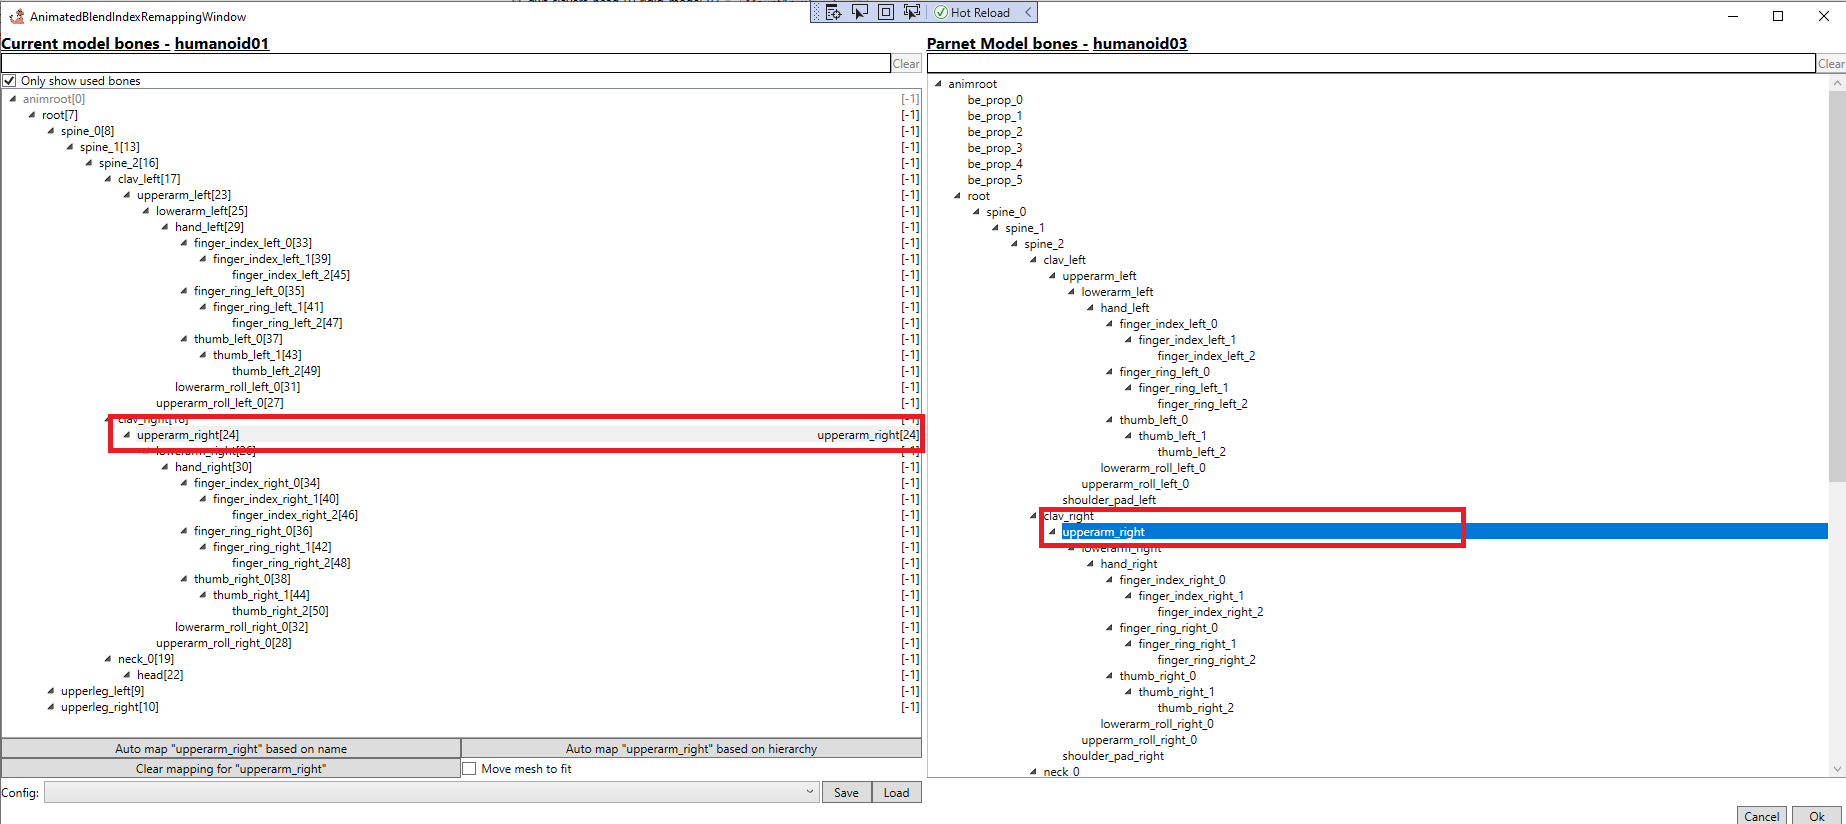
It works by doing a 1:1 mapping between bones in the original skeleton (left side) and the target skeleton (right side)
It works by selecting bones one by one on the left side and then selecting a bone on the right side. When this is done the column on the left side that says -1 should turn into the same the bone selected on the right side.
The tool can also attempt to auto fit the mesh onto the skeleton by selecting the "Fit mesh to skeleton" checkbox.
BMI tool
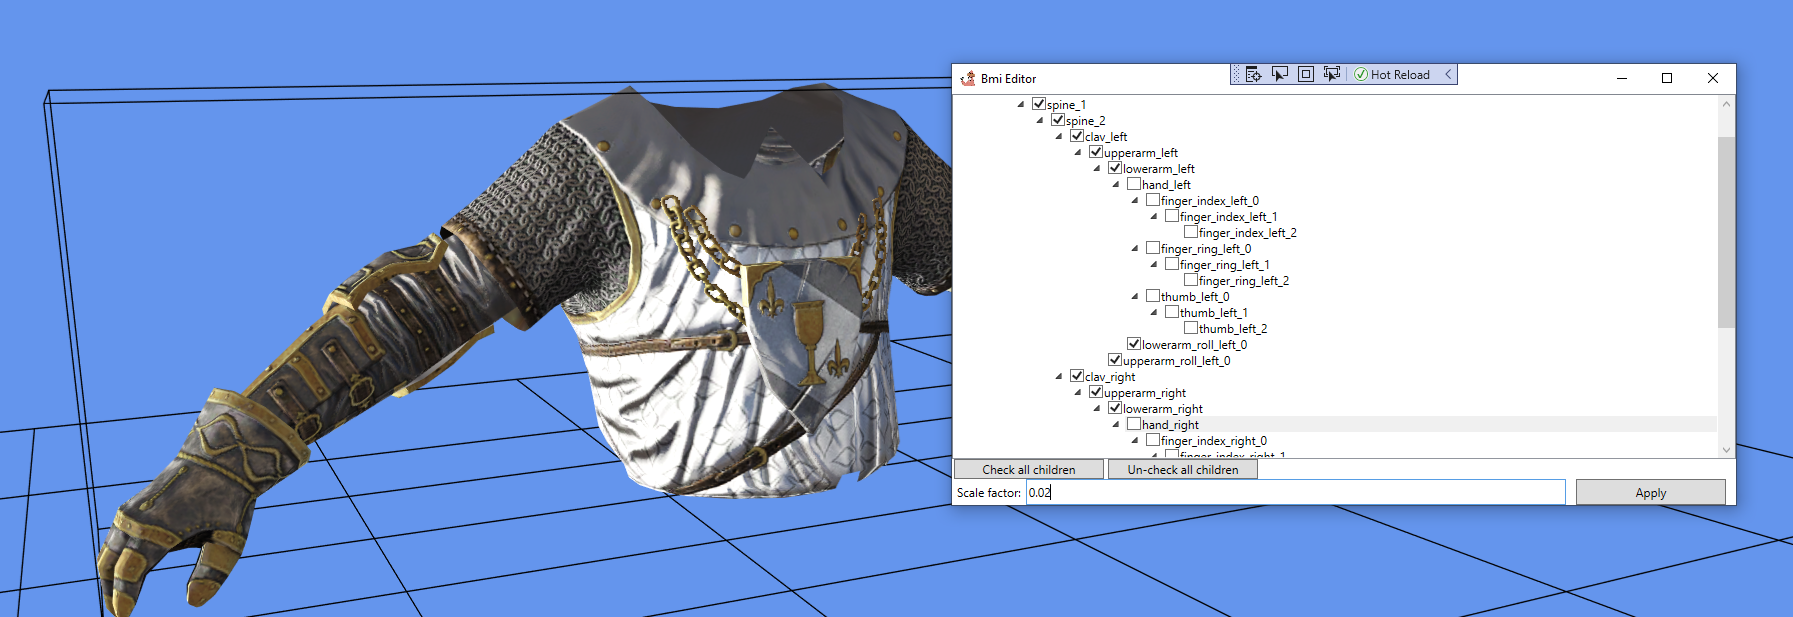
The BMI editor allows the scaling of a mesh along its normals. This gives the impression of adding or removing thickness to and object.
All the bones that are selected in the tree view is applied to the scale when the apply button is pressed.
Mount Animation Creator
The tool also allows for attaching an animation to a vertex on an other skeleton. This is useful for creating mount animations for mount that does not exist in the game.
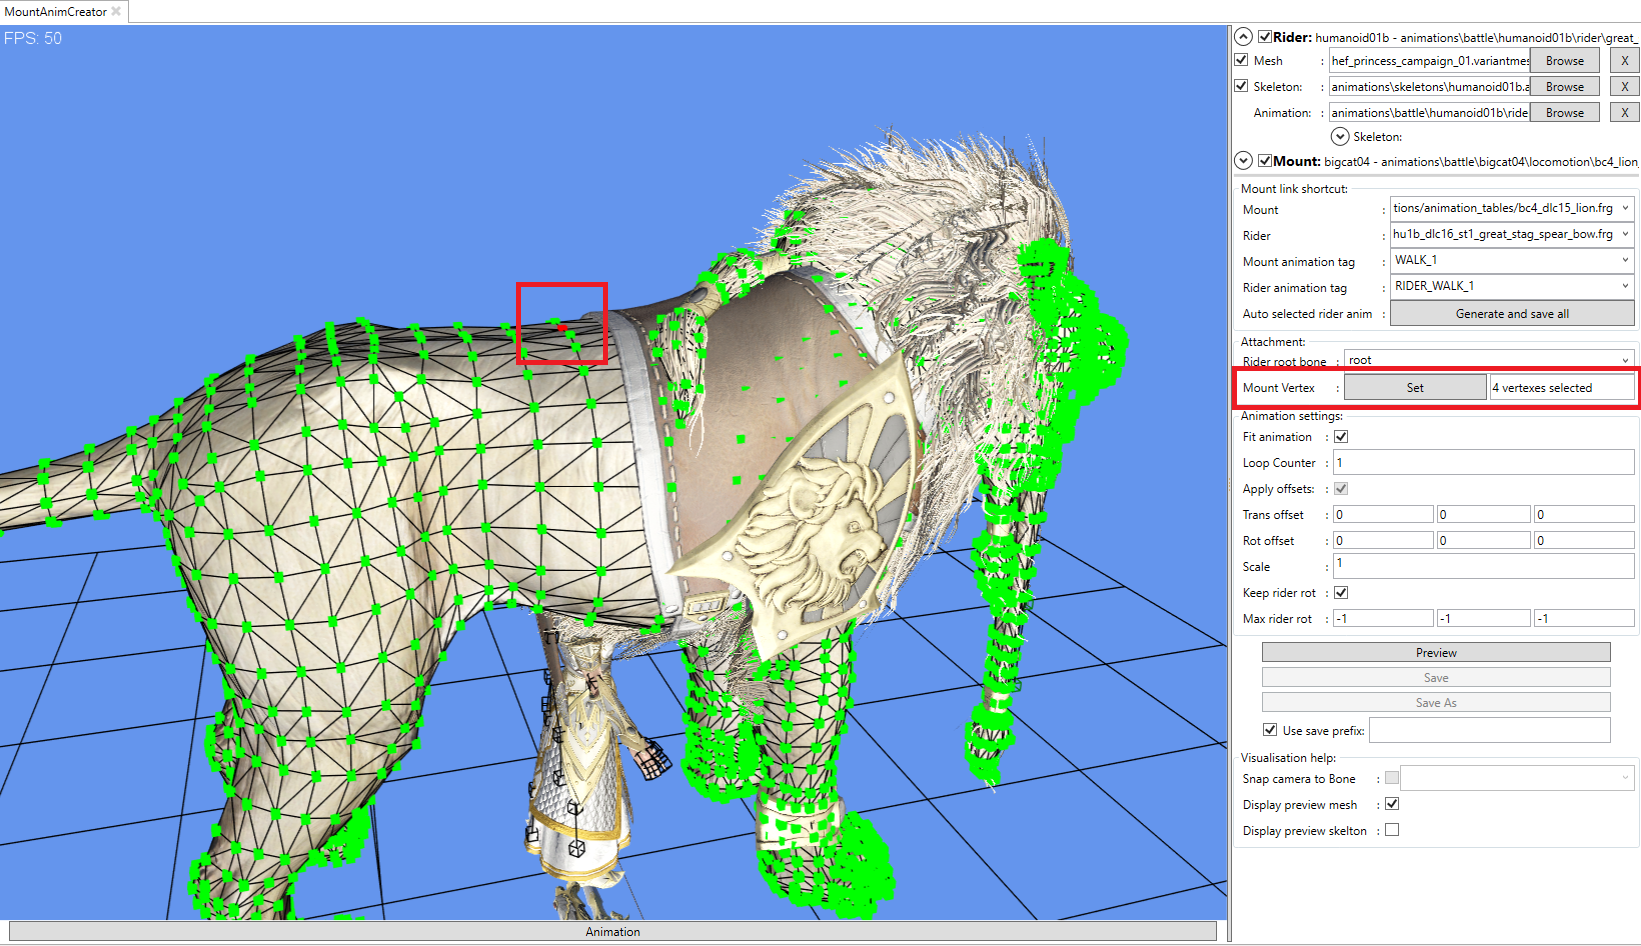
An example of this would be adding a Squig mound to Karl Franze or a Lion animation to the High Elf Princess. https://www.youtube.com/watch?v=4dKFXAu4R1Y
Excellent, must read tutorial for how to use the tool: https://docs.google.com/document/d/123LZH16sY2EGRJWwTH4T3XvT0ENUUQXLLfL6tVUtezk/edit
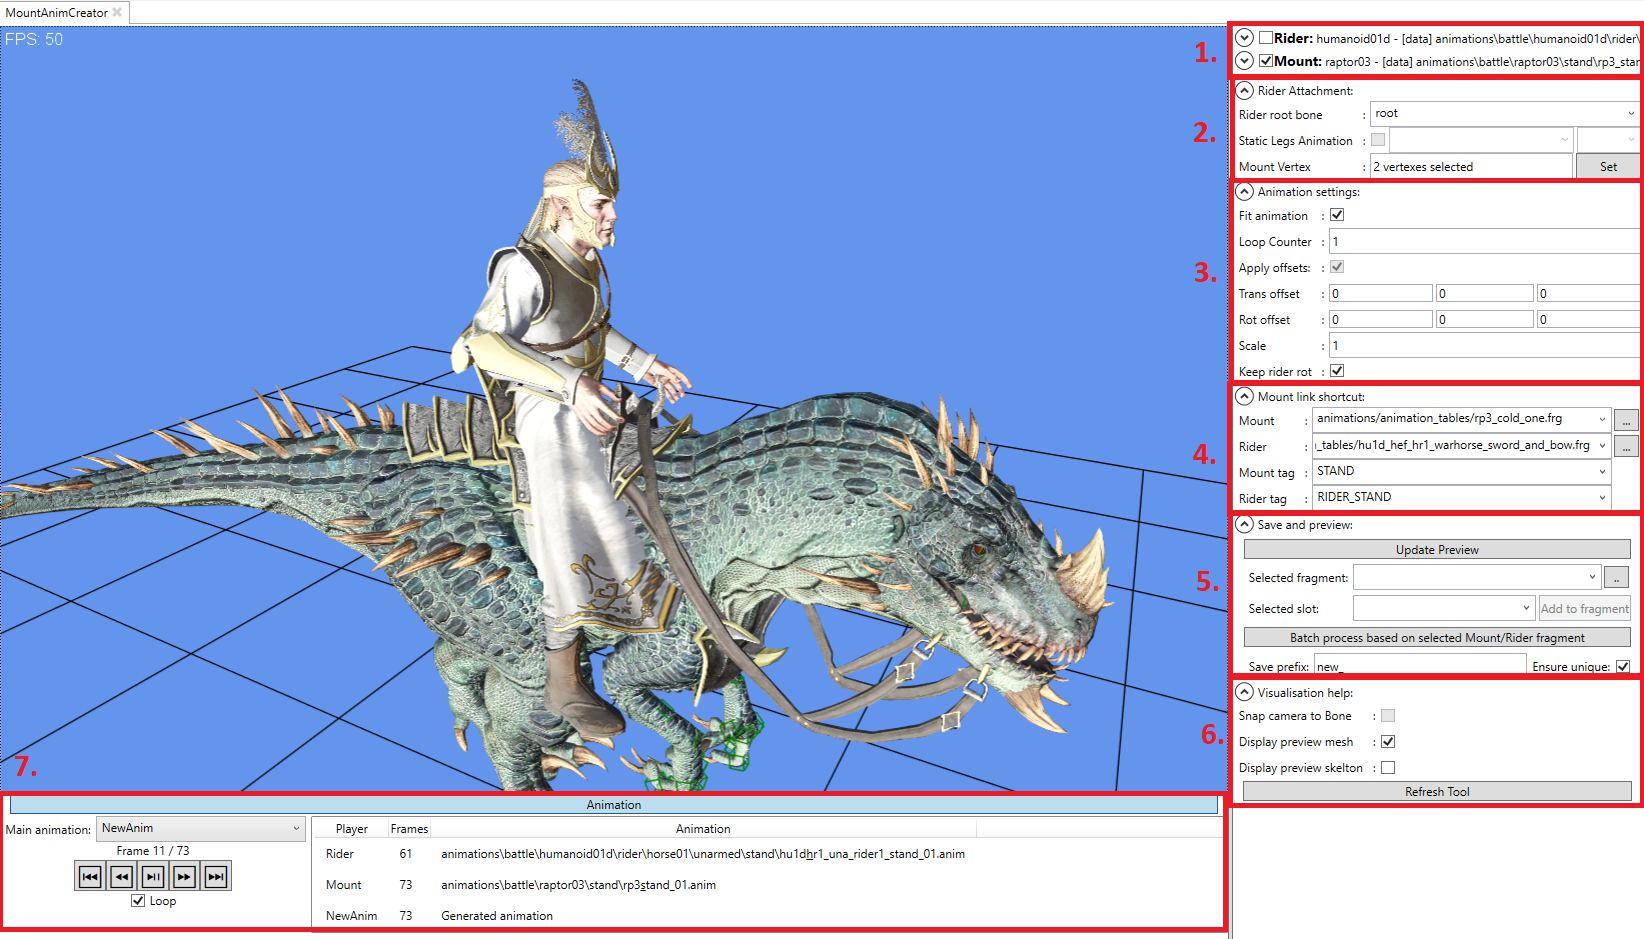
A run-through of the UI components:
- Information about the rider and mount (mesh, skeleton and animation)
- Control how the rider is attached to the mount
- Rider root bone (probably never change this)
- Leg animation (disabled for now)
- The vertex the rider is attached to. Select the mount, press F3 then select the vertex that the rider should be select to and press Set. The first selected vertex is used if multiple vertexes are selected
- Settings for the animation - Hopefully pretty intuitive
- Rider and mount animation fragment and active slots
- Mount is the animation fragment used by the mount
- Rider is the animation fragment used by the rider
- Mount animation tag is the animation used by the mount
- Save and Preview:
- Update the preview to reflect changes done in the animation settings view
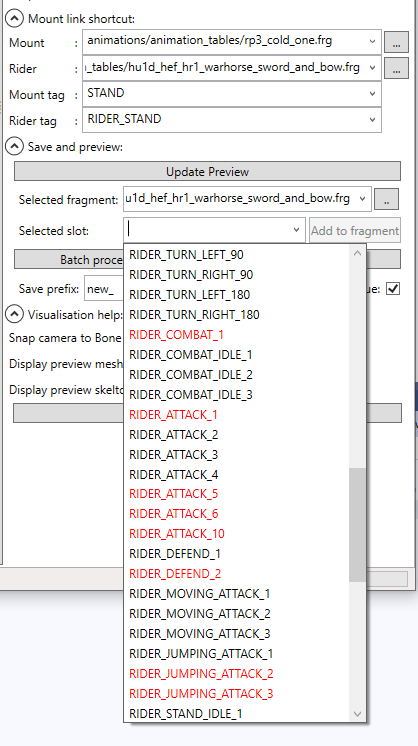
- Active fragment to add items to
- Slot in the active fragment to add to
- Batch process based on the values in "Mount link shortcut view"
- Drawing related things
Workflow
- Select rider and mount meshes
- Select attachment point
- Select rider and mount fragment
- Play around with the settings until you are happy with how it looks
- Press Batch prosess to generate animpack, bin and fragment.
- Look at the report to see if manual tweaks are needed.
- If manual tweaks are needed:
- Load the new fragment into "selected fragment"
- Find a slot that needs to be fixed.
- Select the correct Mount tag for the selected rider slot
- Select a rider tag that looks good
- Press add to fragment
- Repeat
Sliding
If the rider is sliding around or popping, make sure that the scale of the mount is correct.
Matched animations
Matched animations does not work well right now, I recommend deleting them.
Anm.Meta files Editor
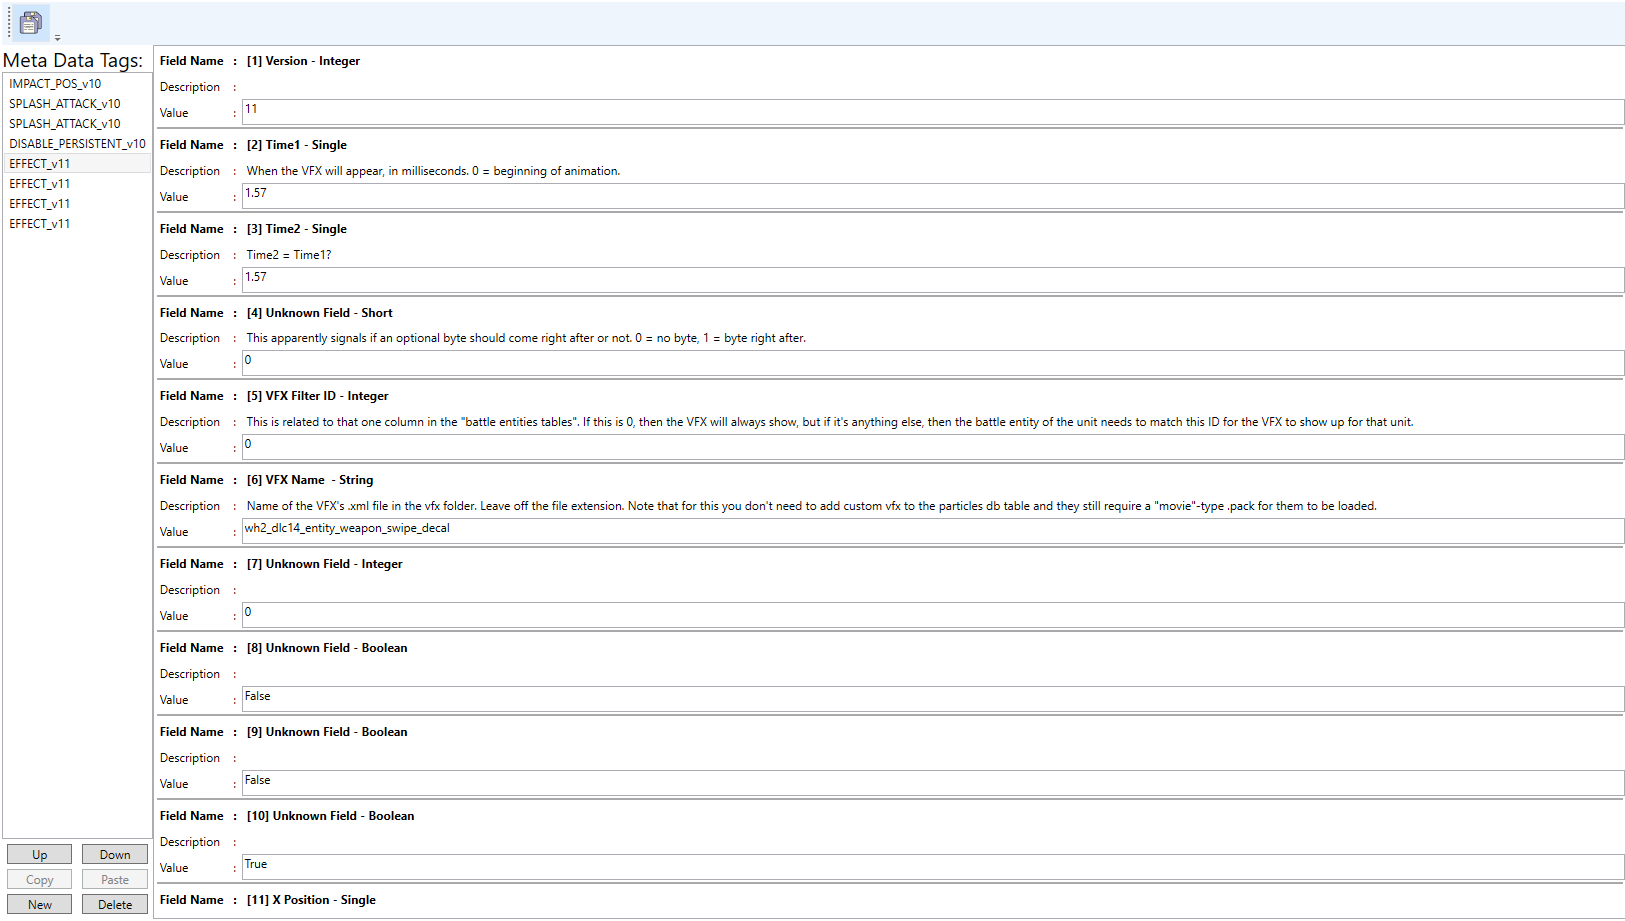
The tool can display and edit most meta file, more information will be added later
