Tutorial:Creating & Editing .Wsmodels
Originally by Shawmuscle
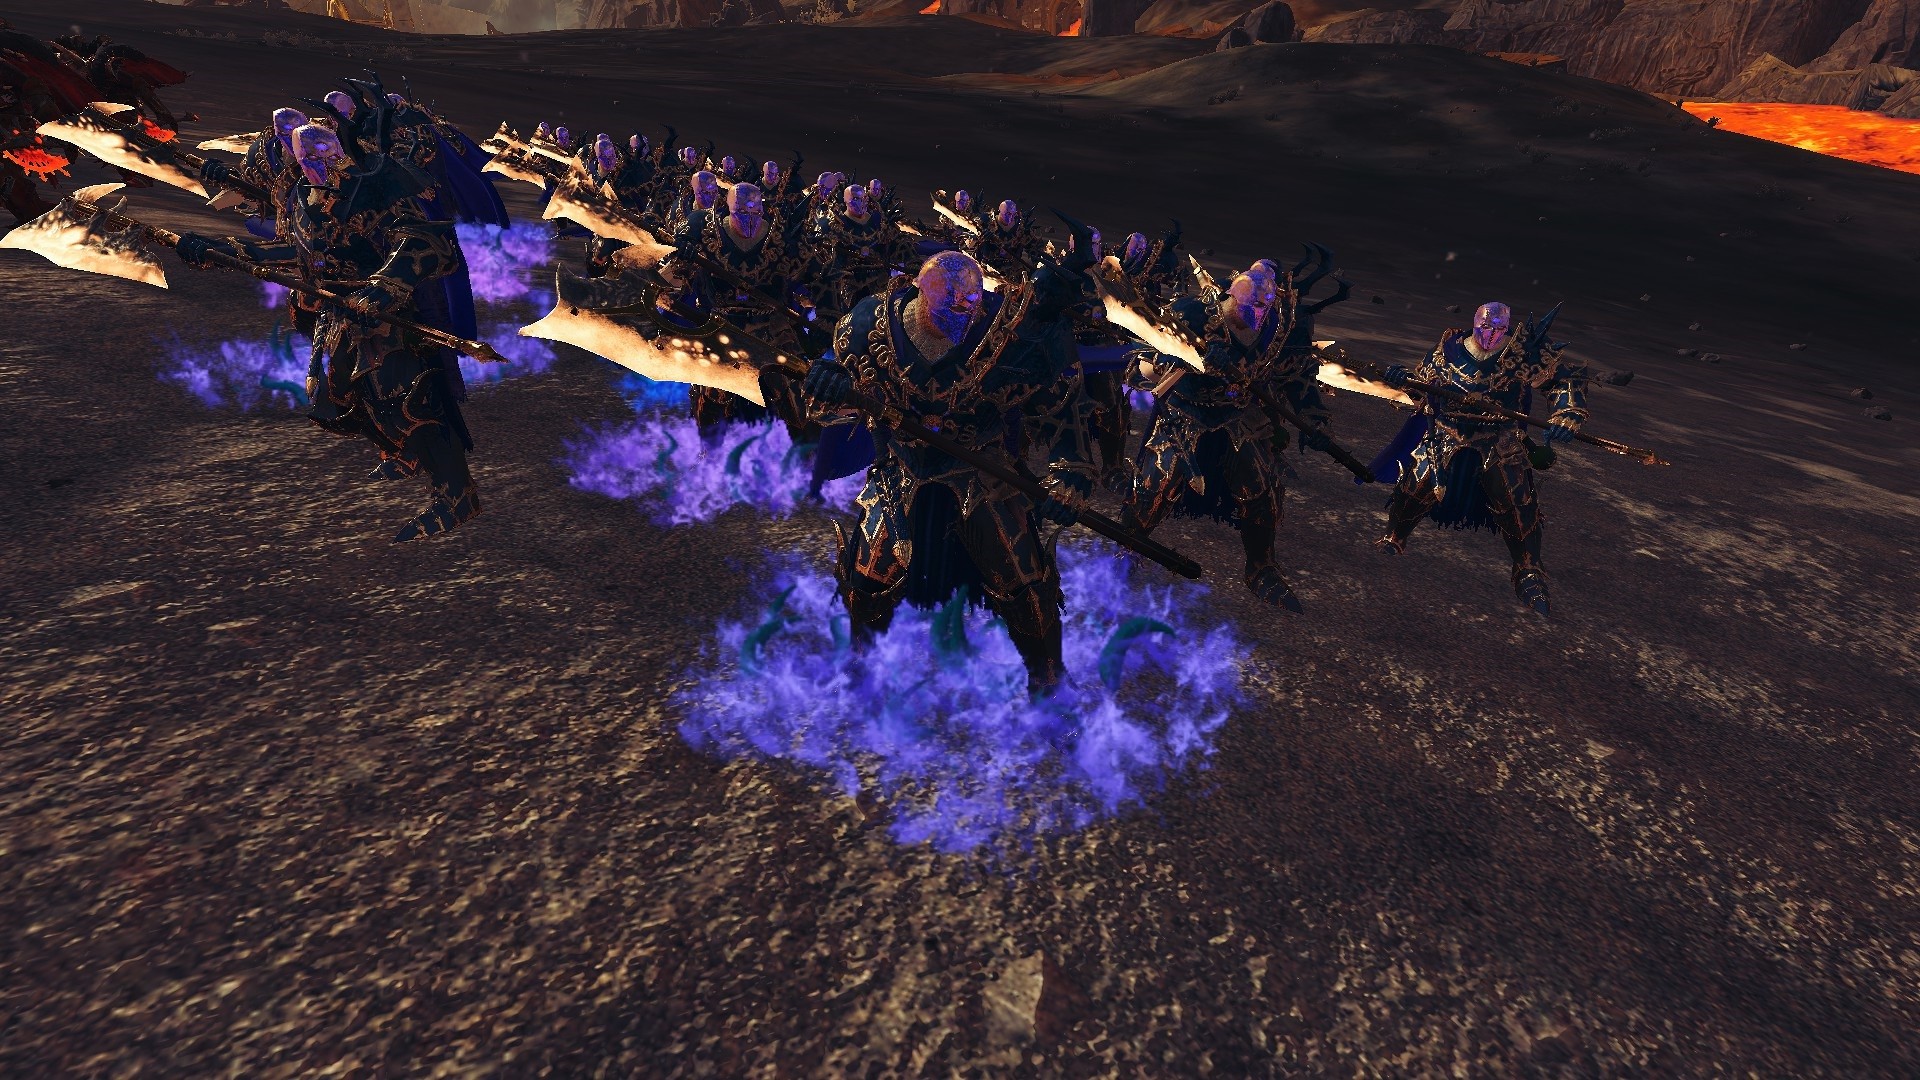
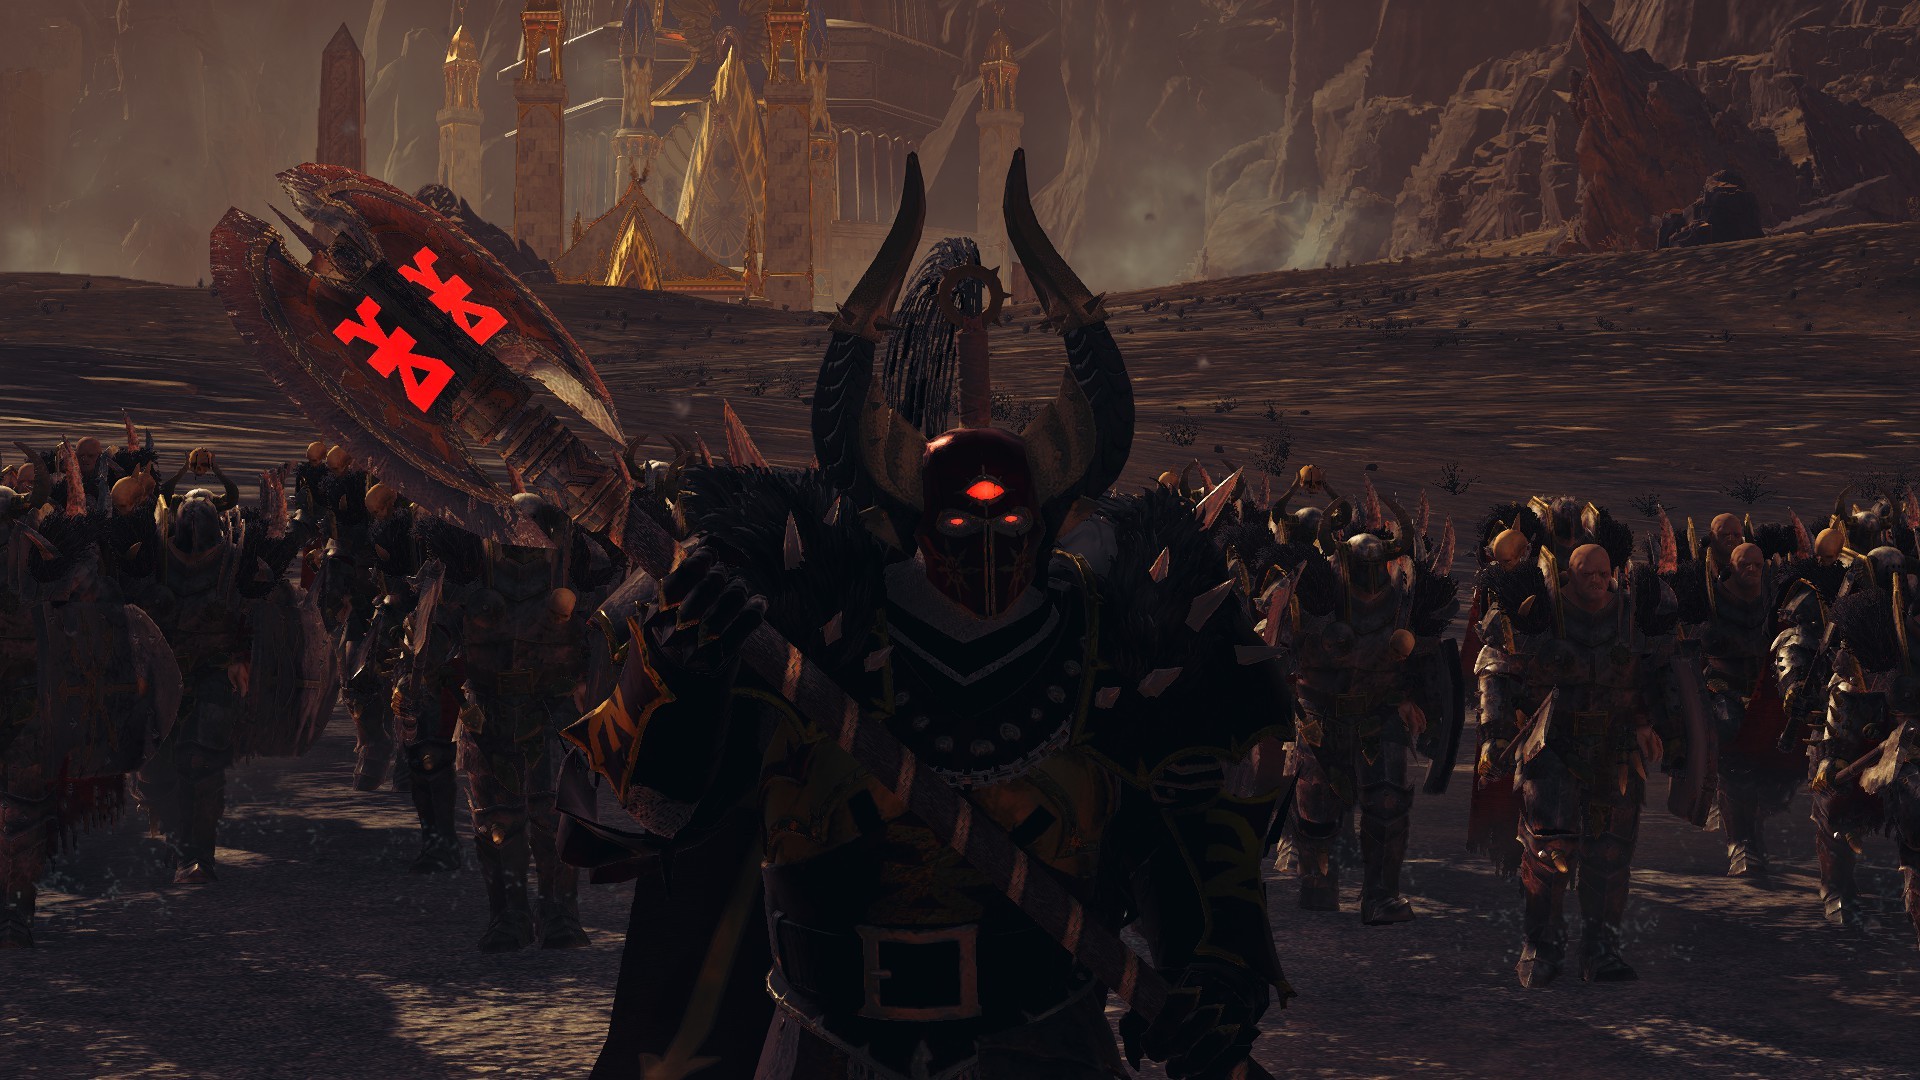
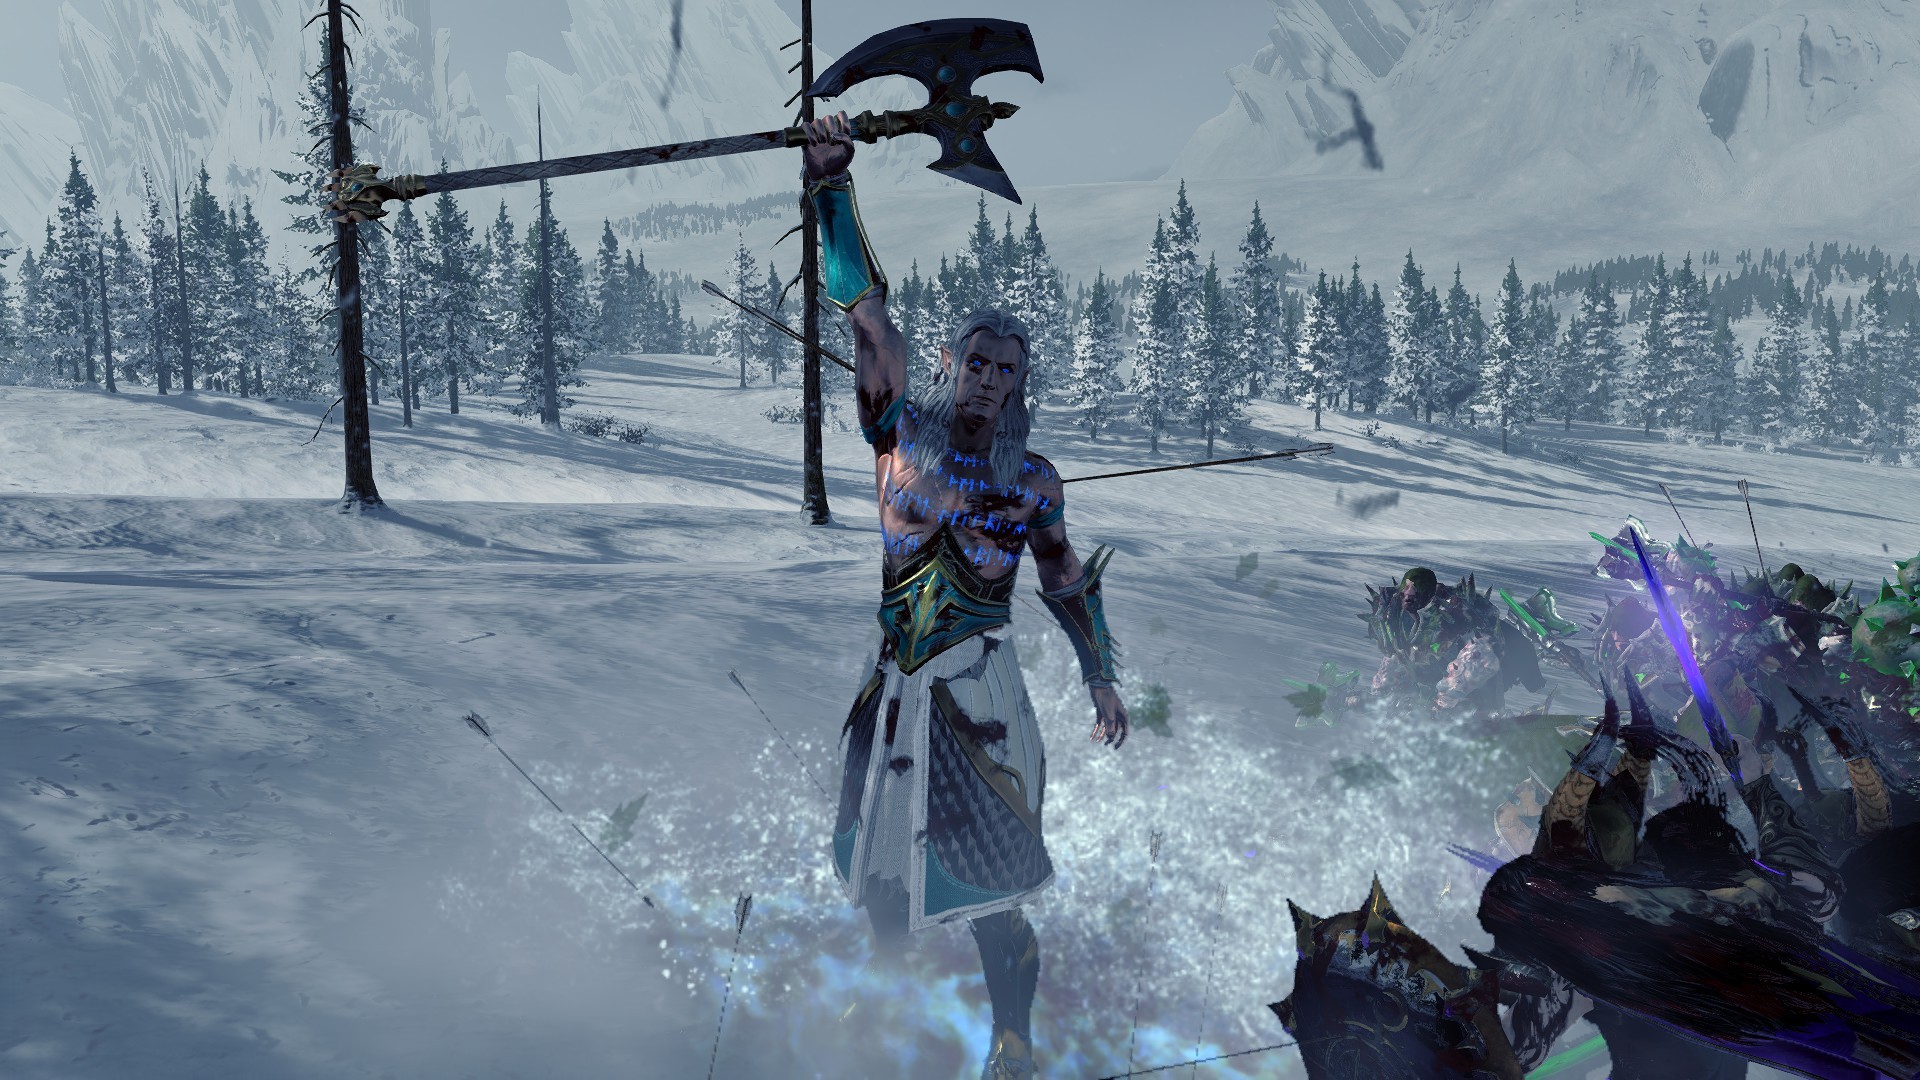
This guide aims to show you how to edit and create .wsmodel files, this will enable you to change the color of hexwraiths, chaos weapons and much more. You will be able to edit the effects that are directly associated with the models in warhammer.
Things you will need
RPFM -(recommended) https://github.com/Frodo45127/rpfm/releases
Unwrap 3D (dont have to have this, just makes life easy) https://www.unwrap3d.com/u3d/index.aspx
Gimp
https://www.gimp.org/downloads/
From here we can start to create the .wsmodel files
I will be selecting a model that currently has no .wsmodel as this will enable you deal with all the possibilities, I will also be showing you how to use glows and effects in the material file and how you can have a material file that allows both the deletion of parts from any model (helmets cause some issues) as well as add effects to them. Next section please!
Get files and create .wsmodel
To start we will be using Karl franz model, why this one? This is a good model as it presents quite a few challenges that not all models have, which I will show you. Comments
So go ahead and open RPFM.
create a new mod if you dont currently have one. or you can use mine here – https://drive.google.com/open?id=19d8tciXLkGjzl9k5ig6aepATJrsFEvuq
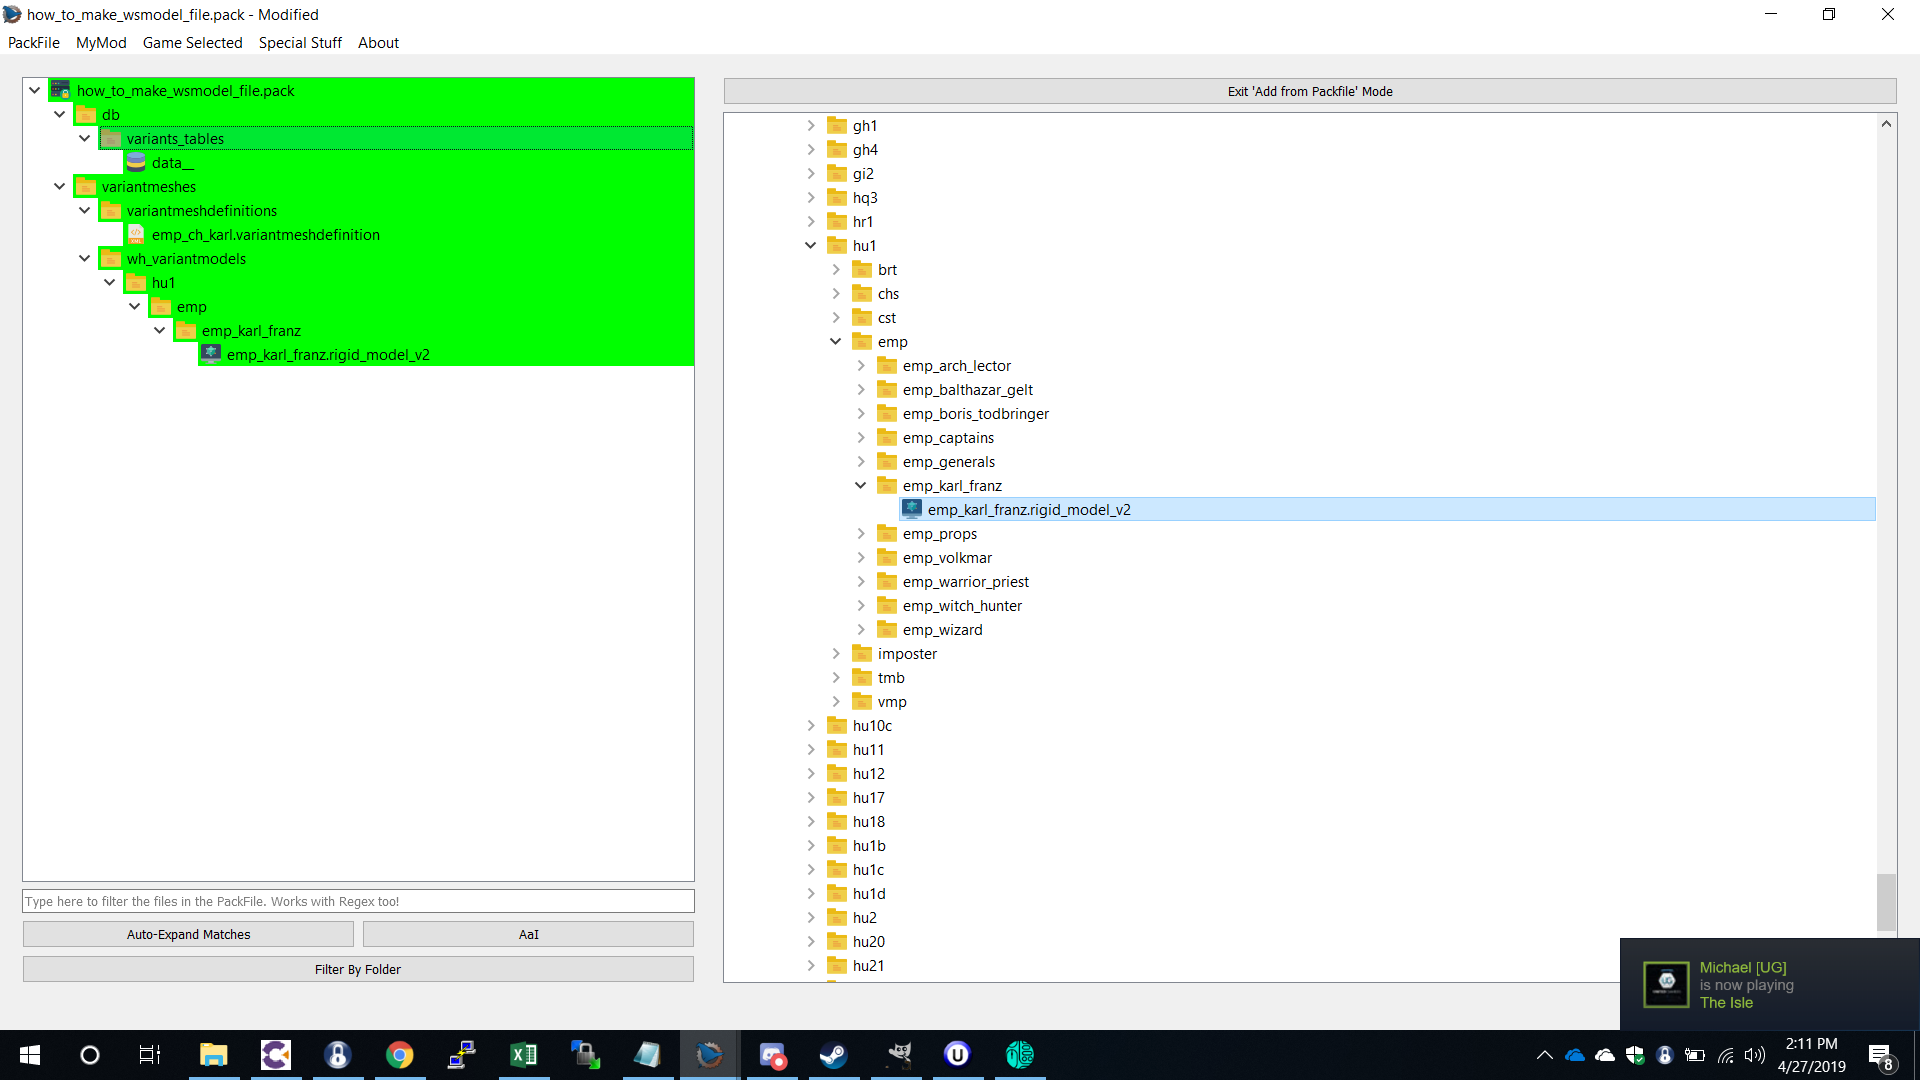
open the “campaign_variants” file
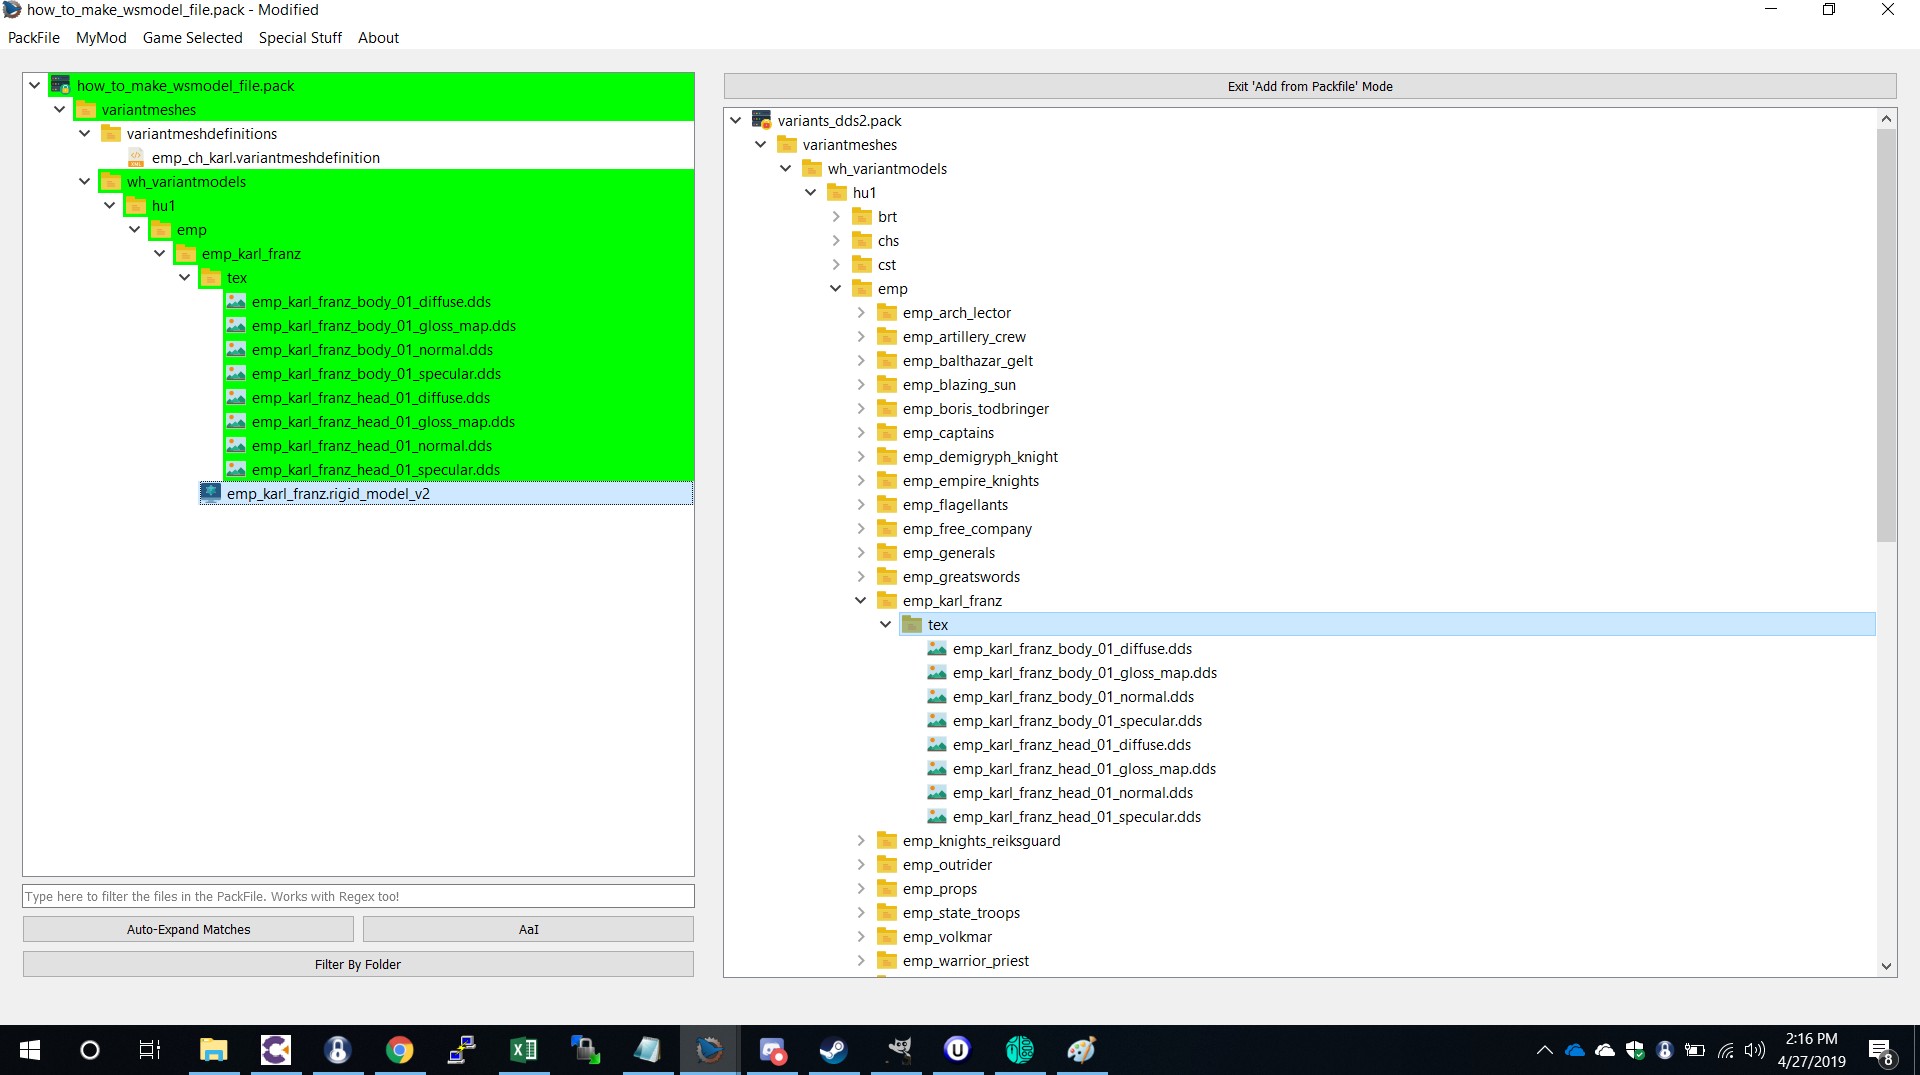
Now open up variants_dds2.pack and extract the “tex” file associated with Karl Franz. like this-
now we have what the vanilla files can offer us.
The Next Step
Next we are going to go ahead an just make the .wsmodel and later we will edit it and show you why you will want to start using .wsmodel files.
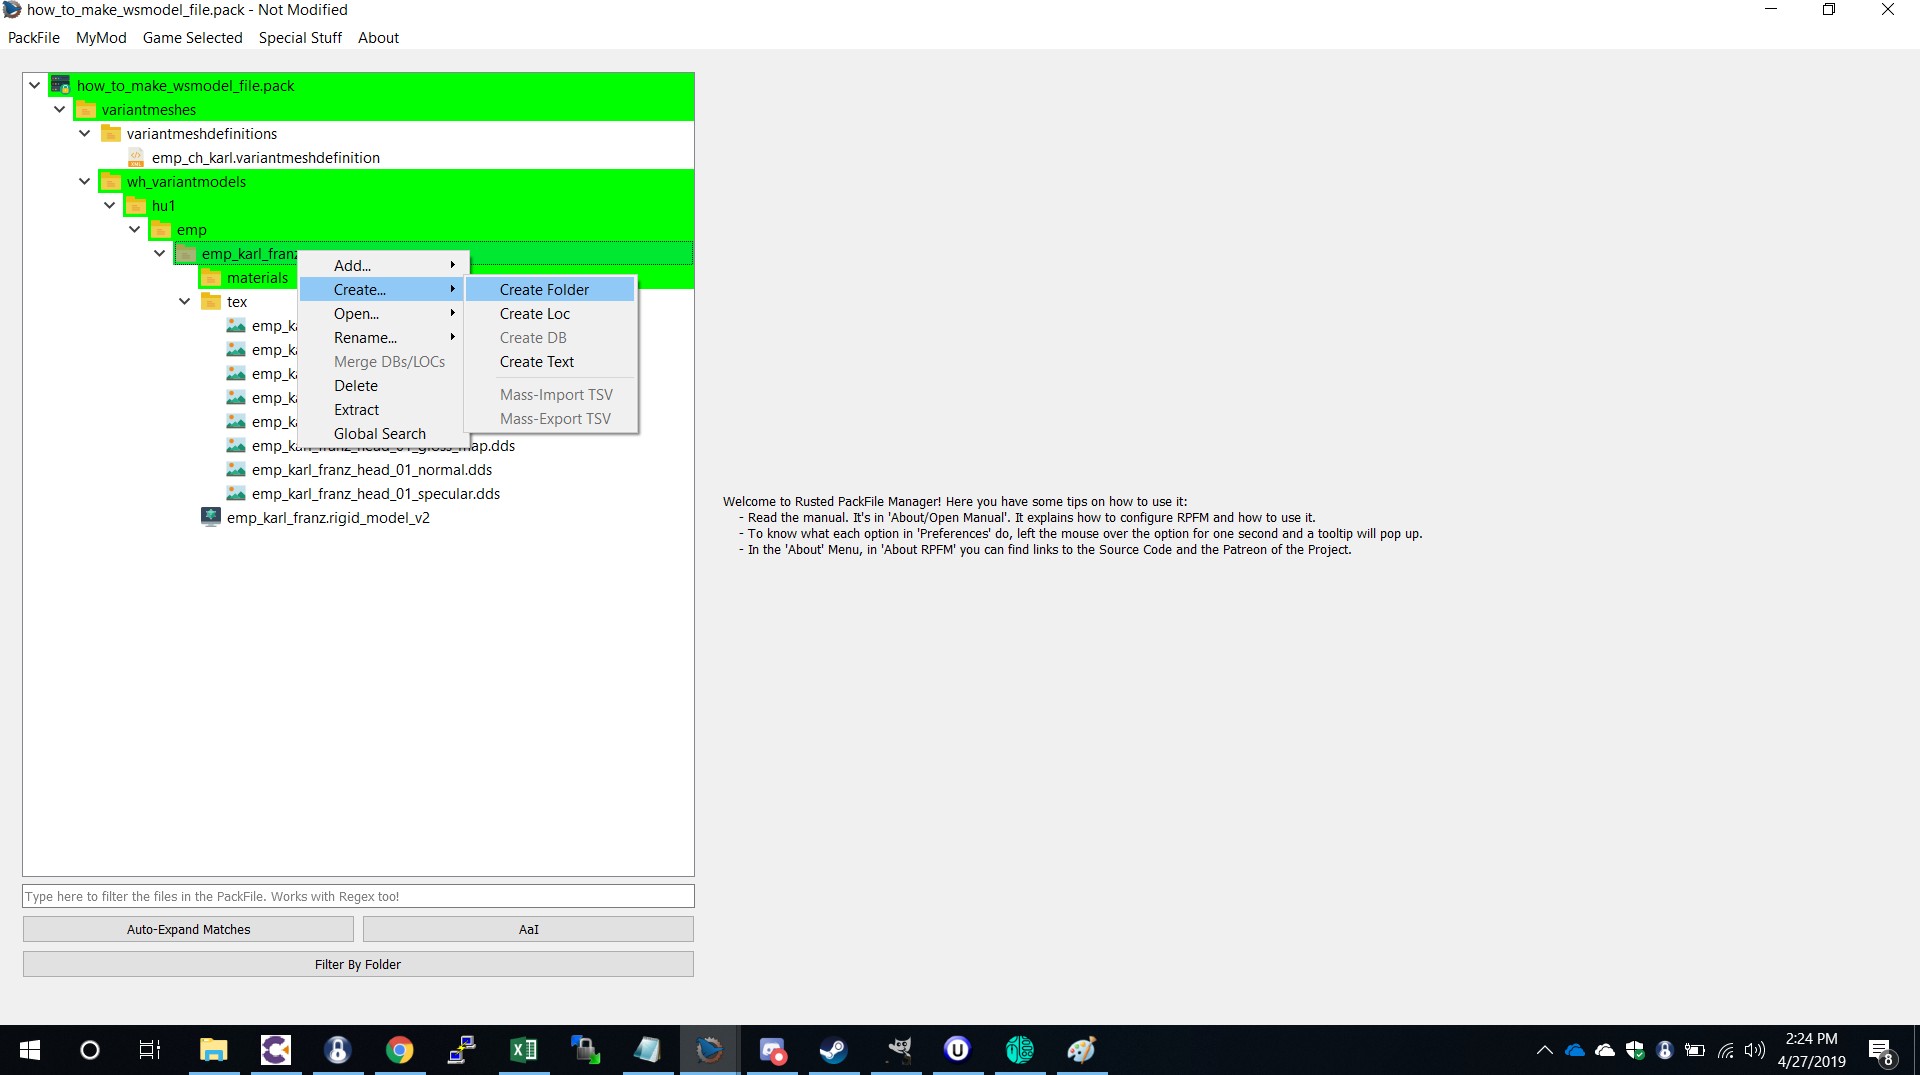
Using RPFM Create a new folder called “materials” Like this-
you now have 2 options,
Option 1 (not recommended but worth mentioning)
- Using Rpfm open up variants or campaign variants and find a unit that has some material files, extract them and import into your mod under the tab “materials”
OR
Option 2 (recommended)
- You can use my material files which do not have limitations as many others in vanilla do – you can find those here-
https://drive.google.com/open?id=1tdaFdxaa6OSrAi7Jbk_89ZZnfNowkp-K
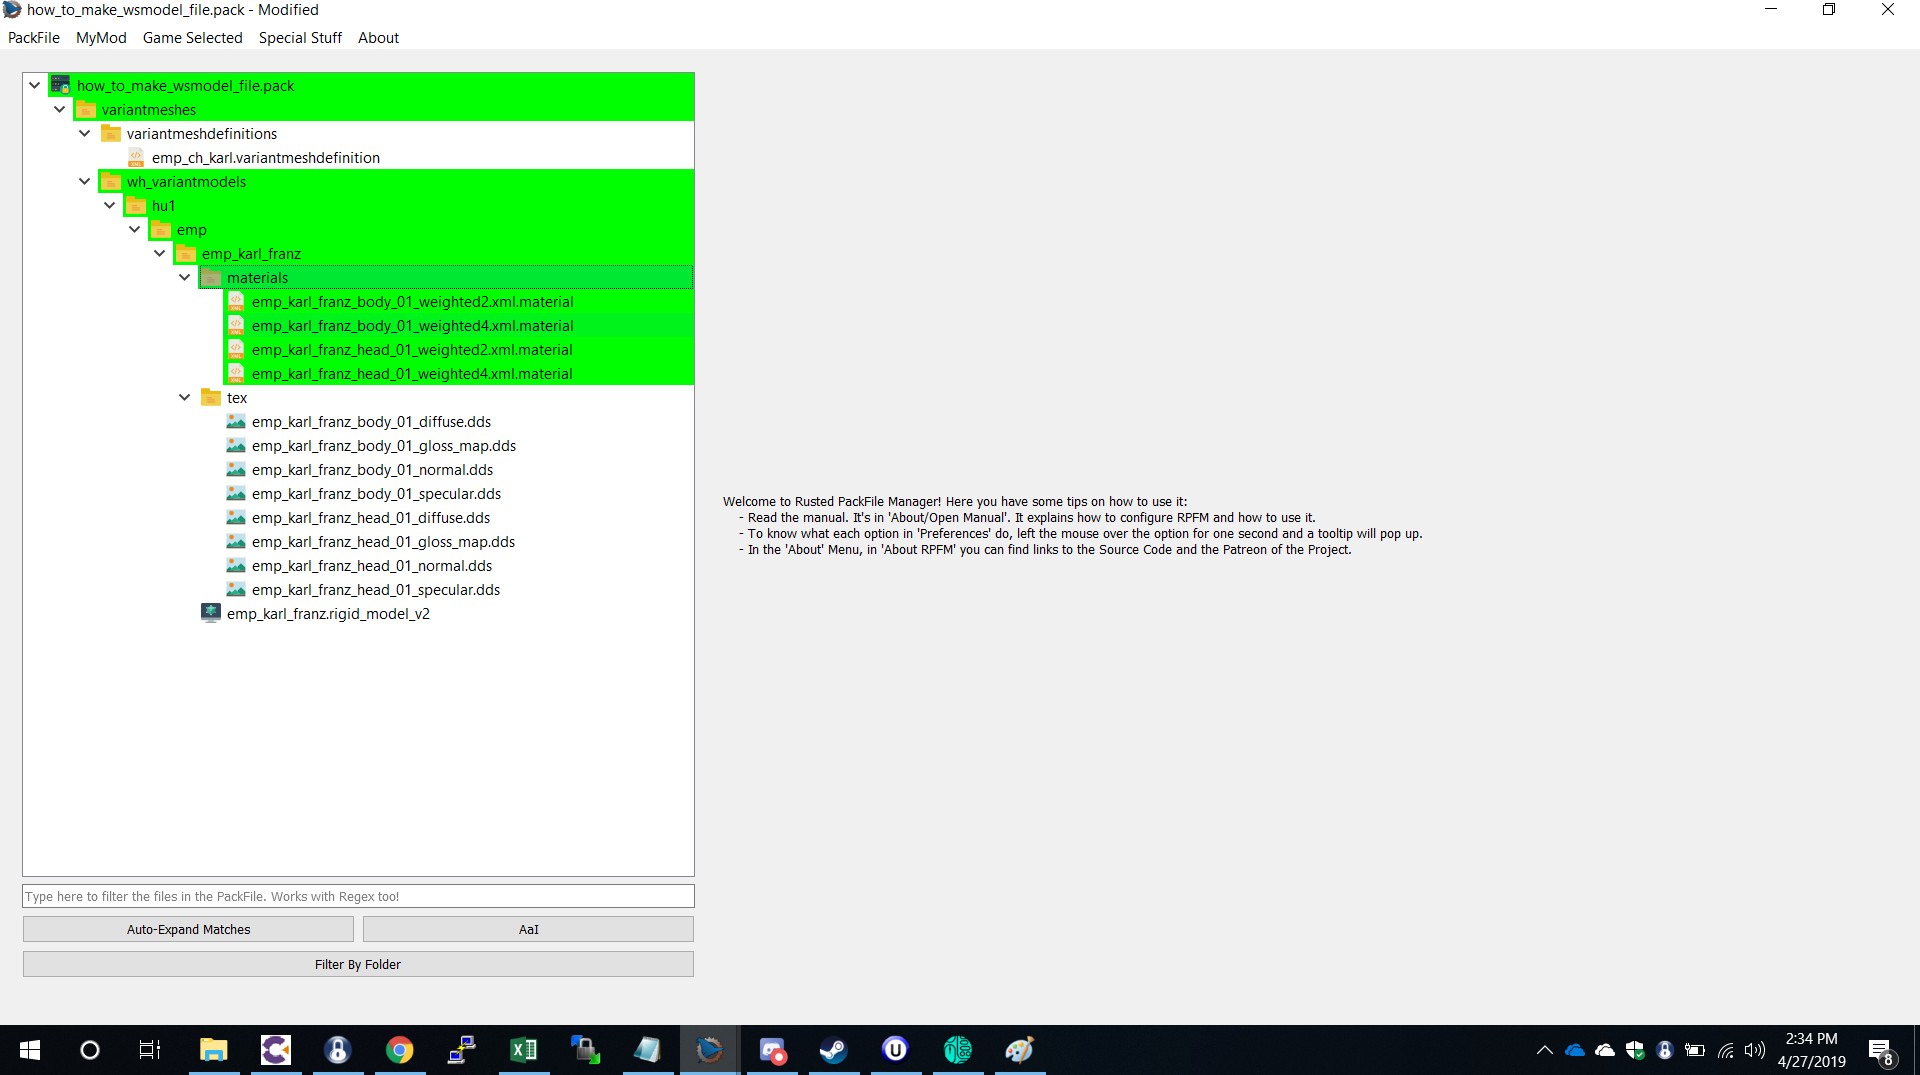
import those material files into your mod, should look like this –
Great! Now we need a .wsmodel file! We will get into the editing of the material files later.
Using RPFM pick a .wsmodel from anyone, you are going to change it so it doesnt matter which. for easy pickings try Green Knight in bret.
Should have a mod that looks something like this –
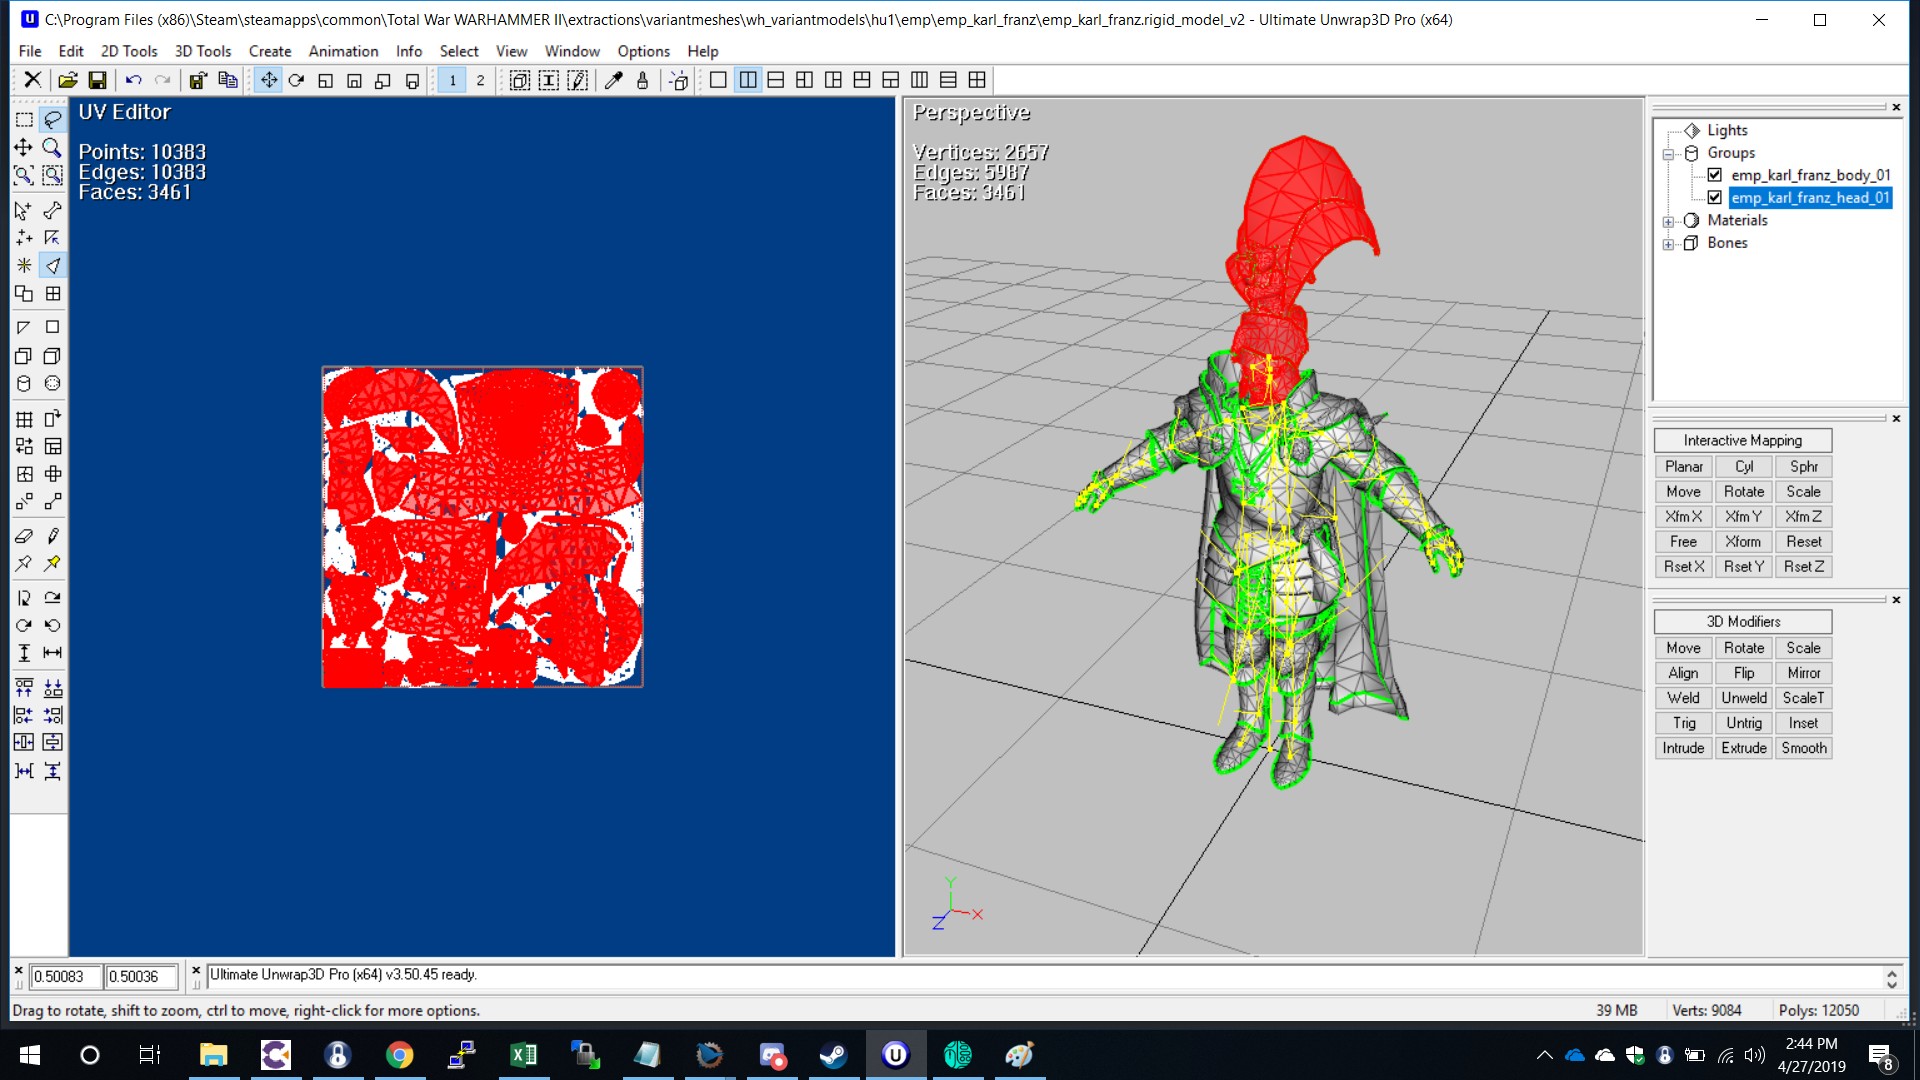
the next step is to open the rigid model v2 file in 3D unwrap but this will allow you to see how many parts there are to a model
like so
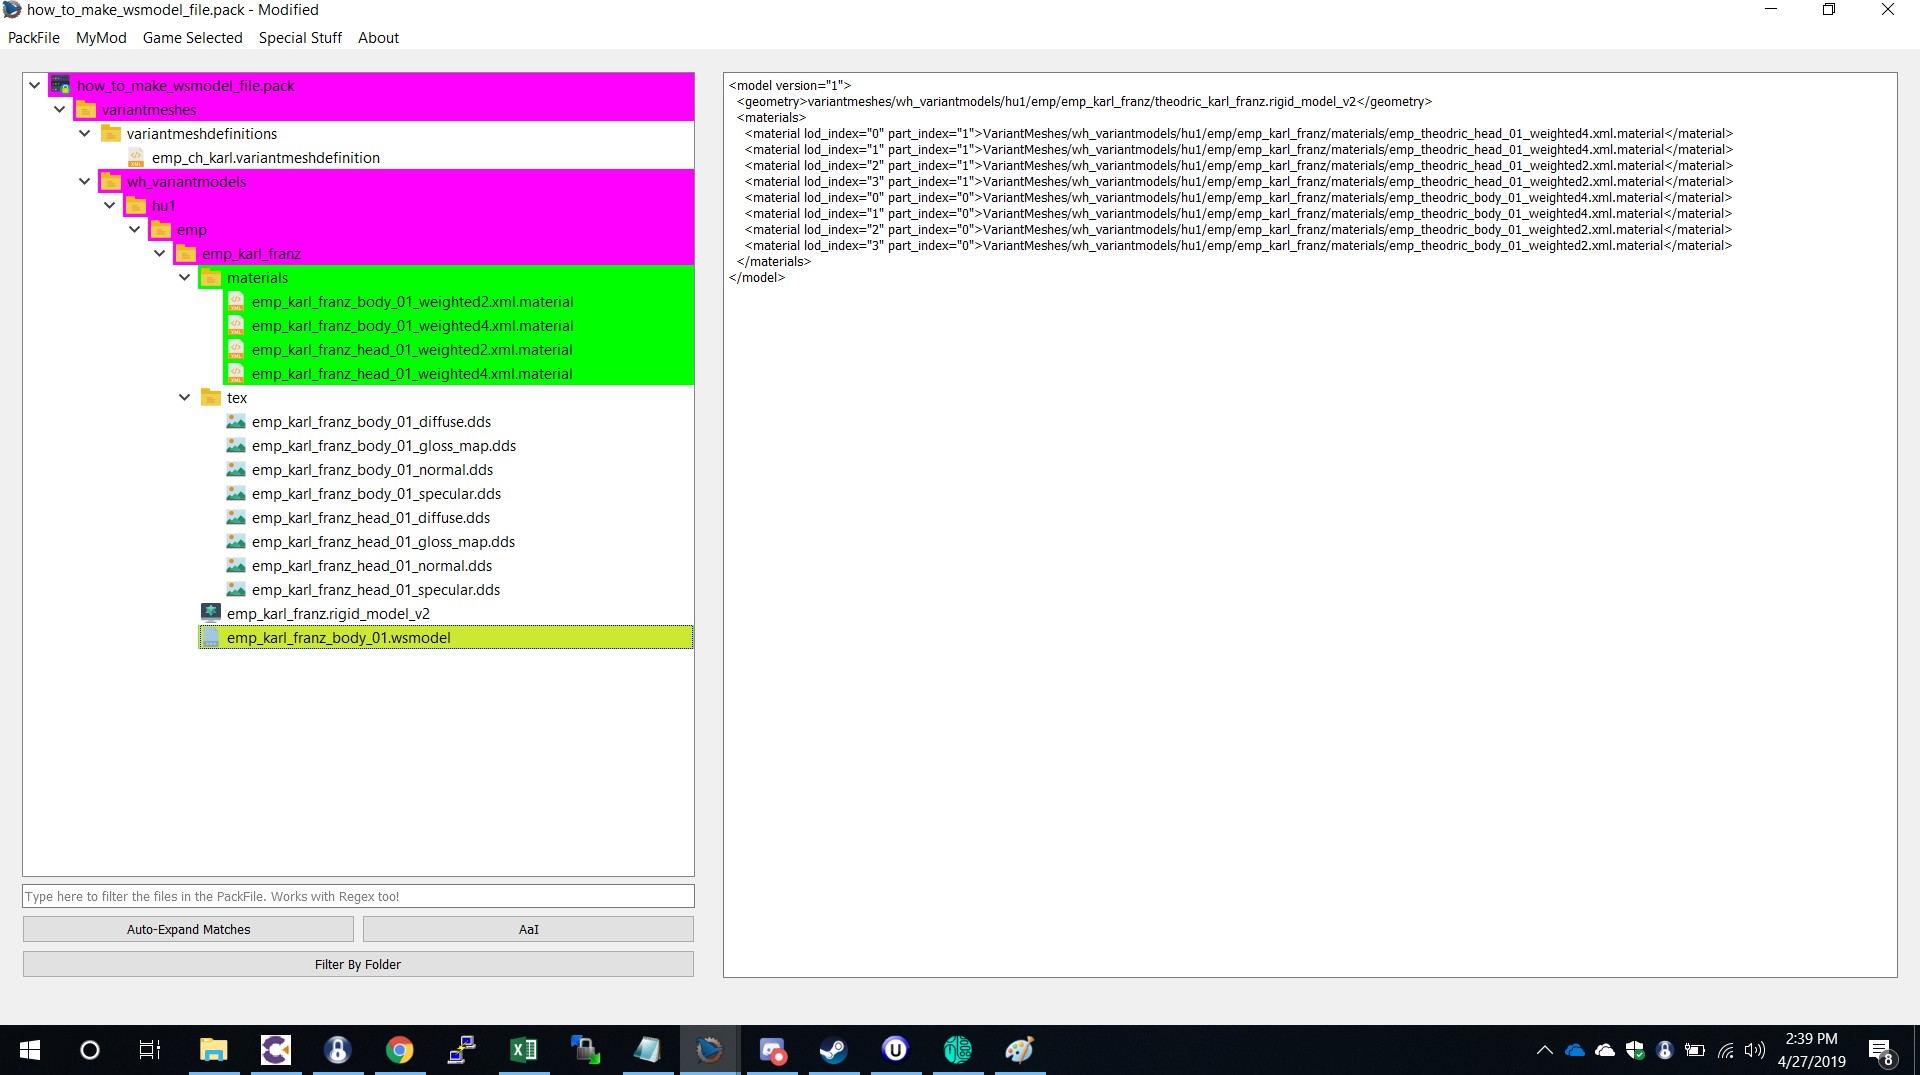
as you can see in the right hand side there are 2 parts to this one rigid model file, so we will need to create a .wsmodel file that refers to 2 parts
 <model version=”1″>
   <geometry>variantmeshes/wh_variantmodels/hu1/emp/emp_karl_franz/theodric_karl_franz.rigid_model_v2</geometry>
   <materials>
      <material lod_index=”0″ part_index=”1″>VariantMeshes/wh_variantmodels/hu1/emp/emp_karl_franz/materials/emp_karl_franz_head_01_weighted4.xml.material</material>
      <material lod_index=”1″ part_index=”1″>VariantMeshes/wh_variantmodels/hu1/emp/emp_karl_franz/materials/emp_karl_franz_head_01_weighted4.xml.material</material>
      <material lod_index=”2″ part_index=”1″>VariantMeshes/wh_variantmodels/hu1/emp/emp_karl_franz/materials/emp_karl_franz_head_01_weighted2.xml.material</material>
      <material lod_index=”3″ part_index=”1″>VariantMeshes/wh_variantmodels/hu1/emp/emp_karl_franz/materials/emp_karl_franz_head_01_weighted2.xml.material</material>
      <material lod_index=”0″ part_index=”0″>VariantMeshes/wh_variantmodels/hu1/emp/emp_karl_franz/materials/emp_karl_franz_body_01_weighted4.xml.material</material>
      <material lod_index=”1″ part_index=”0″>VariantMeshes/wh_variantmodels/hu1/emp/emp_karl_franz/materials/emp_karl_franz_body_01_weighted4.xml.material</material>
      <material lod_index=”2″ part_index=”0″>VariantMeshes/wh_variantmodels/hu1/emp/emp_karl_franz/materials/emp_karl_franz_body_01_weighted2.xml.material</material>
      <material lod_index=”3″ part_index=”0″>VariantMeshes/wh_variantmodels/hu1/emp/emp_karl_franz/materials/emp_karl_franz_body_01_weighted2.xml.material</material>
   </materials>
</model>
here you can use mine.
As you can see I have my “lod” indexes 0-3, always do 4 lods and then I have referenced “part index” 0 and 1 the head being part index 1 and the body being part index 0. I know to put 2 parts as we opened the file in Unwrap 3D.
Awesome! now we have a .wsmodel file! But there is still some work to be done in the material files which I will now show you.
Editing the Material files
Ok for those of you who used Option 1 you will have to spend some time figuring out which material files will work with karl franz, once you have found one, reference karls .dds files in the material file. The important part of the material files to look at are there it says which shader it is. I will reference a few and try to give some info on which types do what
 <name>chs_sorcerer_legs_01_weighted4_alpha_on.xml</name>
<shader>shaders/weighted4_faction_colours_skin_alpha.xml.shader</shader>
This shader is used for a lot of units, it enables the deletion of parts but does not allow glow effects. Also notice where it says “weighted4” super important for armours/bodies as most of the time the lods will reference a “weighted2” and a “weighted4”, its best to look at vanilla wsmodel to be sure but if you are creating a new file reference both in your .wsmodel.
another type of shader you will find is-
 <name>chs_archaon_head_01_weighted2.xml</name>
<shader>shaders/weighted2_tinted_metal_emissive_optimized.xml.shader</shader>
As we all know Archaons head is lit up like a Christmas tree, you guessed it…this shader enables glow effects but does not allow the deletion of parts using the alpha channel. Something that sucks about this one is that it doesnt say “alpha on” or “alpha off” but it usually works that if it enables a glow you cannot use it to delete a part and vice versa.
There are hundreds to choose from so have a search and test what they do, change some values try different stuff out. I made my own material files to work for all purposes as I got frustrated with searching through the shaders endlessly.
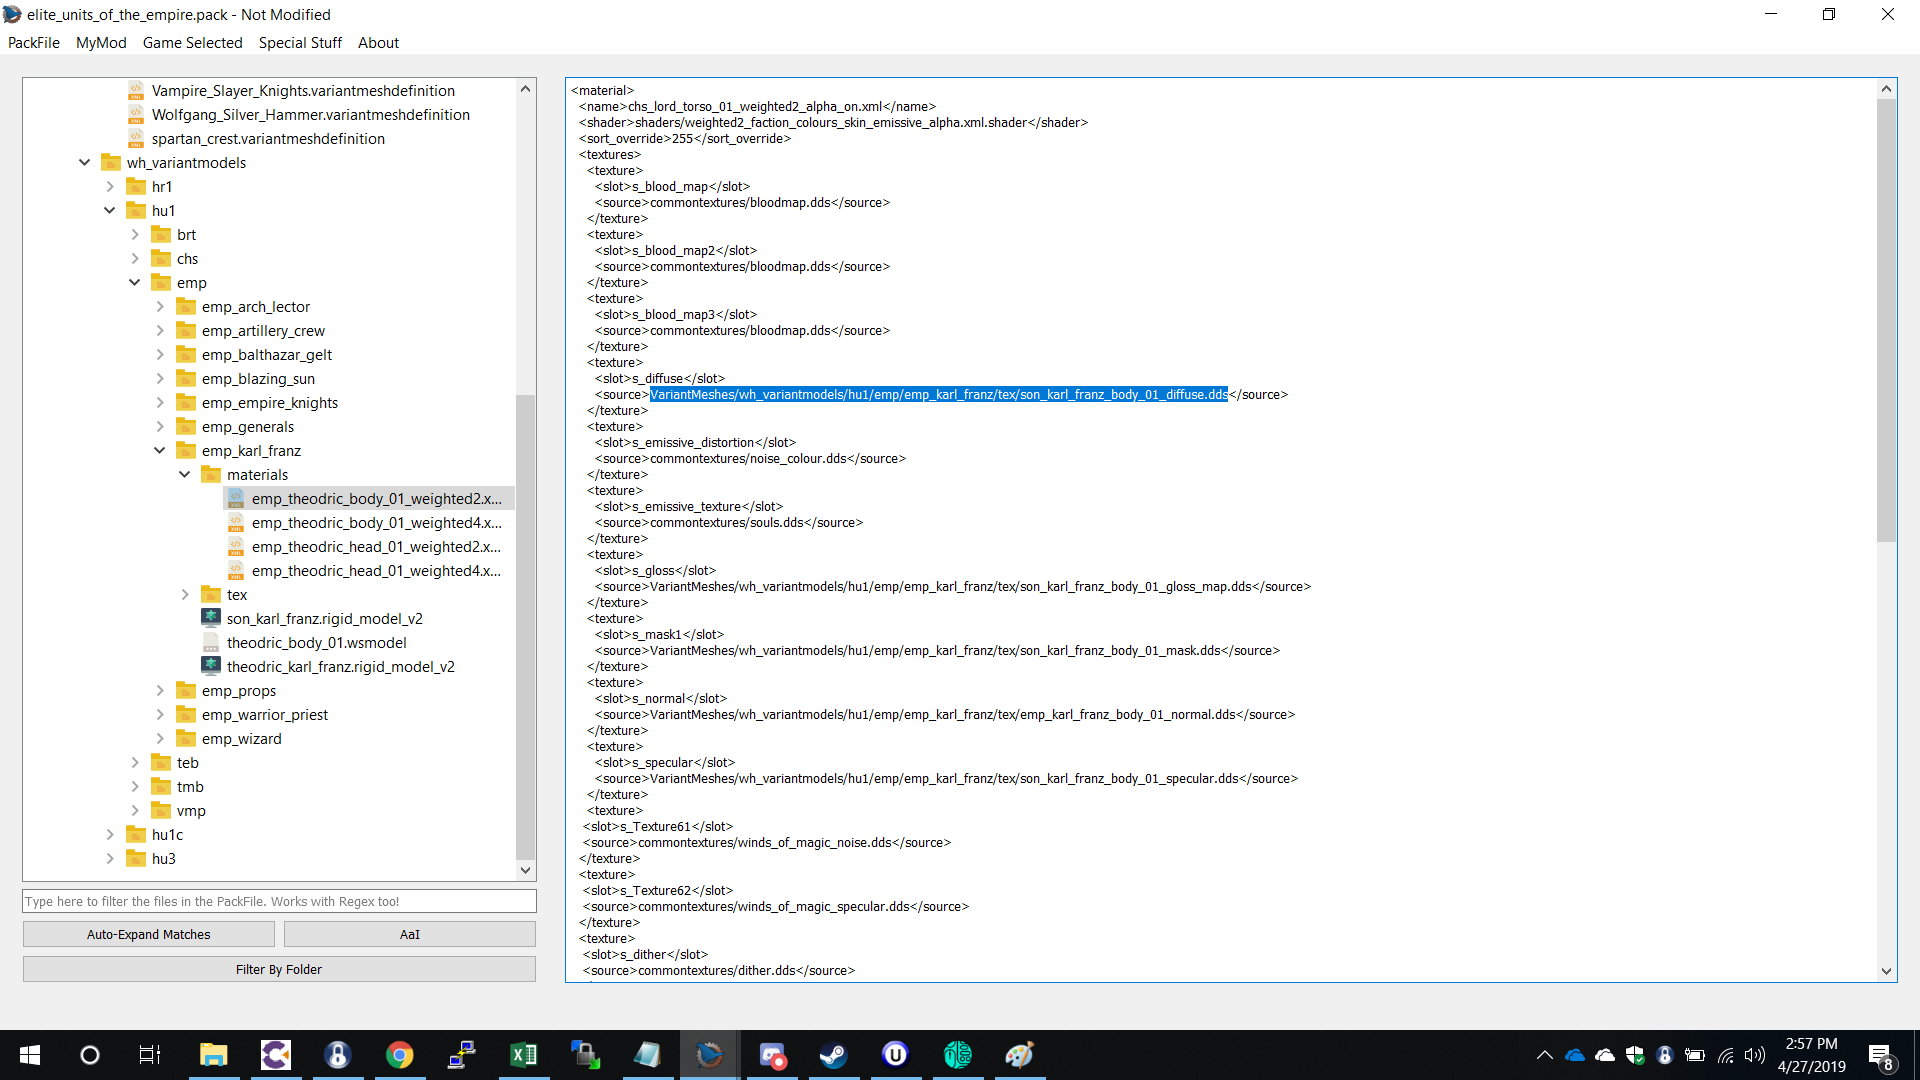
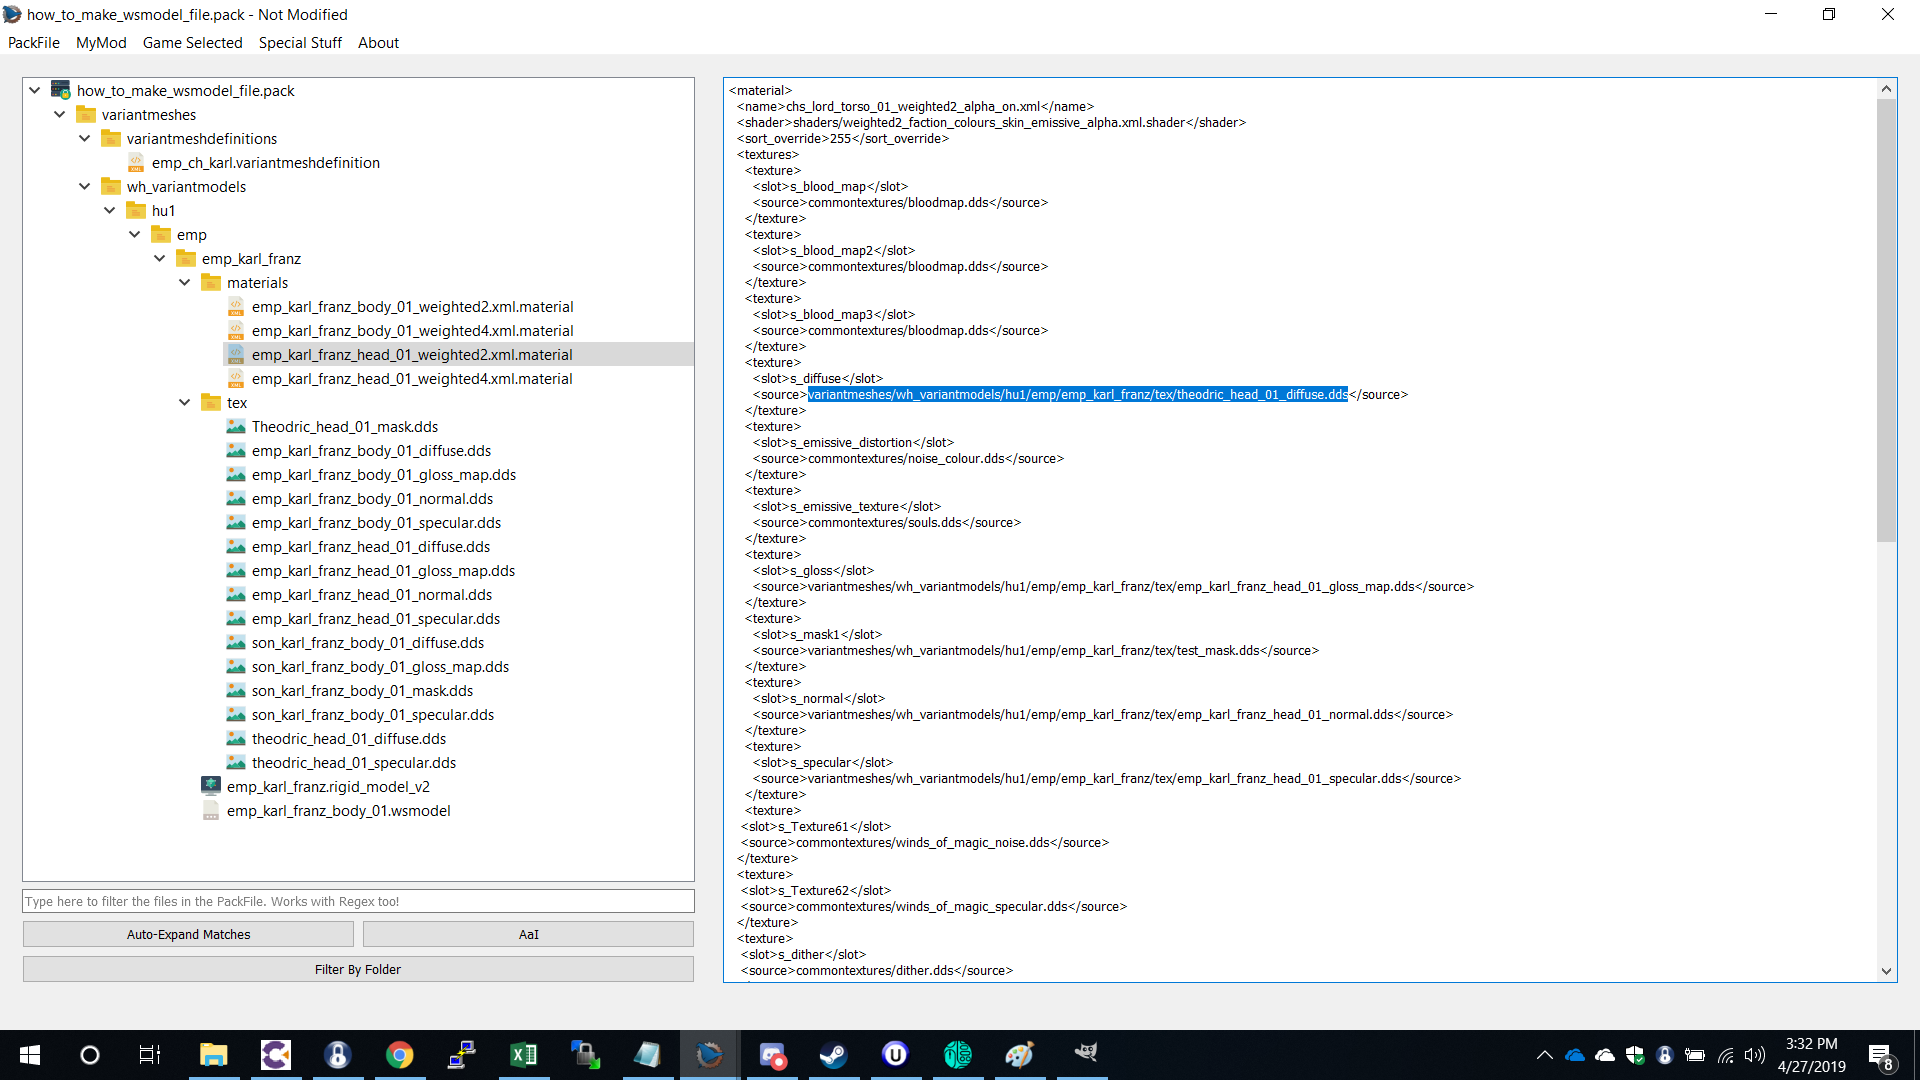
For those who took my material files you should be looking at something like this –
as you can see I have highlighted the line that is referring to the diffuse file, all you need to do to use the vanilla files is go down the list of .dds files and reference
VariantMeshes/wh_variantmodels/hu1/emp/emp_karl_franz/tex/emp_karl_franz_body_01_diffuse.dds
and do this for gloss map,normal,specular and mask dds files.
but if you are wanting to use your own .dds file you have created reference them here, as I have done in the picture above.
Do this for all the material files. You will find that by using my custom material files the diffuse does not get seen and your colors may look a little off, so simply darken your specular .dds file to achieve the same result. (I will show you later why you will want to be using my material files)
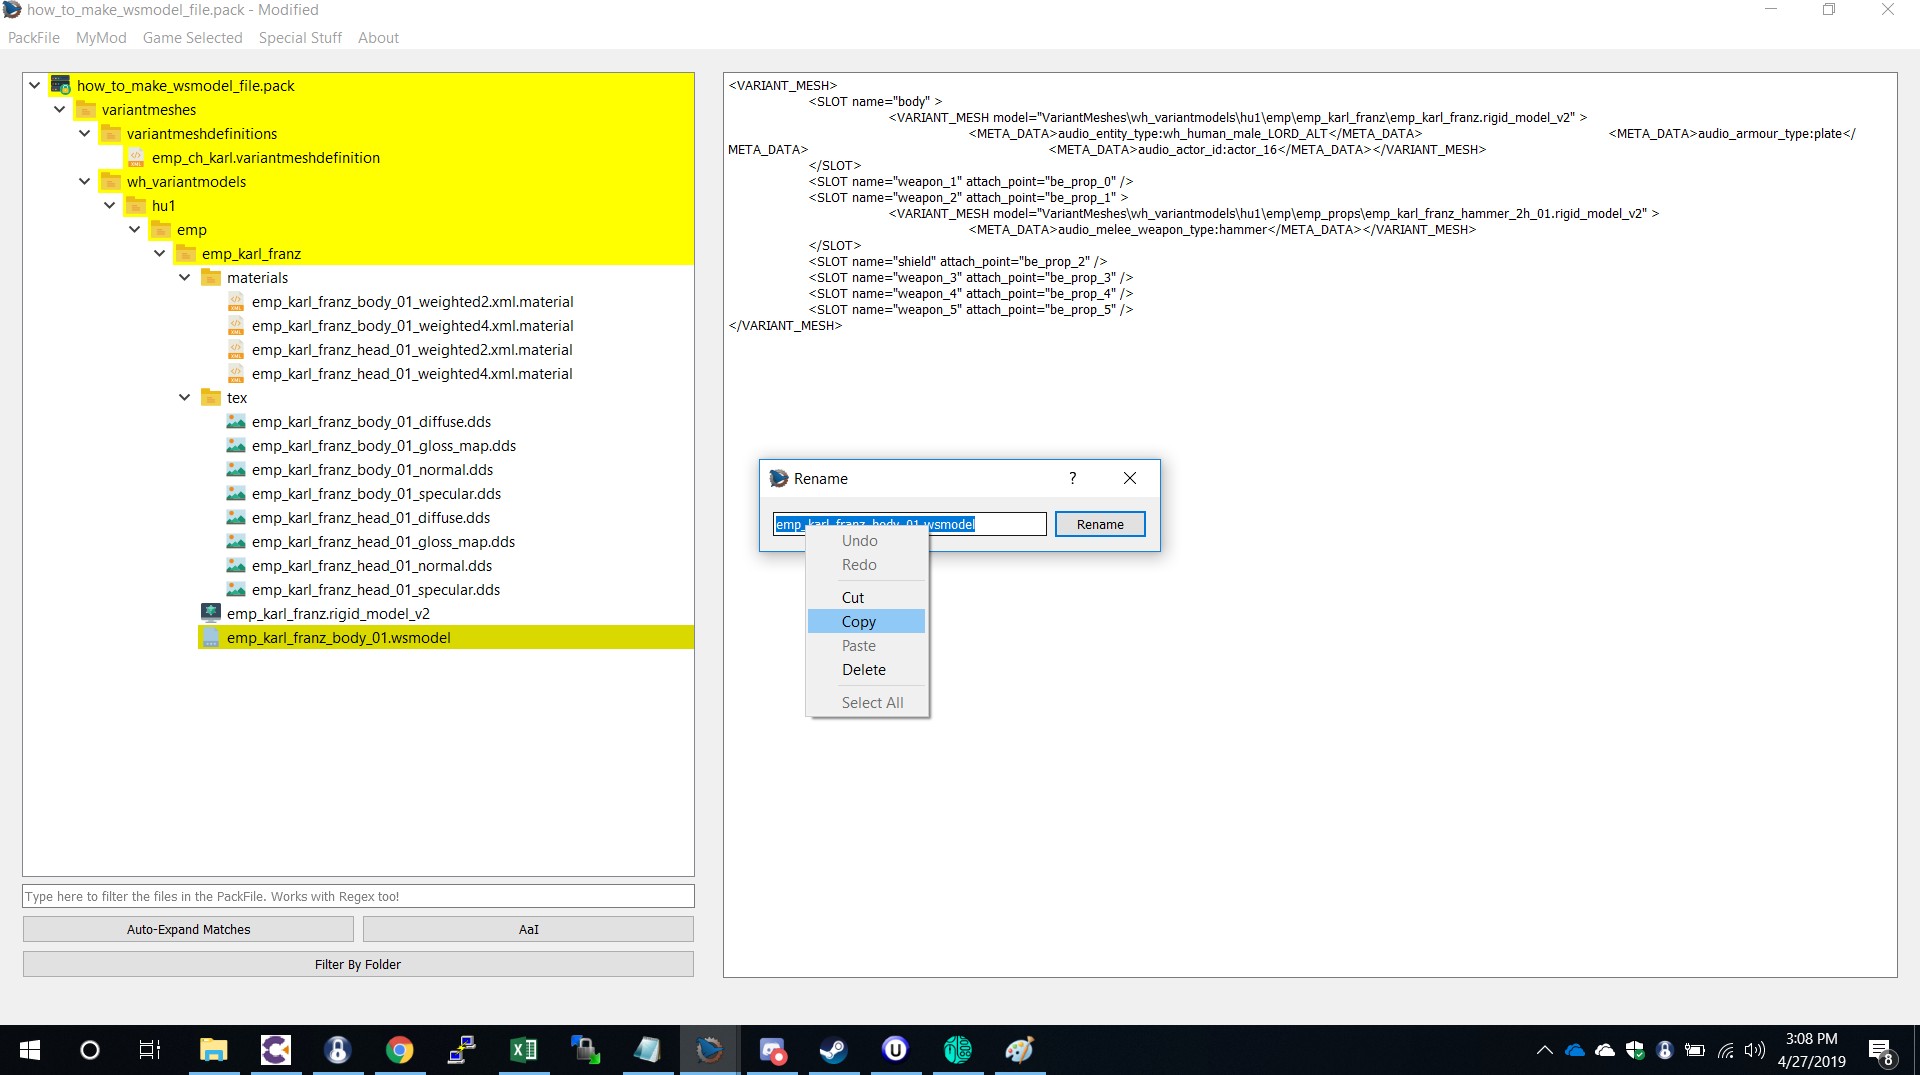
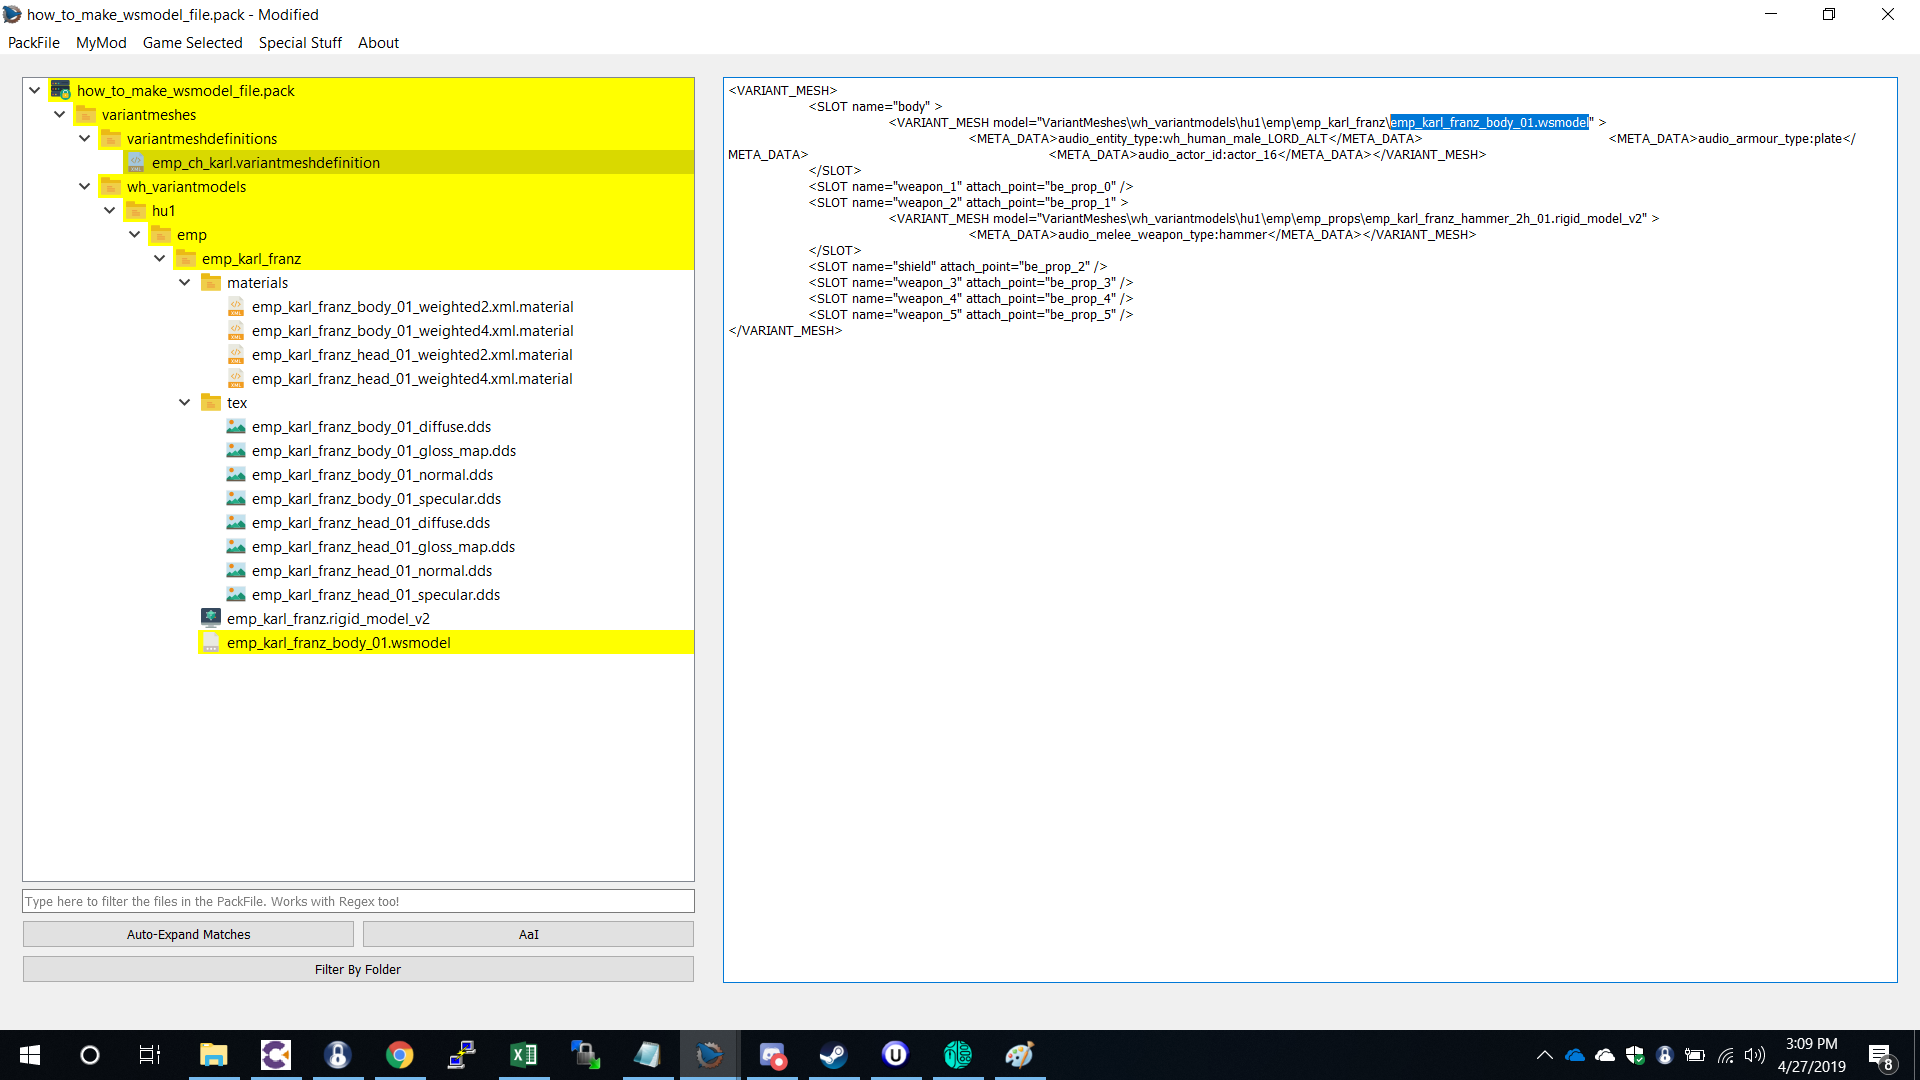
now you have that, all you need to do is reference your material files in your .wsmodel file that you made earlier. Then go to variant mesh definitions\ “emp_ch_karl.variantmeshdefinition” and paste in your new .wsmodel file
like this –
great! If all you wanted to do was create a .wsmodel file and not edit glows or delete parts etc. you are done! Whoooo! good for you guys.
For those interested in the possibilities of a .wsmodel file and why we use them carry on reading ;)
Creating glows & Removing body parts
Ok so this is why I like using .wsmodels, they enable us to do some really cool things. We are going to delete Karl franz head an replace with a different one.
to start I will be showing you something simple and what I imagine most modders know how to do using Rigid model v2 files. Its pretty simple, using my material files that I left a link to earlier, or some people may want to use vanilla files, if you do, pick ones that use Alpha_on as this is what enables us to delete body parts, if you are using one that says Alpha_off then you cannot remove body parts. hence why I made a material file that does both.
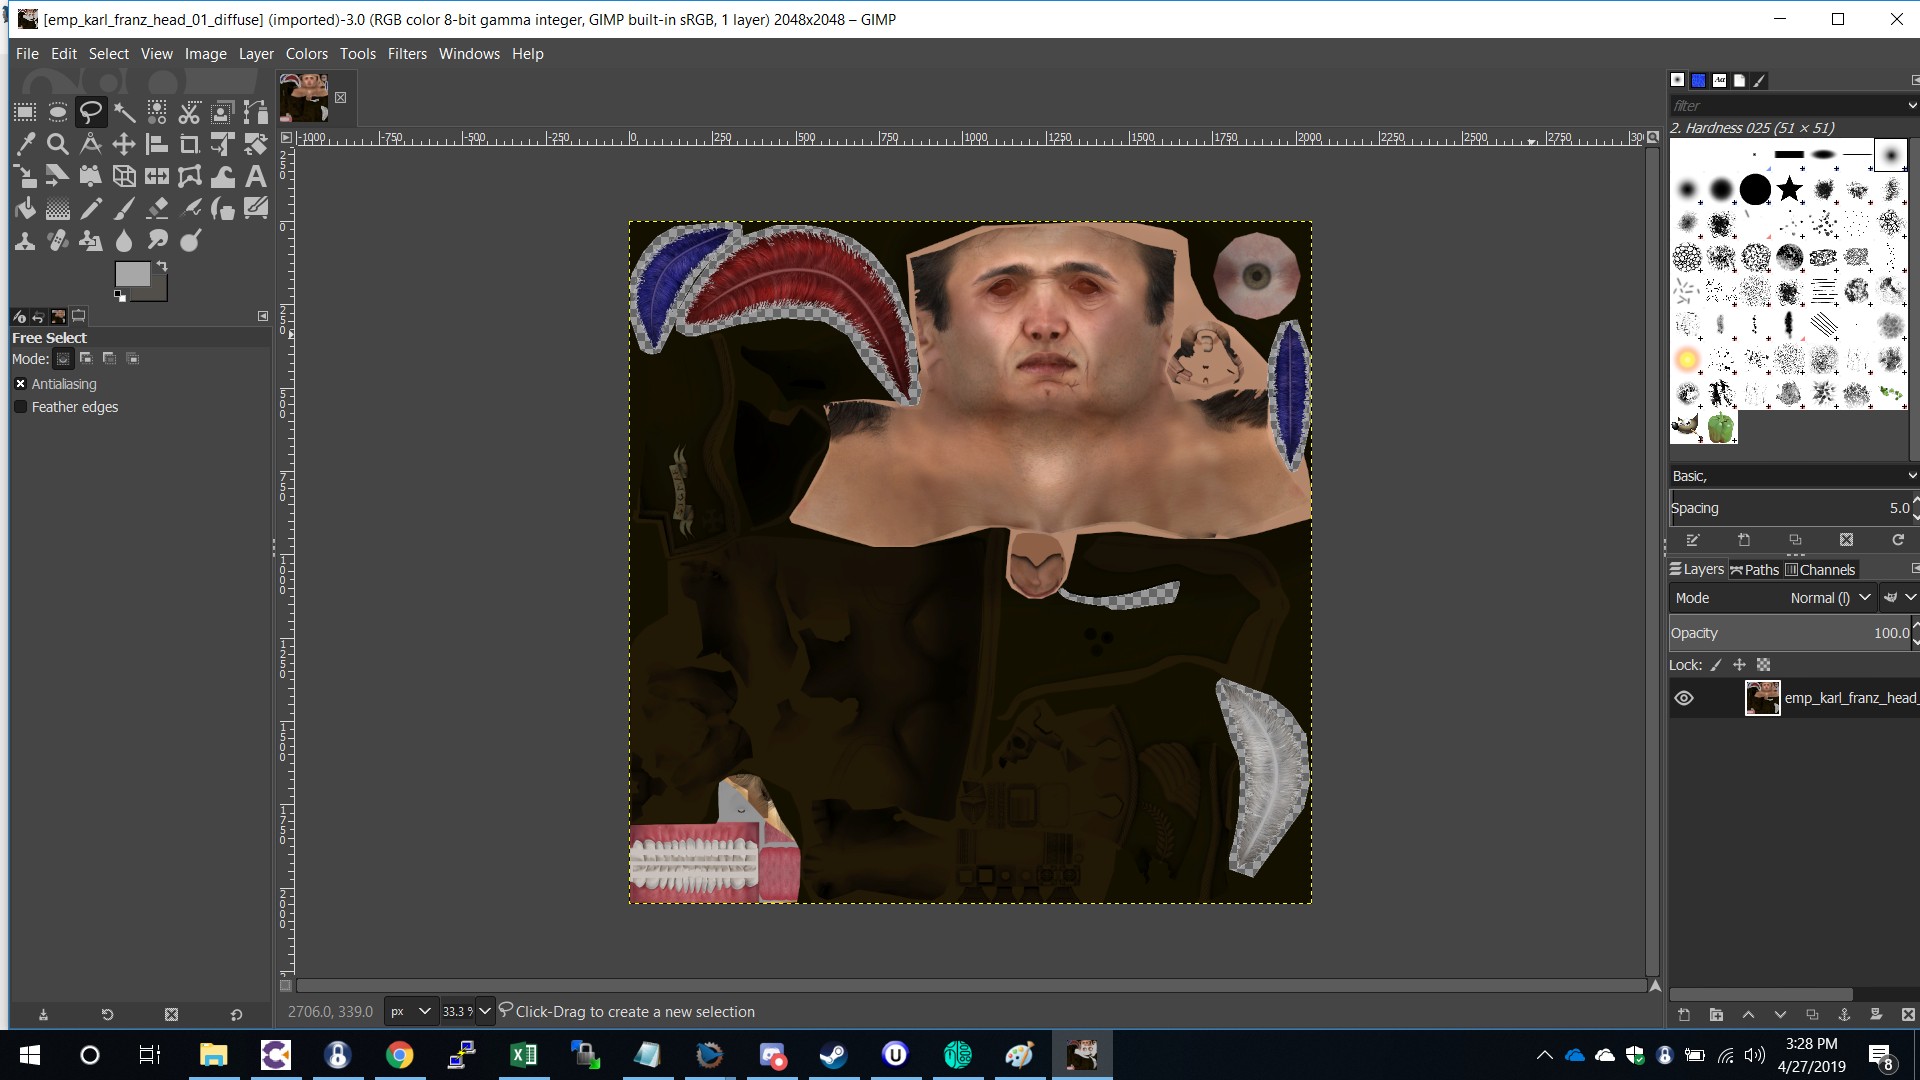
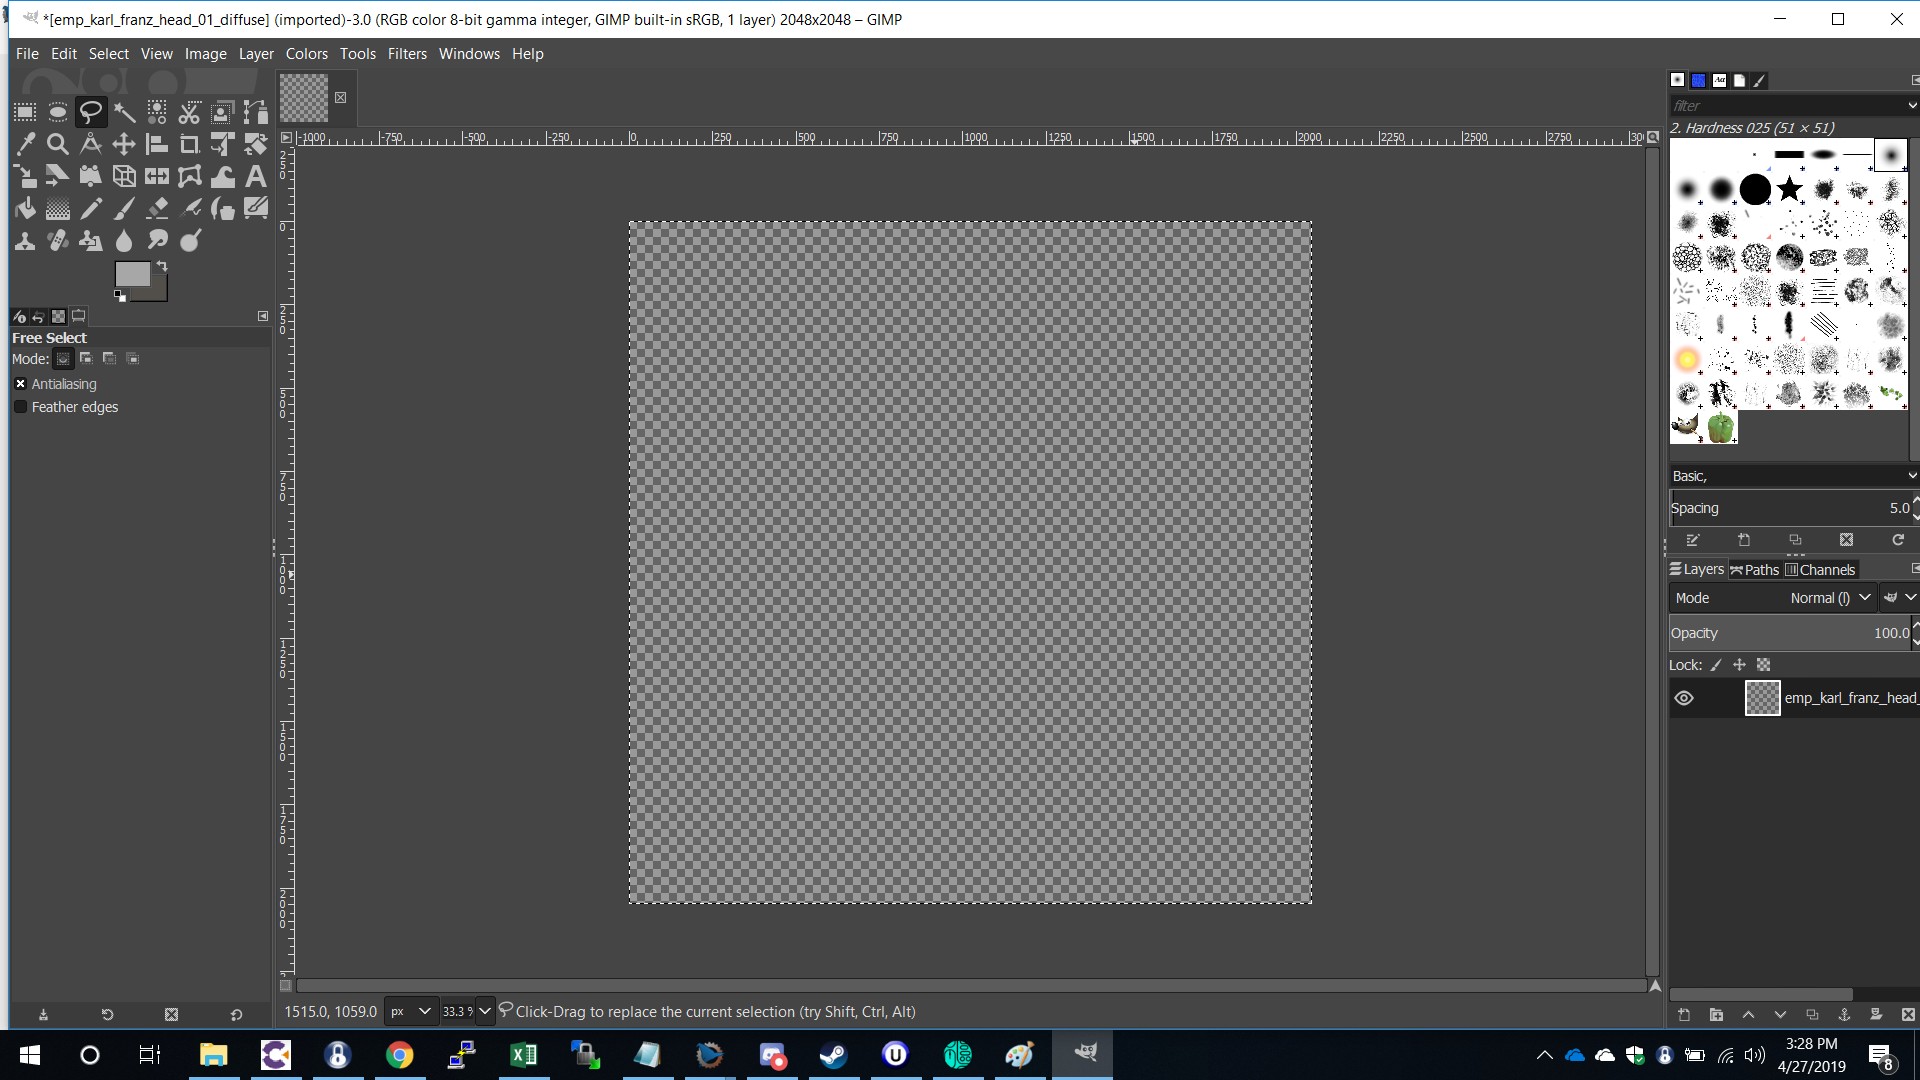
anyway using my material file, you want to open up karl franz head diffuse file in GIMP looks like this – then go ahead and delete everything in there looks like this –
now save it as whatever your heart desires, ideally not the same as karl_franz vanilla... unless you are editing karl franz to have no head.
import you new diffuse.dds file back into your mod.
Referencing it in the “emp_karl_franz_head_01_weighted2.xml.material” and “emp_karl_franz_head_01_weighted4.xml.material” files like so –
this will now have removed his head. But we are replacing it, so in the variant mesh definition add a head from another unit, here is a character Ive already made as an example.
 <VARIANT_MESH>
   <SLOT name=”tophat” >
      <VARIANT_MESH model=”VariantMeshes/wh_variantmodels/hu1/tmb/tmb_tomb_guard/head/slv_tomb_guard_head_03.rigid_model_v2″ />
   </SLOT>
   <SLOT name=”faceness” >
      <VARIANT_MESH model=”VariantMeshes\wh_variantmodels\hu1\brt\brt_lord\head\ude_lord_head_01.rigid_model_v2″ />
   </SLOT>
   <SLOT name=”body” >
      <VARIANT_MESH model=”VariantMeshes\wh_variantmodels\hu1\emp\emp_karl_franz\theodric_body_01.wsmodel” >
         <META_DATA>audio_entity_type:wh_human_male_LH</META_DATA>
         <META_DATA>audio_armour_type:plate</META_DATA>
         <META_DATA>audio_actor_id:actor_16</META_DATA></VARIANT_MESH>
   </SLOT>
   <SLOT name=”weapon_1″ attach_point=”be_prop_0″ />
   <SLOT name=”weapon_2″ attach_point=”be_prop_1″ >
      <VARIANT_MESH model=”VariantMeshes\wh_variantmodels\hu1\emp\emp_props\emp_arch_lector_hammer_1h_01.rigid_model_v2″ >
         <META_DATA>audio_melee_weapon_type:hammer</META_DATA></VARIANT_MESH>
   </SLOT>
   <SLOT name=”shield” attach_point=”be_prop_2″ />
   <SLOT name=”weapon_3″ attach_point=”be_prop_3″ />
   <SLOT name=”weapon_4″ attach_point=”be_prop_4″ />
   <SLOT name=”weapon_5″ attach_point=”be_prop_5″ >
      <VARIANT_MESH model=”VariantMeshes\wh_variantmodels\hu1\emp\emp_props\emp_arch_lector_hammer_1h_01.rigid_model_v 2″ >
         <META_DATA>audio_melee_weapon_type:hammer</META_DATA></VARIANT_MESH>
   </SLOT>
</VARIANT_MESH>
as you can see I added 2 extra models together to make a new head, looks like this
which is cool but you can already do this using the vanilla files, or a Rigid_v2 file.
I will show you how using the .wsmodel combined with my material files, can create units that are completely unique.
So far we have removed the head of the model karl franz and replaced it, but in a .wsmodel, we will now learn how to add effects like Durthu has or a hexwraith to any unit and to specific parts of each model.
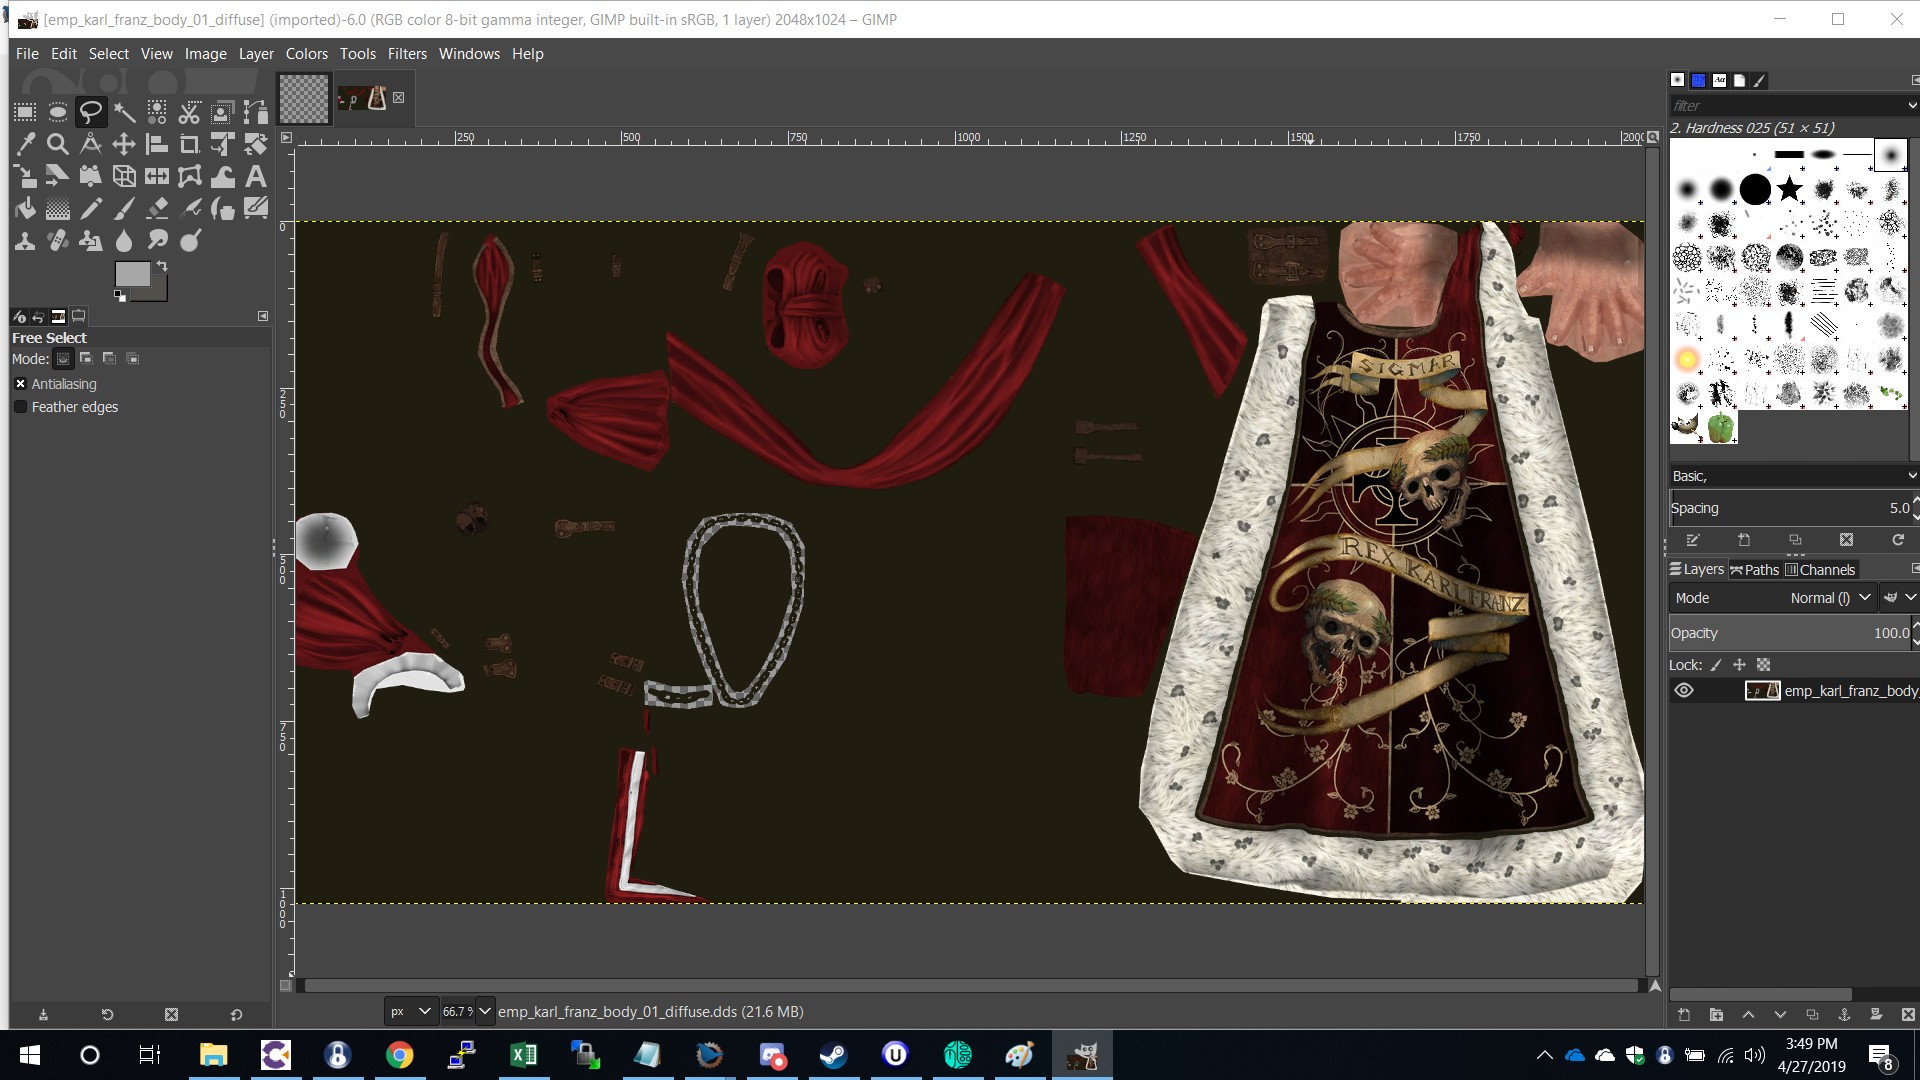
Going back to Gimp open up karl franz body diffuse file, do a save as on this but save it as a ” (yourcharcternamehere)_mask.dds” looks like this
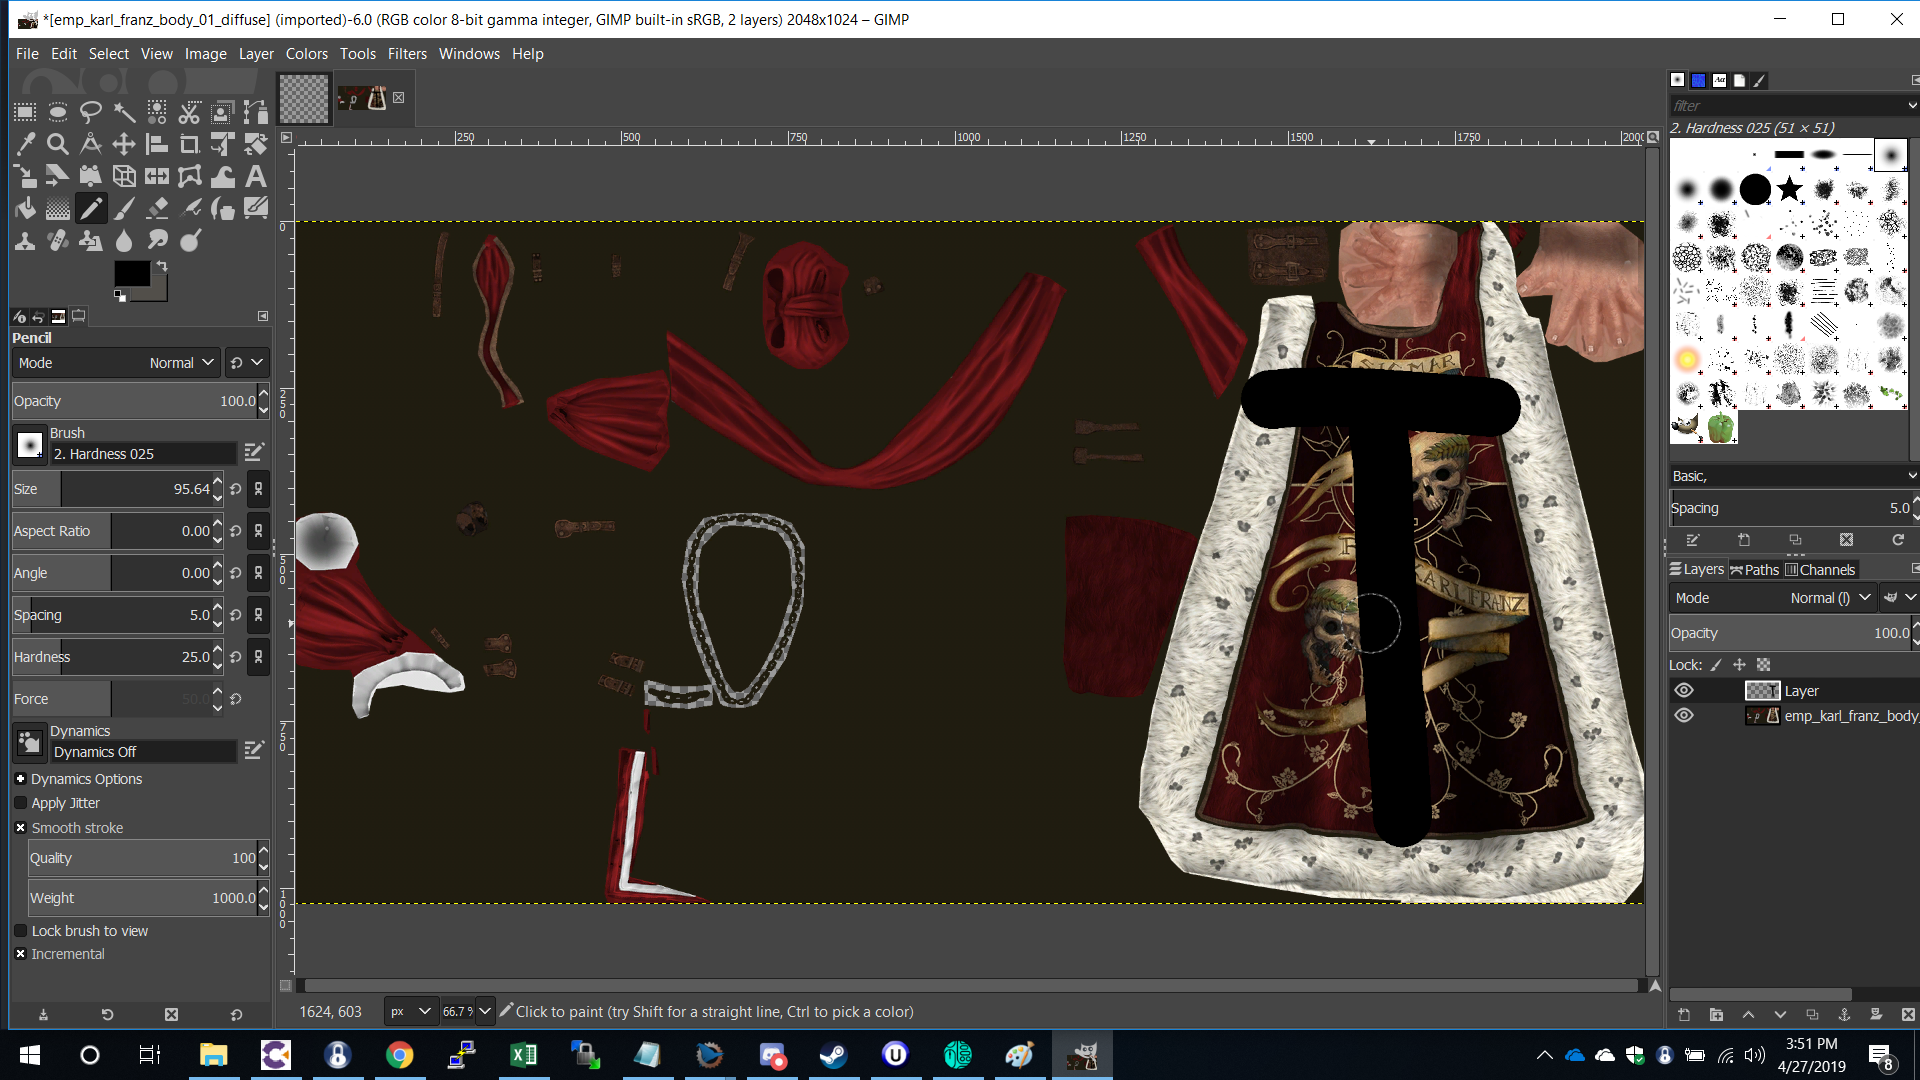
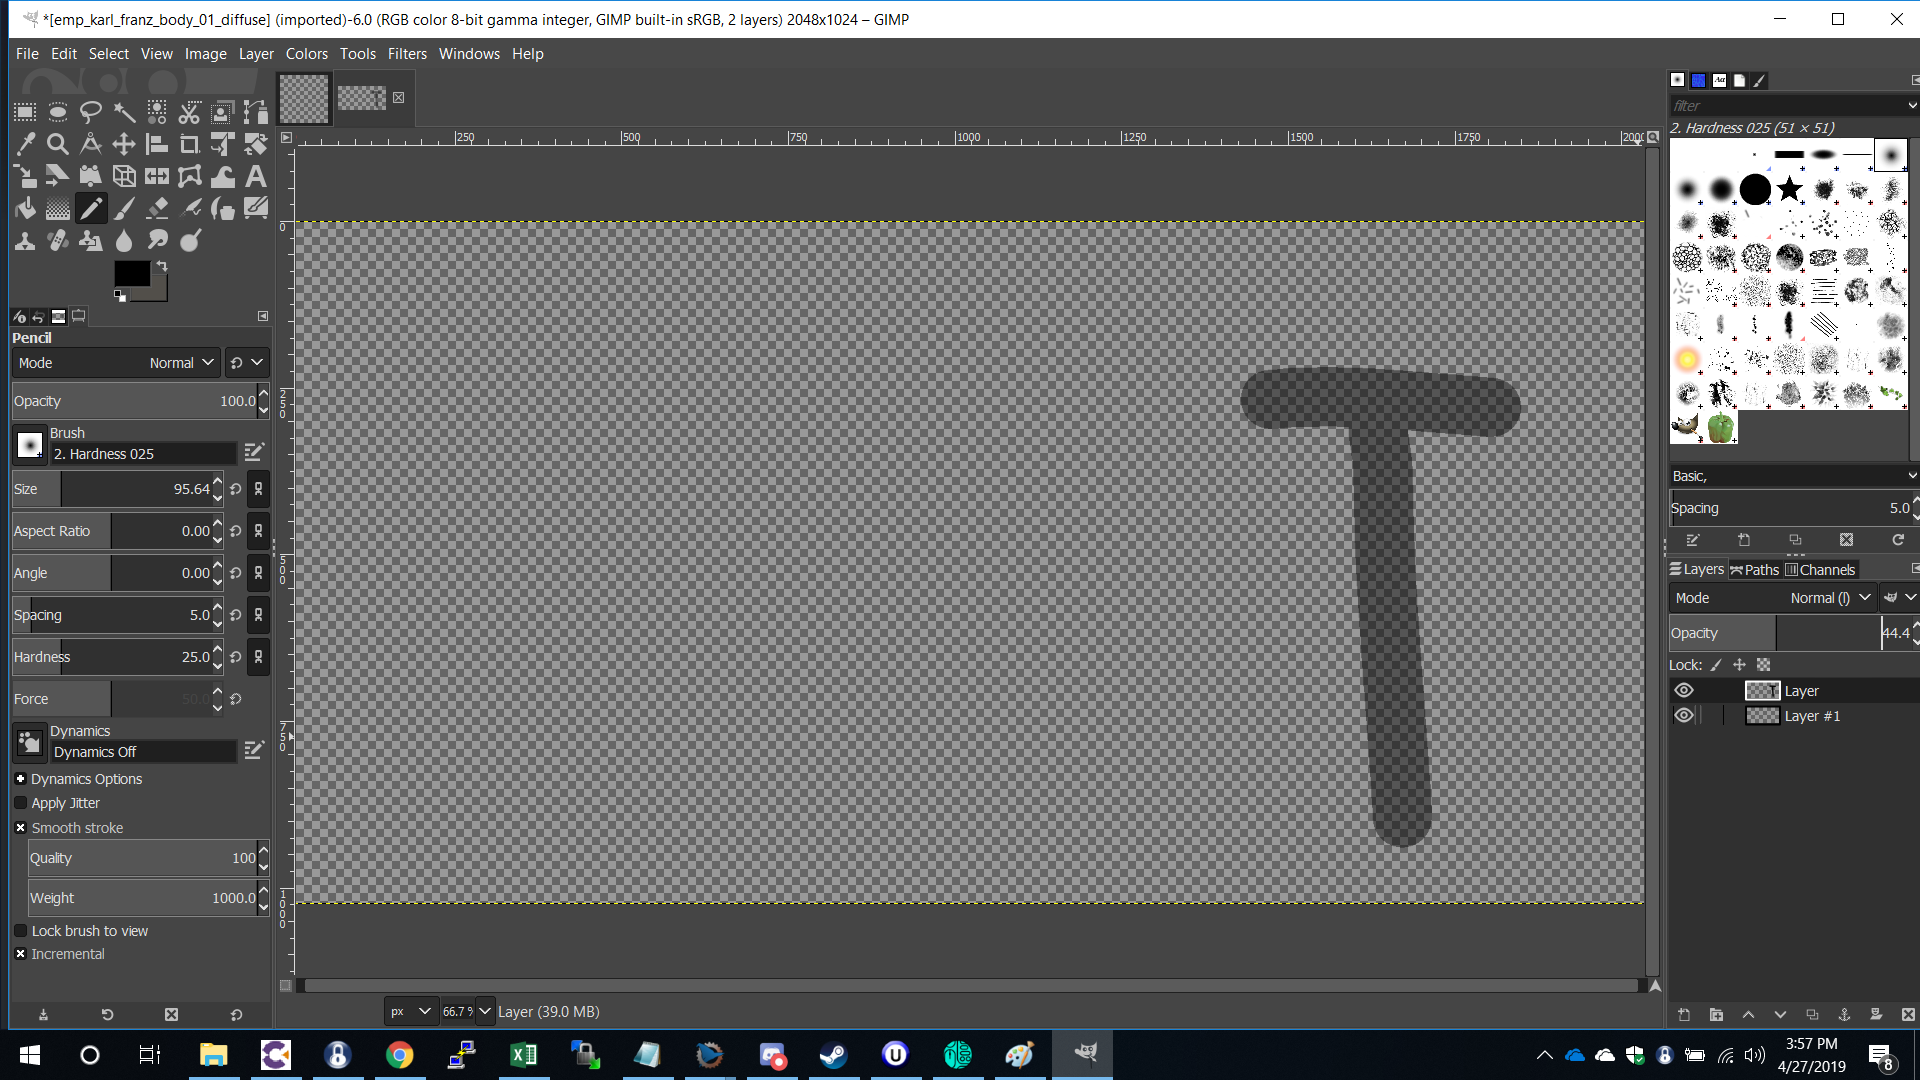
now create a new layer and using a BLACK brush draw on where you would like to see a glow effect here is my example –
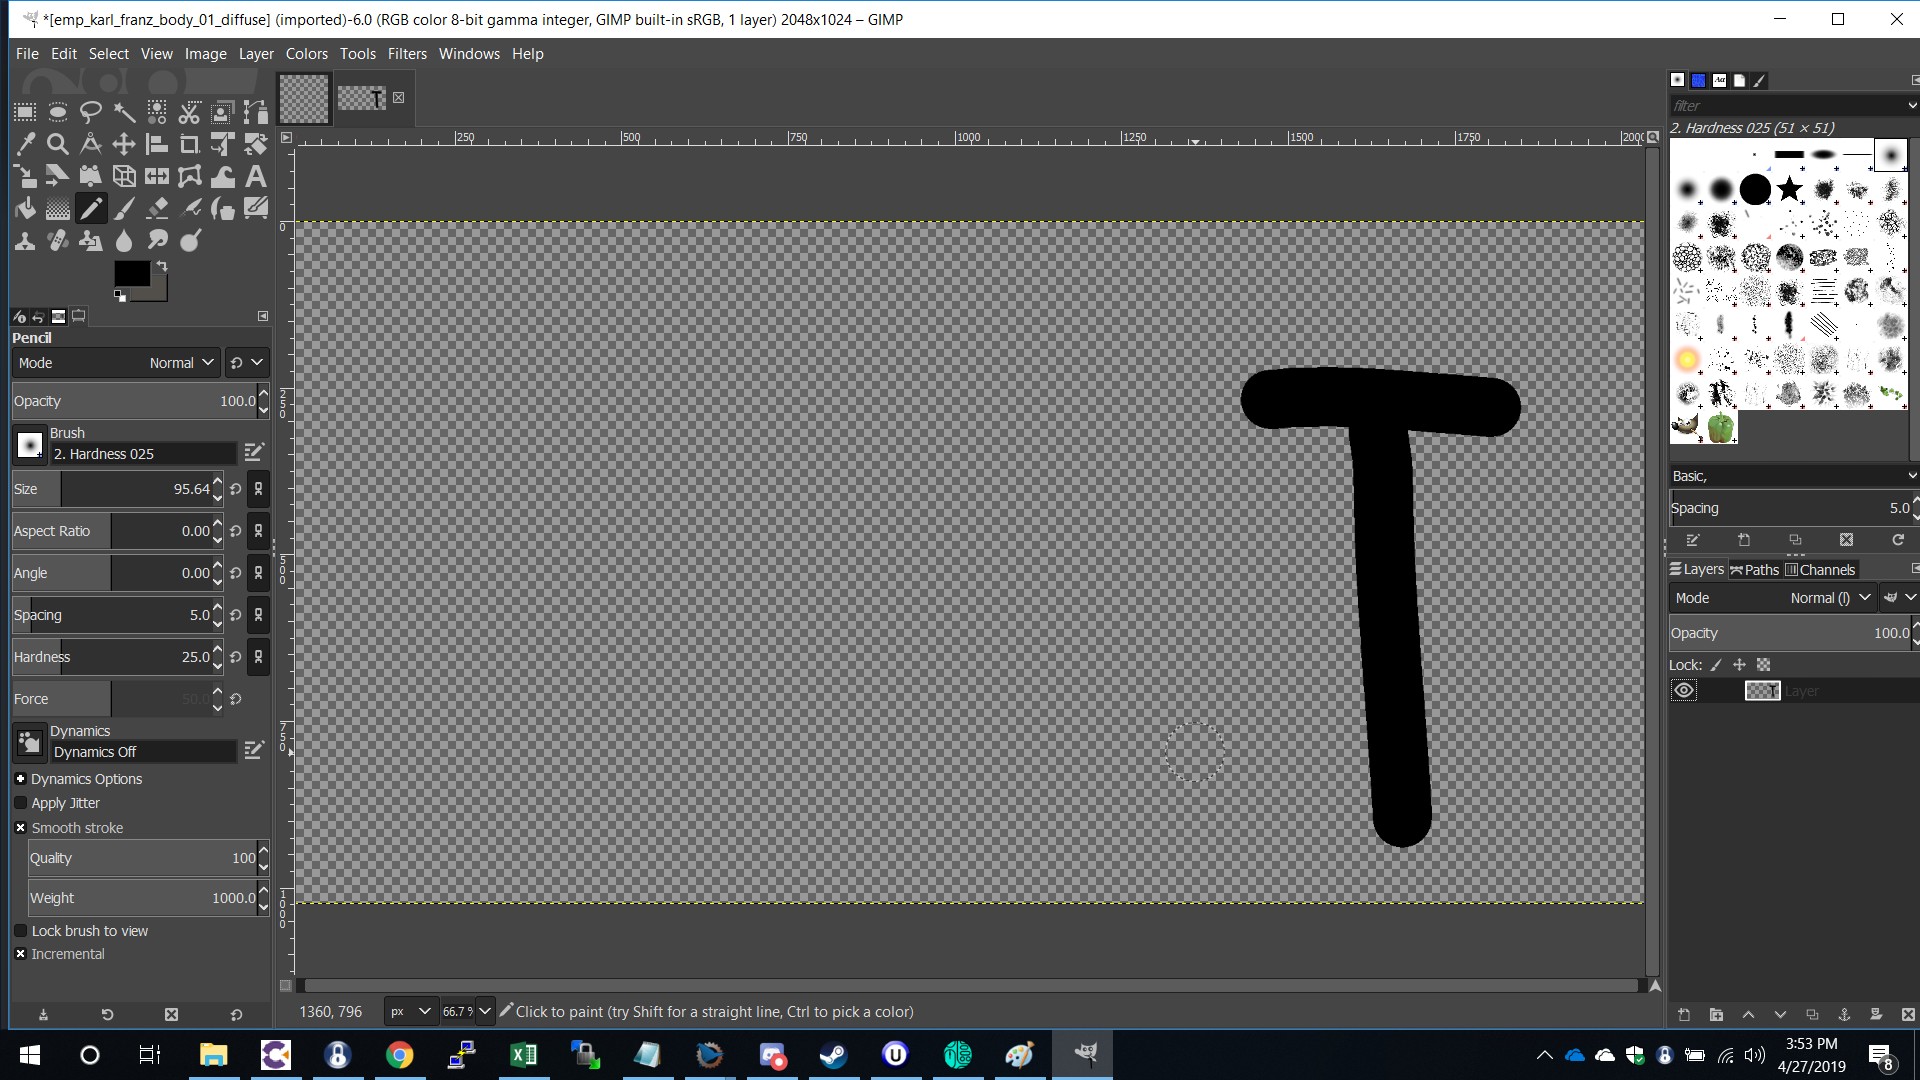
I just drew a big T on the cape. Now delete the bottom layer. should now only have the T left, like so
here is where people trip up, this will work but it will be a very solid and almost uncomfortable look, we can actually create a gradient (man im tired) using the mask file there are 2 things that effect this, one is the mask file itself and second is located within the material file itself under
 <name>emissive_strength</name>
<type>float</type>
<value>0.75</value>
so using the mask file create a blank layer underneath this one like so –
notice how now it looks faint, what this does is lessen the active effect and how strong it is in certain parts,if you want stronger glow in the center make it darker there than on the edges etc. this will enable you to create effects like the chaos weapons have the key is to
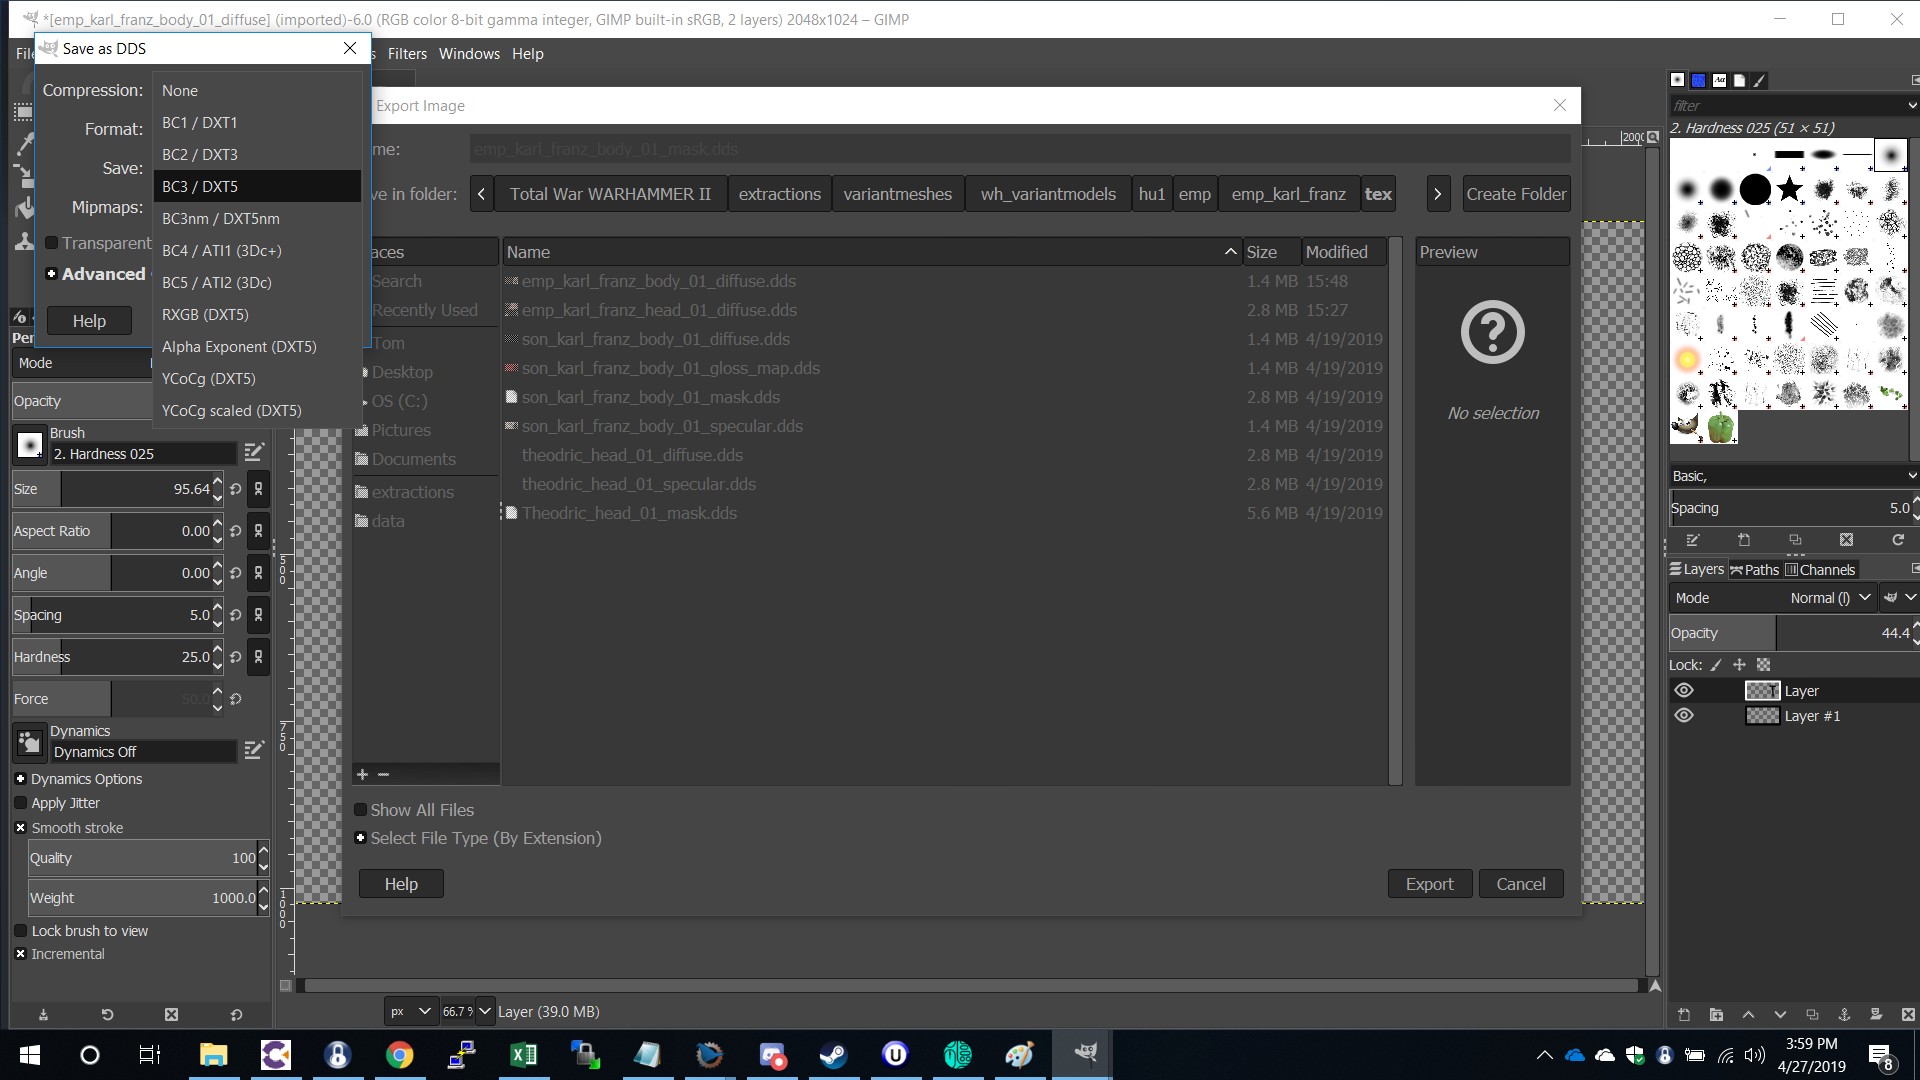
Save as “BC3 / DXT5” –
Now you have your new mask.dds file made just for Karl Franz, go ahead and import it then reference it in your material file using the correct file paths
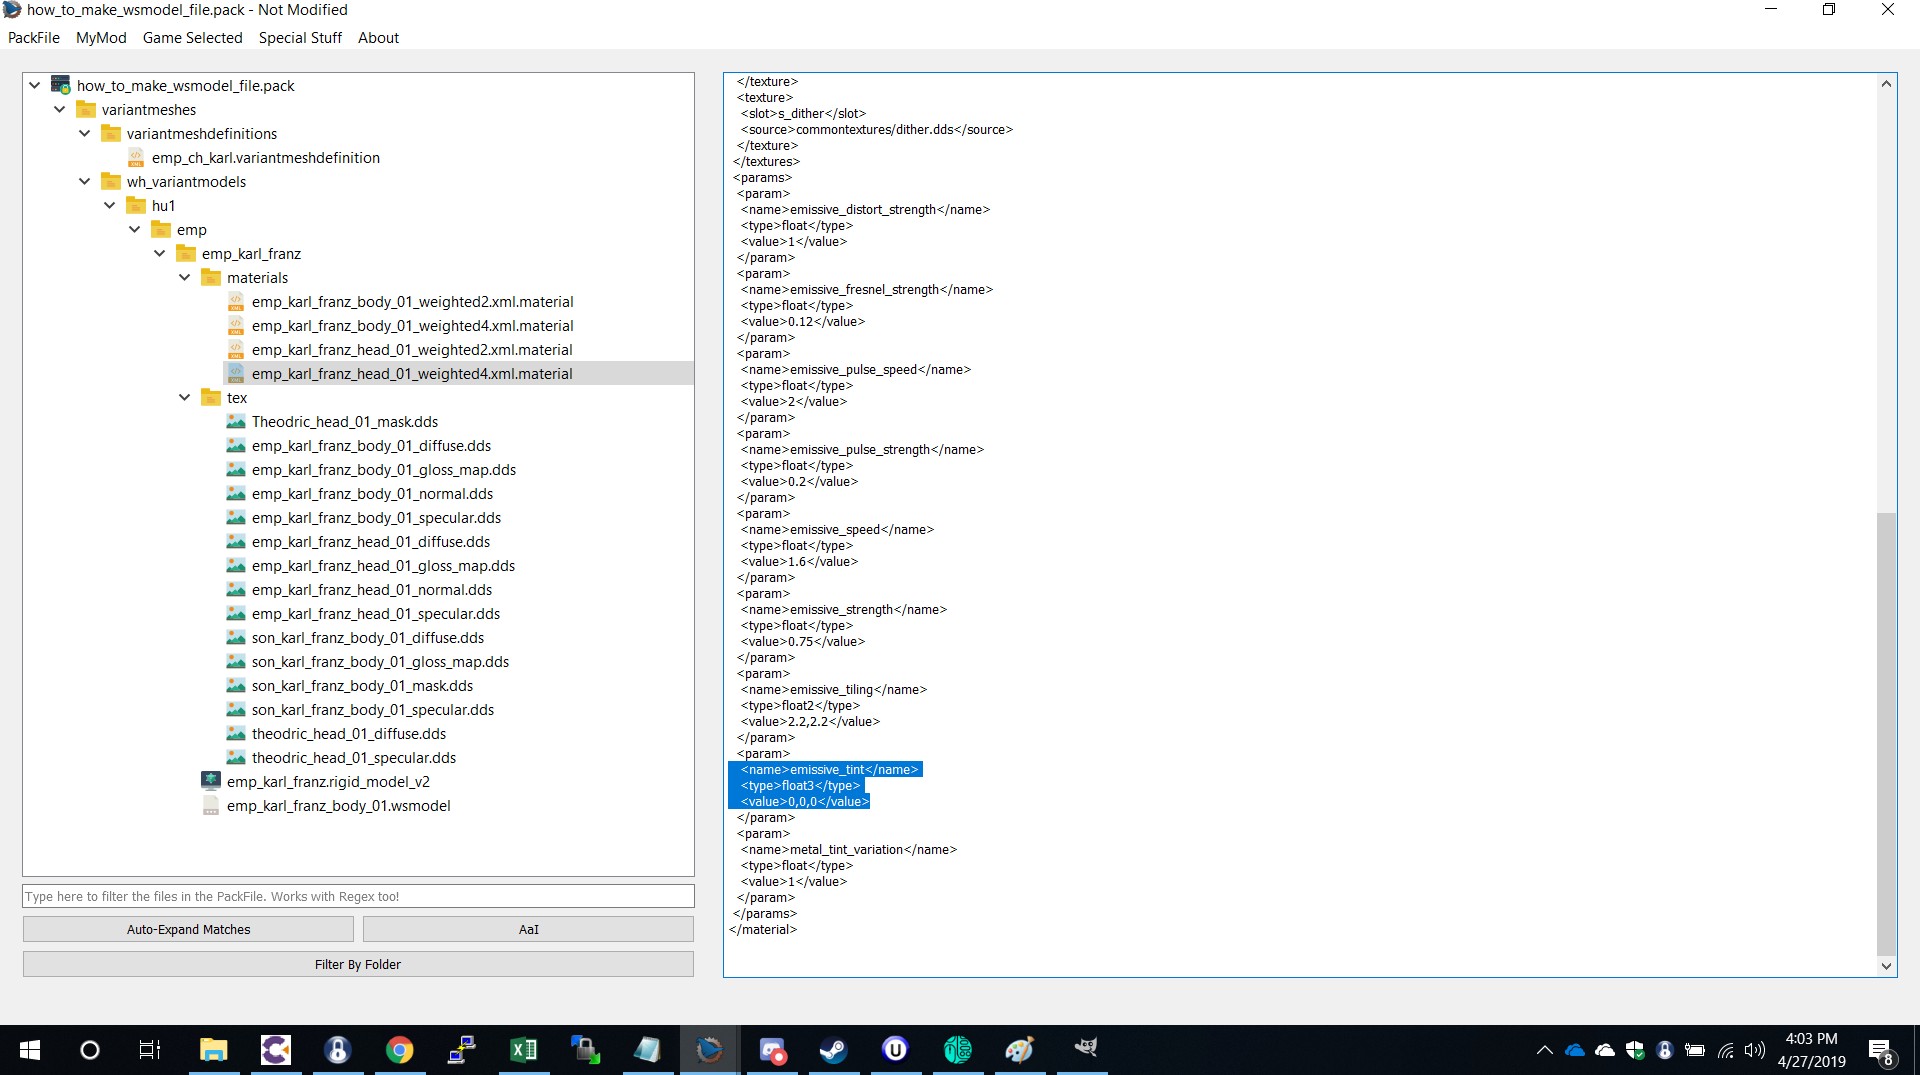
to change the color of the effect you have to change the RGB values in the material file located here –
 <name>emissive_tint</name>
<type>float3</type>
<value>100,0,0</value>
this would show a red glow, the middle is green and the right value is blue etc. If the colors are showing too strong or too weak try editing the emissive strength value which I referenced earlier.
Ok now give it a go should have a glow that is in a T shape on the cape of Karl franz. Boom Finished! Enjoy life now that you know a little more than you did before
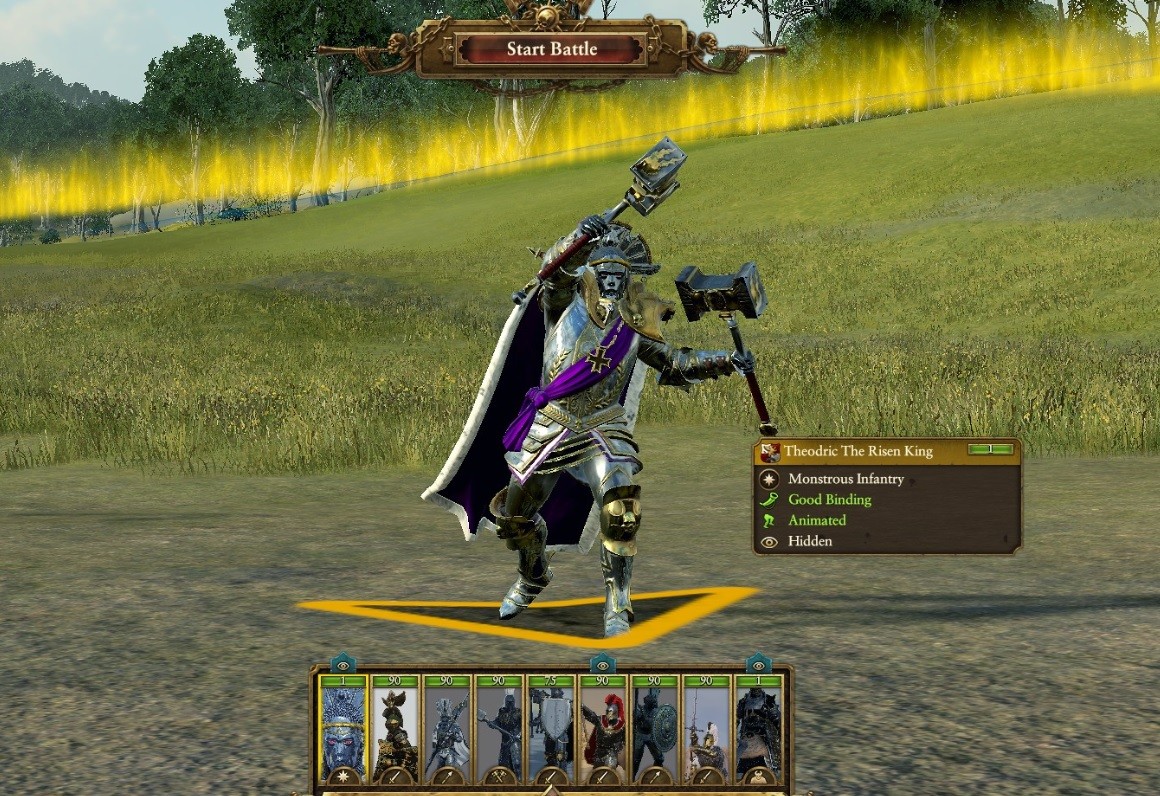
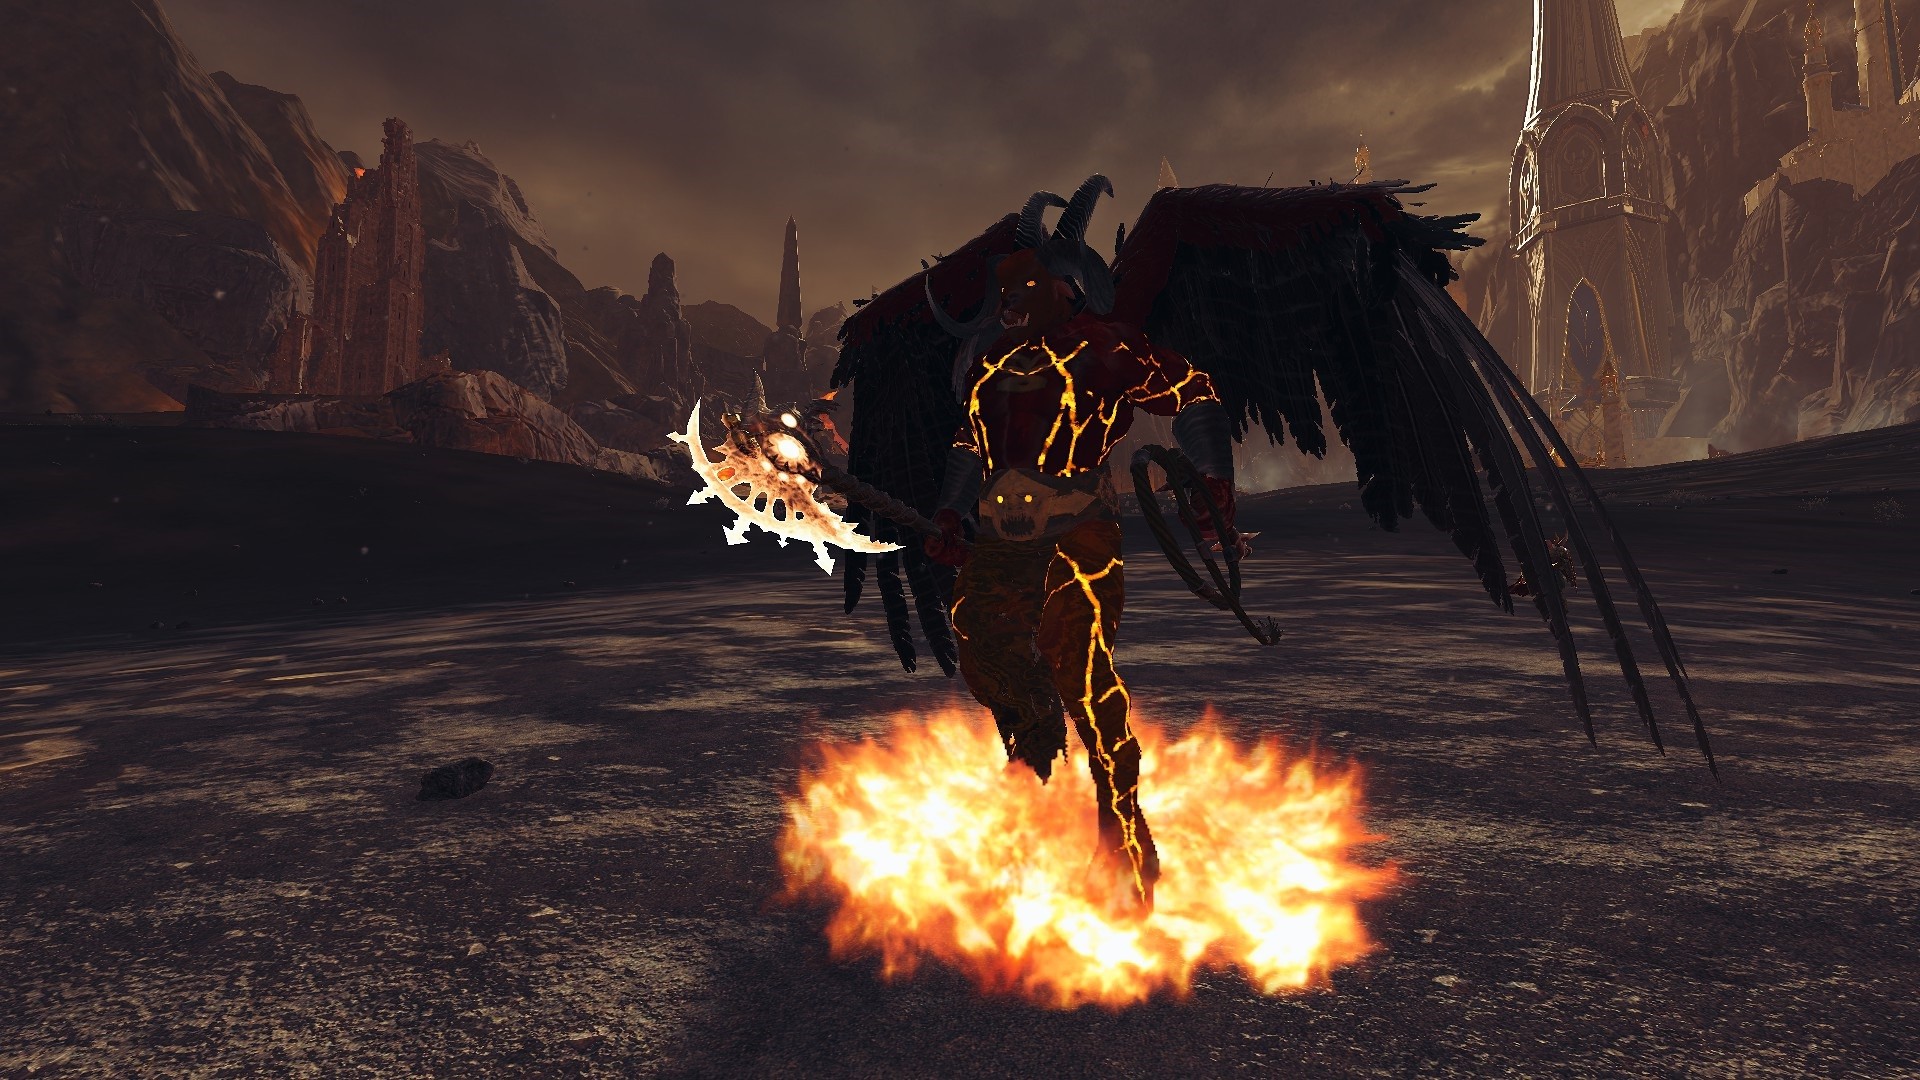
But this is just the surface of possibilities. here are some units I have made using .wsmodel files
Notes n Stuff
Hey guys hope you enjoyed the guide and learnt something new, if you know something I dont and think it needs to be in this guide let me know! I would love know and share that with others!
When your .wsmodel files are not working 90% of the time its a file path error you messed up
somewhere I guarantee it! Sometimes is your “lods” and “parts” and in some cases it the shader you are trying to use.
This tip comes from Chaos robbie, so thank you you him
Super Tip: If you’re getting that washed-out bug when using wsmodels it’s because your .dds formats are wrong. Here are the Intel Texture Works v1.0.4 settings that work 100% of the time:
- for Diffuse use Color and BC7 8 bpp Fine (sRGB, DX11++)
o or if you have an alpha channel use Color+Alpha and BC7 8 bpp Fine (sRGB, DX11++)
- for Specular use the same
- for Gloss Map you use Color and BC1 4bpp (Linear)
- for Normal Map you use Color+Alpha and BC1 4bpp (Linear)
the best advice I can give is dont give up, keep trying different stuff, we are all still new to this .wsmodel stuff, who knows you may find something new.
If you get stuck you can ask here but I am much more likely to reply on the Discord here – https://discord.gg/62retHM
If I do not answer someone else like Cataph or Marthenil will be able to help you.
which reminds me, this guide would not be possible if not for the discord, so thanks to everyone who has helped and answered my questions.
